Visual Detector
Learn about our visual detector model type
Input: Images and videos
Output: Regions
Visual detector, also known as object detection, is a type of deep fine-tuned model designed to identify and locate objects within images or video frames. It goes beyond simple image classification, where the goal is to assign a single label to an entire image.
Instead, an object detection model can identify multiple objects of different classes within an image and provide their corresponding bounding box coordinates. They help answer the question "Where" are objects in your data.
The primary task of a visual detector model is twofold:
- Object localization: The model identifies the location of objects within an image by predicting bounding box coordinates that tightly enclose each object.
- Object classification: The model classifies each detected object into one of several predefined classes or categories.
The visual detector model type also comes with various templates that give you the control to choose the specific architecture used by your neural network, as well as define a set of hyperparameters you can use to fine-tune the way your model learns.
Visual detector models have a wide range of applications, including:
- Object detection: This is the task of identifying and localizing objects in images. Visual detector models are used in a variety of applications, such as self-driving cars, security cameras, and robotics.
- Image classification: This is the task of classifying images into categories, such as "dog," "cat," or "tree." Visual detector models can be used to improve the accuracy of image classification models by providing them with information about the objects that are present in the image.
- Visual tracking: This is the task of tracking the movement of objects in images or videos. Visual detector models can be used to initialize visual trackers by identifying the objects that they need to track.
You may choose the visual detector model type in cases where:
- You want to detect and localize objects within an image, and accuracy and the ability to carefully target solutions take priority over speed and ease of use.
- You need a detection model to learn new features not recognized by the existing Clarifai models. In that case, you may need to "deep fine-tune" your custom model and integrate it directly within your workflows.
- You have a custom-tailored dataset with bounding box annotations for objects, and the expertise and time to fine-tune models.
Example Use Case
A roofing company wants to provide insurance companies and customers with a consistent way of evaluating roof damage. This company captures images of roofs with a drone, and then feeds the images into a detection model. The detection model can then locate and classify specific areas of damage on the roofs.
Create and Train a Visual Detector
Let's demonstrate how to create and train a visual detector model using our API.
Before using the Python SDK, Node.js SDK, or any of our gRPC clients, ensure they are properly installed on your machine. Refer to their respective installation guides for instructions on how to install and initialize them.
Step 1: App Creation
Let's start by creating an app.
- Python SDK
from clarifai.client.user import User
#replace your "user_id"
client = User(user_id="user_id")
app = client.create_app(app_id="demo_train", base_workflow="Universal")
Step 2: Dataset Upload
Next, let’s upload the dataset that will be used to train the model to the app.
You can find the dataset we used here.
- Python SDK
#importing load_module_dataloader for calling the dataloader object in dataset.py in the local data folder
from clarifai.datasets.upload.utils import load_module_dataloader


# Construct the path to the dataset folder
module_path = os.path.join(os.getcwd().split('/models/model_train')[0],'datasets/upload/image_detection/voc')

# Load the dataloader module using the provided function from your module
voc_dataloader = load_module_dataloader(module_path)

# Create a Clarifai dataset with the specified dataset_id ("image_dataset")
dataset = app.create_dataset(dataset_id="train_dataset")

# Upload the dataset using the provided dataloader and get the upload status
dataset.upload_dataset(dataloader=voc_dataloader)
Step 3: Model Creation
Let's list all the available trainable model types in the Clarifai platform.
- Python SDK
print(app.list_trainable_model_types())
Output
['visual-classifier',
 'visual-detector',
 'visual-segmenter',
 'visual-embedder',
 'clusterer',
 'text-classifier',
 'embedding-classifier',
 'text-to-text']
Next, let's select the visual-detector model type and use it to create a model.
- Python SDK
MODEL_ID = "model_detector"
MODEL_TYPE_ID = "visual-detector"
# Create a model by passing the model name and model type as parameter
model = app.create_model(model_id=MODEL_ID, model_type_id=MODEL_TYPE_ID)
Step 4: Template Selection
Let's list all the available training templates in the Clarifai platform.
- Python SDK
print(model.list_training_templates())
Output
['MMDetection_AdvancedConfig',
 'MMDetection_FasterRCNN',
 'MMDetection_SSD',
 'MMDetection_YoloF',
 'Clarifai_InceptionV2',
 'Clarifai_InceptionV4',
 'detection_msc10']
Next, let's choose the 'MMDetection_SSD' template to use for training our model, as demonstrated below.
Step 5: Set Up Model Parameters
You can customize the model parameters as needed before starting the training process.
- Python SDK
# Get the params for the selected template
model_params = model.get_params(template='MMDetection_SSD')
# list the concepts to add in the params
concepts = [concept.id for concept in app.list_concepts()]
model.update_params(dataset_id = 'train_dataset',concepts = concepts)
print(model.training_params)
Output
{'dataset_id': 'train_dataset',
 'dataset_version_id': '',
 'concepts': ['id-hamburger', 'id-ramen', 'id-prime_rib', 'id-beignets'],
 'train_params': {'invalid_data_tolerance_percent': 5.0,
  'template': 'Clarifai_ResNext',
  'logreg': 1.0,
  'image_size': 256.0,
  'batch_size': 64.0,
  'init_epochs': 25.0,
  'step_epochs': 7.0,
  'num_epochs': 65.0,
  'per_item_lrate': 7.8125e-05,
  'num_items_per_epoch': 0.0}}
Step 6: Initiate Model Training
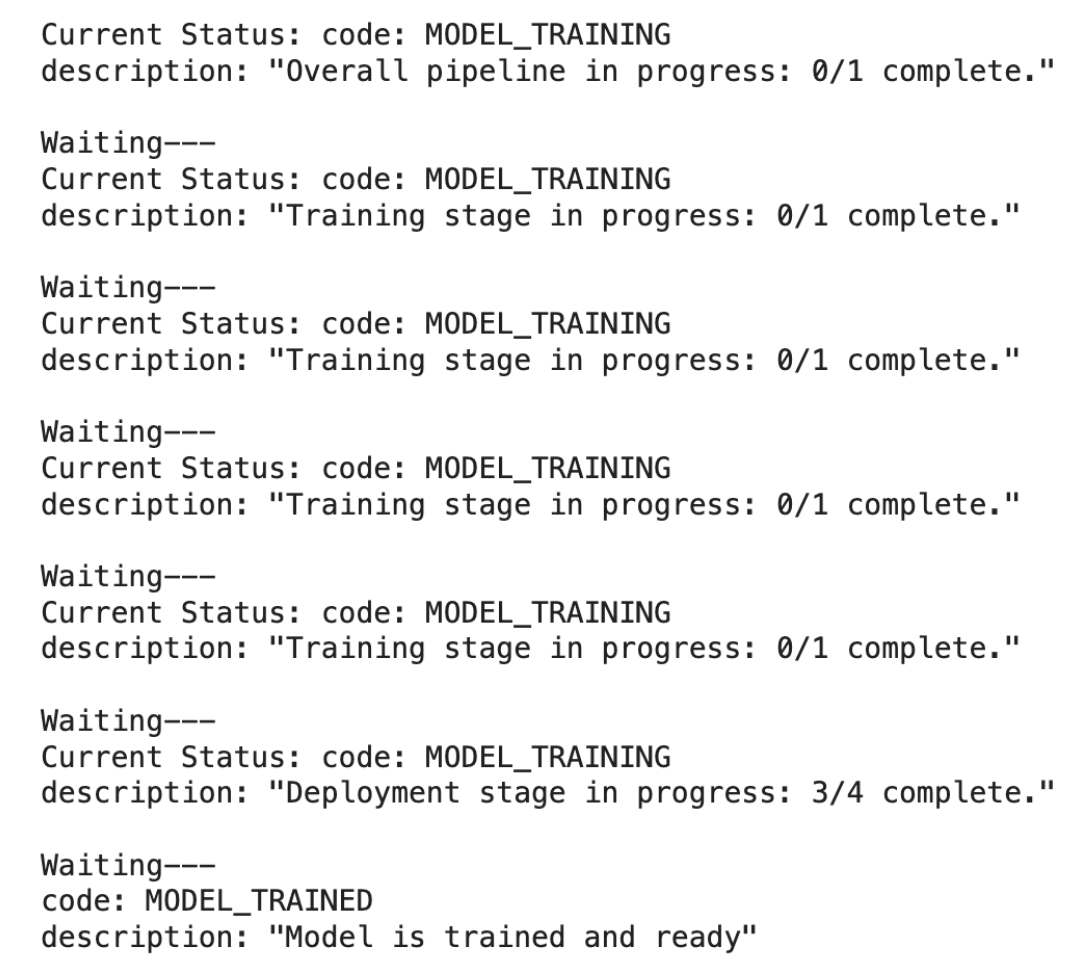
To initiate the model training process, call the model.train() method. The Clarifai API also provides features for monitoring training status and saving training logs to a local file.
If the status code is MODEL-TRAINED, it indicates that the model has been successfully trained and is ready for use.
- Python SDK
import time
#Starting the training
model_version_id = model.train()

#Checking the status of training
while True:
    status = model.training_status(version_id=model_version_id,training_logs=False)
    if status.code == 21106: #MODEL_TRAINING_FAILED
        print(status)
        break
    elif status.code == 21100: #MODEL_TRAINED
        print(status)
        break
    else:
        print("Current Status:",status)
        print("Waiting---")
        time.sleep(120)
Output

Step 7: Model Prediction
After the model is trained and ready to use, you can run some predictions with it.
- Python SDK
import cv2
import matplotlib.pyplot as plt
from urllib.request import urlopen
import numpy as np


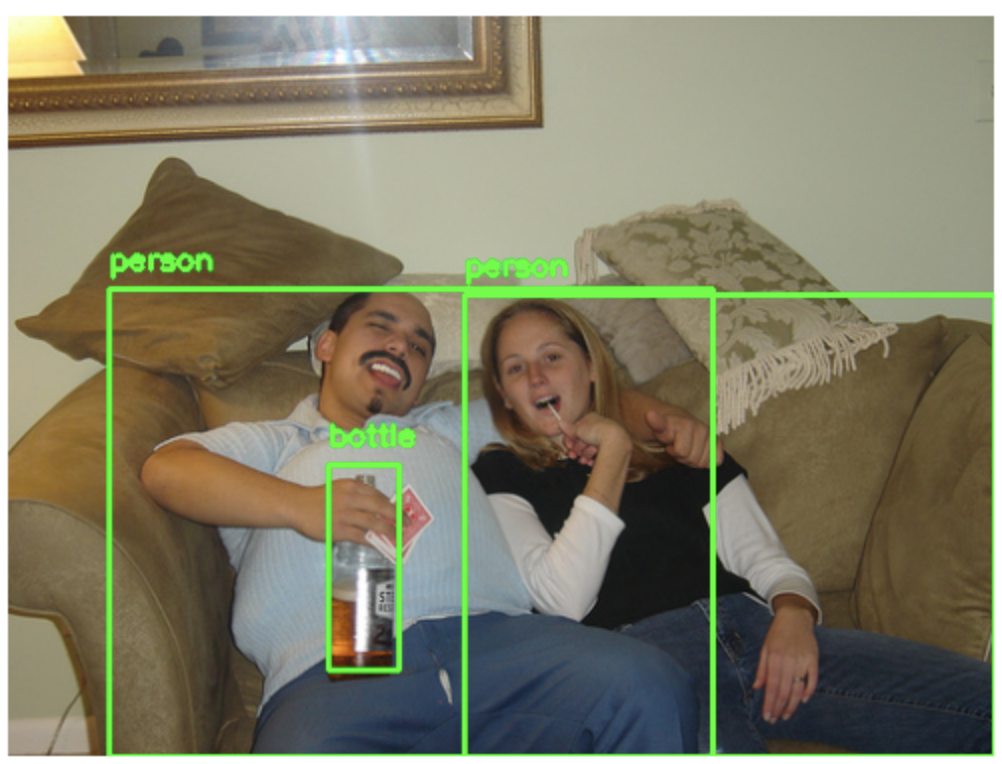
IMAGE_PATH = os.path.join(os.getcwd().split('/models')[0],'datasets/upload/image_detection/voc/images/2008_008526.jpg')

prediction_response = model.predict_by_filepath(IMAGE_PATH, input_type="image",inference_params={'detection_threshold': 0.5})

# Get the output
regions = prediction_response.outputs[0].data.regions

img = cv2.imread(IMAGE_PATH)

for region in regions:
    # Accessing and rounding the bounding box values
    top_row = round(region.region_info.bounding_box.top_row, 3) * img.shape[0]
    left_col = round(region.region_info.bounding_box.left_col, 3)* img.shape[1]
    bottom_row = round(region.region_info.bounding_box.bottom_row, 3)* img.shape[0]
    right_col = round(region.region_info.bounding_box.right_col, 3)* img.shape[1]

    cv2.rectangle(img, (int(left_col),int(top_row)), (int(right_col),int(bottom_row)), (36,255,12), 2)

    # Get concept name
    concept_name = region.data.concepts[0].name

    # Display text
    cv2.putText(img, concept_name, (int(left_col),int(top_row-10)), cv2.FONT_HERSHEY_SIMPLEX, 0.5, (36,255,12), 2)

plt.axis('off')
plt.imshow(img[...,::-1])
Image Output

Step 8: Model Evaluation
Let’s evaluate the model using both the training and test datasets. We’ll start by reviewing the evaluation metrics for the training dataset.
- Python SDK
# Evaluate the model on a specific dataset with ID 'train_dataset'
model.evaluate(dataset_id='train_dataset', eval_id='one')

# Get the evaluation result by its ID 'one'
result = model.get_eval_by_id(eval_id="one")

print(result.summary)
Output
mean_avg_precision_iou_50: 1.0
mean_avg_precision_iou_range: 0.9453125
Before evaluating the model on the test dataset, ensure it is uploaded using the data loader. Once uploaded, proceed with the evaluation.
- Python SDK
# Set the path to the module containing the data
PATH=os.path.join(os.getcwd().split('/models/model_train')[0],'datasets/upload/data/voc_test')

# Load the dataloader module from the specified path
voc_dataloader = load_module_dataloader(PATH)

# Create a new dataset object with a unique ID 'test_dataset_1'
test_dataset = app.create_dataset(dataset_id="test_dataset_1")

# Upload the dataset using the previously loaded dataloader
test_dataset.upload_dataset(dataloader=voc_dataloader)

# Evaluate the model using the uploaded dataset, with evaluation ID 'two'
model.evaluate(dataset_id='test_dataset_1', eval_id='two')

# Retrieve the evaluation result with ID 'two' for the model
result = model.get_eval_by_id("two")

# Print the summary of the evaluation result
print(result.summary)
Output
mean_avg_precision_iou_50: 1.0
mean_avg_precision_iou_range: 0.9555555582046509
Finally, to gain deeper insights into the model’s performance, use the EvalResultCompare method to compare results across multiple datasets.
- Python SDK
# Importing the EvalResultCompare class from the clarifai.utils.evaluation module
from clarifai.utils.evaluation import EvalResultCompare


# Creating an EvalResultCompare object with specified models and datasets
eval_result = EvalResultCompare(models=[model], datasets=[dataset, test_dataset])

# Printing a detailed summary of the evaluation result
print(eval_result.detailed_summary())
Output
(     Concept  Average Precision  Total Labeled  True Positives  \
 0     id-cow                1.0              2               2
 0   id-horse                1.0              1               1
 0  id-bottle                1.0              2               2
 0    id-sofa                1.0              1               1
 0    id-bird                1.0              1               1
 0     id-cat                1.0              2               2
 0     id-dog                1.0              1               1
 0  id-person                1.0              8               8
 0     id-dog                1.0              1               1
 0  id-person                1.0              3               3

    False Positives  False Negatives  Recall  Precision        F1  \
 0                0                0     1.0      0.841  0.913634
 0                0                0     1.0      0.783  0.878295
 0                0                0     1.0      0.819  0.900495
 0                0                0     1.0      0.769  0.869418
 0                0                0     1.0      0.790  0.882682
 0                0                0     1.0      0.836  0.910675
 0                0                0     1.0      0.763  0.865570
 0                0                0     1.0      0.940  0.969072
 0                0                0     1.0      0.763  0.865570
 0                0                0     1.0      0.884  0.938429

           Dataset
 0  train_dataset2
 0  train_dataset2
 0  train_dataset2
 0  train_dataset2
 0  train_dataset2
 0  train_dataset2
 0  train_dataset2
 0  train_dataset2
 0  test_dataset_1
 0  test_dataset_1  ,
             Total Concept  Average Precision  Total Labeled  True Positives  \
 0  Dataset:train_dataset2                1.0             18              18
 0  Dataset:test_dataset_1                1.0              4               4

    False Positives  False Negatives  Recall  Precision   F1
 0                0                0     1.0        1.0  1.0
 0                0                0     1.0        1.0  1.0  )