Visual Classifier
Learn how to train a visual classifier using Clarifai Python SDK
The Visual Classifier is a powerful component of the Clarifai platform designed for efficient and accurate image recognition. Leveraging advanced machine learning algorithms, the Visual Classifier allows users to train custom models tailored to specific visual recognition tasks. You can learn more about Visual Classifier here.
App Creation
The first part of model training includes the creation of an app under which the training process takes place.
Here we are creating an app with the app id as “demo_train” and the base workflow is set as “Universal”. You can change the base workflows to Empty, Universal, Language Understanding, and General according to your use case.
- Python
from clarifai.client.user import User
#replace your "user_id"
client = User(user_id="user_id")
app = client.create_app(app_id="demo_train", base_workflow="Universal")
Dataset Upload
The next step involves dataset upload. You can upload the dataset to your app so that the model accepts the data directly from the platform. The data used for training in this tutorial is available in the examples repository you have cloned.
- Python
#importing load_module_dataloader for calling the dataloader object in dataset.py in the local data folder
from clarifai.datasets.upload.utils import load_module_dataloader


# Construct the path to the dataset folder
module_path = os.path.join(os.getcwd().split('/models/model_train')[0], 'datasets/upload/image_classification/food-101')

# Load the dataloader module using the provided function from your module
food101_dataloader = load_module_dataloader(module_path)

# Create a Clarifai dataset with the specified dataset_id ("image_dataset")
dataset = app.create_dataset(dataset_id="image_dataset")

# Upload the dataset using the provided dataloader and get the upload status
dataset.upload_dataset(dataloader=food101_dataloader, get_upload_status=True)
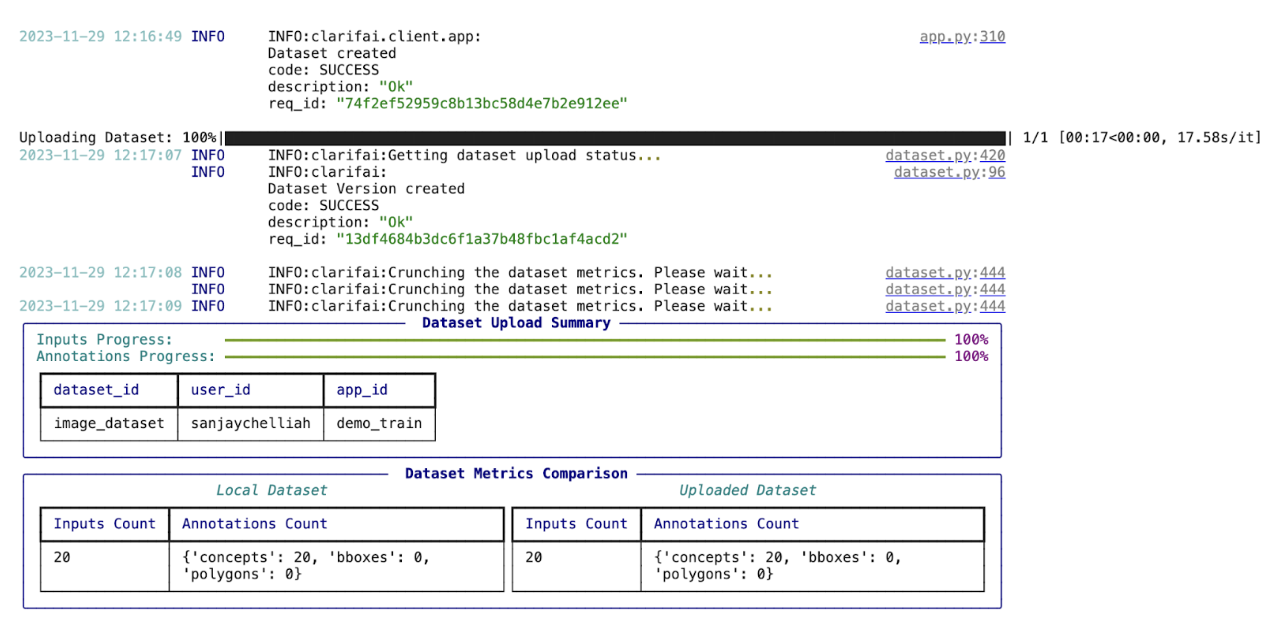
If you have followed the steps correctly you should receive an output that looks like this,
Output

Choosing The Model Type
Now let's list the all available trainable model types in the platform that you can use for your tasks,
- Python
print(app.list_trainable_model_types())
Output
['visual-classifier',
 'visual-detector',
 'visual-segmenter',
 'visual-anomaly-heatmap',
 'visual-embedder',
 'clusterer',
 'text-classifier',
 'embedding-classifier',
 'text-to-text']
Click here to know more about Clarifai Model Types.
Model Creation
From the above list of model types we are going to choose visual-classifier as it is similar to our use case. Now let's create a model with the above model type.
- Python
MODEL_ID = "model_classifier"
MODEL_TYPE_ID = "visual-classifier"
# Create a model by passing the model name and model type as parameter
model = app.create_model(model_id=MODEL_ID, model_type_id=MODEL_TYPE_ID)
Template Selection
Inside the Clarifiai platform there is a template feature. Templates give you the control to choose the specific architecture used by your neural network, as well as define a set of hyperparameters you can use to fine-tune the way your model learns. We are going to choose the 'MMClassification_EfficientNet' template for training our model.
- Python
print(model.list_training_templates())
Output
['classification_inception_general_v1_3_transfer_embednorm',
 'classification_basemodel_v1',
 'classification_cifar10_v1',
 'Clarifai_InceptionTransferEmbedNorm',
 'Clarifai_ResNext',
 'Clarifai_InceptionV2',
 'Clarifai_InceptionBatchNorm',
 'MMClassification',
 'MMClassification_EfficientNet',
 'MMClassification_ResNet_50_RSB_A1',
 'MMClassification_ResNet_50']
Setup Model Parameters
You can save the model parameters into a YAML file so that it can passed on to the model while initiating training.
- Python
import yaml
YAML_FILE = 'mmclassification_efficientnet.yaml'
model_params = model.get_params(template='MMClassification_EfficientNet', save_to=YAML_FILE)
# Preview YAML content
file = open(YAML_FILE)
data = yaml.safe_load(file)
print(data)
Output
{'dataset_id': '',
 'dataset_version_id': '',
 'concepts': [],
 'train_params': {'invalid_data_tolerance_percent': 5.0,
  'template': 'MMClassification_EfficientNet',
  'seed': -1.0,
  'num_gpus': 1.0,
  'image_size': 336.0,
  'batch_size': 4.0,
  'num_epochs': 30.0,
  'per_item_lrate': 0.000390625,
  'weight_decay': 0.0001,
  'momentum': 0.9,
  'pretrained_weights': 'ImageNet-1k',
  'flip_probability': 0.5,
  'flip_direction': 'horizontal',
  'concepts_mutually_exclusive': False},
 'inference_params': {'select_concepts': []}}
You can edit the YAML file according to our needs and then load the files again for model training. Below is an example of the edits made to the YAML file,
- Python
file = open('models/model_train/saved_mmclassification_efficientnet.yaml')
data = yaml.safe_load(file)
print(data)
Output
{'dataset_id': 'image_dataset',
 'dataset_version_id': '',
 'concepts': ['id-ramen', 'id-prime_rib', 'id-hamburger', 'id-beignets'],
 'train_params': {'invalid_data_tolerance_percent': 5.0,
  'template': 'MMClassification_EfficientNet',
  'seed': -1.0,
  'num_gpus': 1.0,
  'image_size': 336.0,
  'batch_size': 4.0,
  'num_epochs': 10.0,
  'per_item_lrate': 0.000390625,
  'weight_decay': 0.0001,
  'momentum': 0.9,
  'pretrained_weights': 'ImageNet-1k',
  'flip_probability': 0.5,
  'flip_direction': 'horizontal',
  'concepts_mutually_exclusive': False},
 'inference_params': {'select_concepts': []}}
Initiate Model Training
We can initiate the model training by passing the YAML configuration file as parameter to the model.train(). The Clarifai Python SDK also offers features like showing training status and saving training logs in a local file.
If the status code is "MODEL-TRAINED", then the user can know the model is Trained and ready to use.
- Python
#Starting the training
model_version_id = model.train(yaml_file='models/model_train/saved_mmclassification_efficientnet.yaml')
#Checking the status of training
#To store training logs in a file, fix training_logs param as True
status = model.training_status(version_id=model_version_id,training_logs=False)
Output
code: MODEL_TRAINED
description: "Model is trained and ready"
Model Prediction
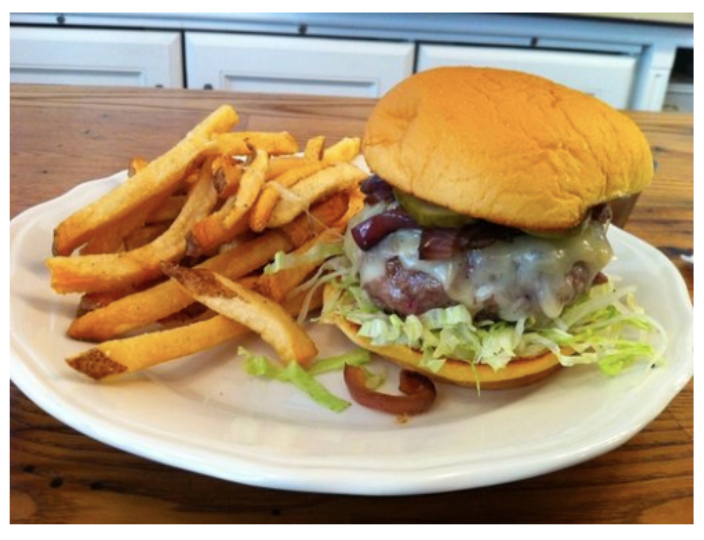
Since the model is trained and ready let’s run some predictions to view the model performance,
- Python
import cv2
import matplotlib.pyplot as plt

IMAGE_PATH = os.path.join(os.getcwd().split('/models')[0],'datasets/upload/image_classification/food-101/images/hamburger/139558.jpg')
model_prediction = model.predict_by_filepath(IMAGE_PATH, input_type="image")

#Display the model predictions
img = plt.imread(IMAGE_PATH)
plt.axis('off')
plt.imshow(img)
for concept in model_prediction.outputs[0].data.concepts:
    print(concept.id,':',round(concept.value,2))
Output
id-hamburger : 0.64

id-ramen : 0.45

id-prime_rib : 0.44

id-beignets : 0.42

Model Evaluation
Now let's evaluate the model using train and test datasets. First let's see the evaluation metrics for the training dataset,
- Python
# Evaluate the model using the specified dataset ID and evaluation ID.
model.evaluate(dataset_id='image_dataset', eval_id='one')


# Retrieve the evaluation results using the specified evaluation ID and store it in the variable 'result'.
result = model.get_eval_by_id(eval_id="one")

# Print a summary of the evaluation results stored in the variable 'result'.
print(result.summary)
Output
macro_avg_roc_auc: 0.9200000166893005
macro_std_roc_auc: 0.03399345278739929
macro_avg_f1_score: 0.6682435274124146
macro_std_f1_score: 0.08137183636426926
macro_avg_precision: 0.53125
macro_avg_recall: 0.949999988079071
Before evaluating with a test dataset, we have to first upload the dataset using the data loader and then perform model evaluation,
- Python
# Load the dataloader module using the provided function from your module
PATH=os.path.join(os.getcwd().split('/models/model_train')[0],'datasets/upload/data/images_test')
food101_dataloader = load_module_dataloader(PATH)

# Create a Clarifai dataset with the specified dataset_id ("image_dataset")
test_dataset = app.create_dataset(dataset_id="image_dataset2")

# Upload the dataset using the provided dataloader and get the upload status
test_dataset.upload_dataset(dataloader=food101_dataloader, get_upload_status=True)

# Evaluate the model using the specified dataset ID and evaluation ID.
model.evaluate(dataset_id='image_dataset2',eval_id='two')


# Retrieve the evaluation results using the specified evaluation ID and store it in the variable 'result'.
result=model.get_eval_by_id("two")

print(result.summary)
Output
macro_avg_roc_auc: 1.0
macro_avg_f1_score: 0.7916666865348816
macro_std_f1_score: 0.21650634706020355
macro_avg_precision: 0.7083333134651184
macro_avg_recall: 1.0
Finally let's compare the results from multiple datasets using EvalResultCompare feature from Clarifai Python SDK to get a better understanding of the model's performance.
- Python
from clarifai.utils.evaluation import EvalResultCompare

# Initializing an object of the EvalResultCompare class
# with specified models and datasets
eval_result = EvalResultCompare(models=[model], datasets=[dataset, test_dataset])

print(eval_result.detailed_summary())
Output
INFO:clarifai.utils.evaluation.helpers:Model visual_classifier_eval2/model_classifier/48ed4: retrieving {'binary_metrics': True} metrics of dataset: image_dataset2
(        Concept  Accuracy (ROC AUC)  Total Labeled  Total Predicted  \
 0      id-ramen               0.933              5               12
 0  id-prime_rib               0.960              5                5
 0  id-hamburger               0.920              5                8
 0   id-beignets               0.867              5               12
 0      id-ramen               1.000              1                3
 0  id-prime_rib               1.000              1                1
 0  id-hamburger               1.000              1                1
 0   id-beignets               1.000              1                1

    True Positives  False Negatives  False Positives  Recall  Precision  \
 0               5                0                7     1.0     0.4167
 0               4                1                1     0.8     0.6667
 0               5                0                3     1.0     0.6250
 0               5                0                7     1.0     0.4167
 0               1                0                2     1.0     0.3333
 0               1                0                0     1.0     1.0000
 0               1                0                0     1.0     1.0000
 0               1                0                0     1.0     0.5000

          F1         Dataset
 0  0.588269  image_dataset3
 0  0.727293  image_dataset3
 0  0.769231  image_dataset3
 0  0.588269  image_dataset3
 0  0.499962  image_dataset2
 0  1.000000  image_dataset2
 0  1.000000  image_dataset2
 0  0.666667  image_dataset2  ,
             Total Concept  Accuracy (ROC AUC)  Total Labeled  Total Predicted  \
 0  Dataset:image_dataset3                0.92             20               37
 0  Dataset:image_dataset2                1.00              4                6

    True Positives  False Negatives  False Positives  Recall  Precision  \
 0              19                1               18    0.95   0.531275
 0               4                0                2    1.00   0.708325

          F1
 0  0.681455
 0  0.829263  )