Create Clusters and Nodepools
Set up capabilities that match your computational needs
A compute cluster serves as the main environment where models are deployed, whether for training or inference. Each cluster can contain multiple nodepools, which are groups of virtual machine instances with similar configurations (such as CPU/GPU type, memory).
After creating a custom cluster, you can configure nodepools within it to optimize resource usage. These nodepools will help tailor the infrastructure to meet the specific hardware, performance, cost, or regulatory compliance of your machine learning needs.
For example, you may create a nodepool for GPU-intensive tasks and another for lighter workloads running on CPUs.
With clusters and nodepools, you can organize and manage (orchestrate) the compute resources necessary for running your models and workflows.
You can connect your existing AWS, Google Cloud (GCP), or Oracle infrastructure to leverage your current investments. This lets you maintain full control over your data while optimizing for cost and flexibility. Contact our support team for assistance.
Via the UI
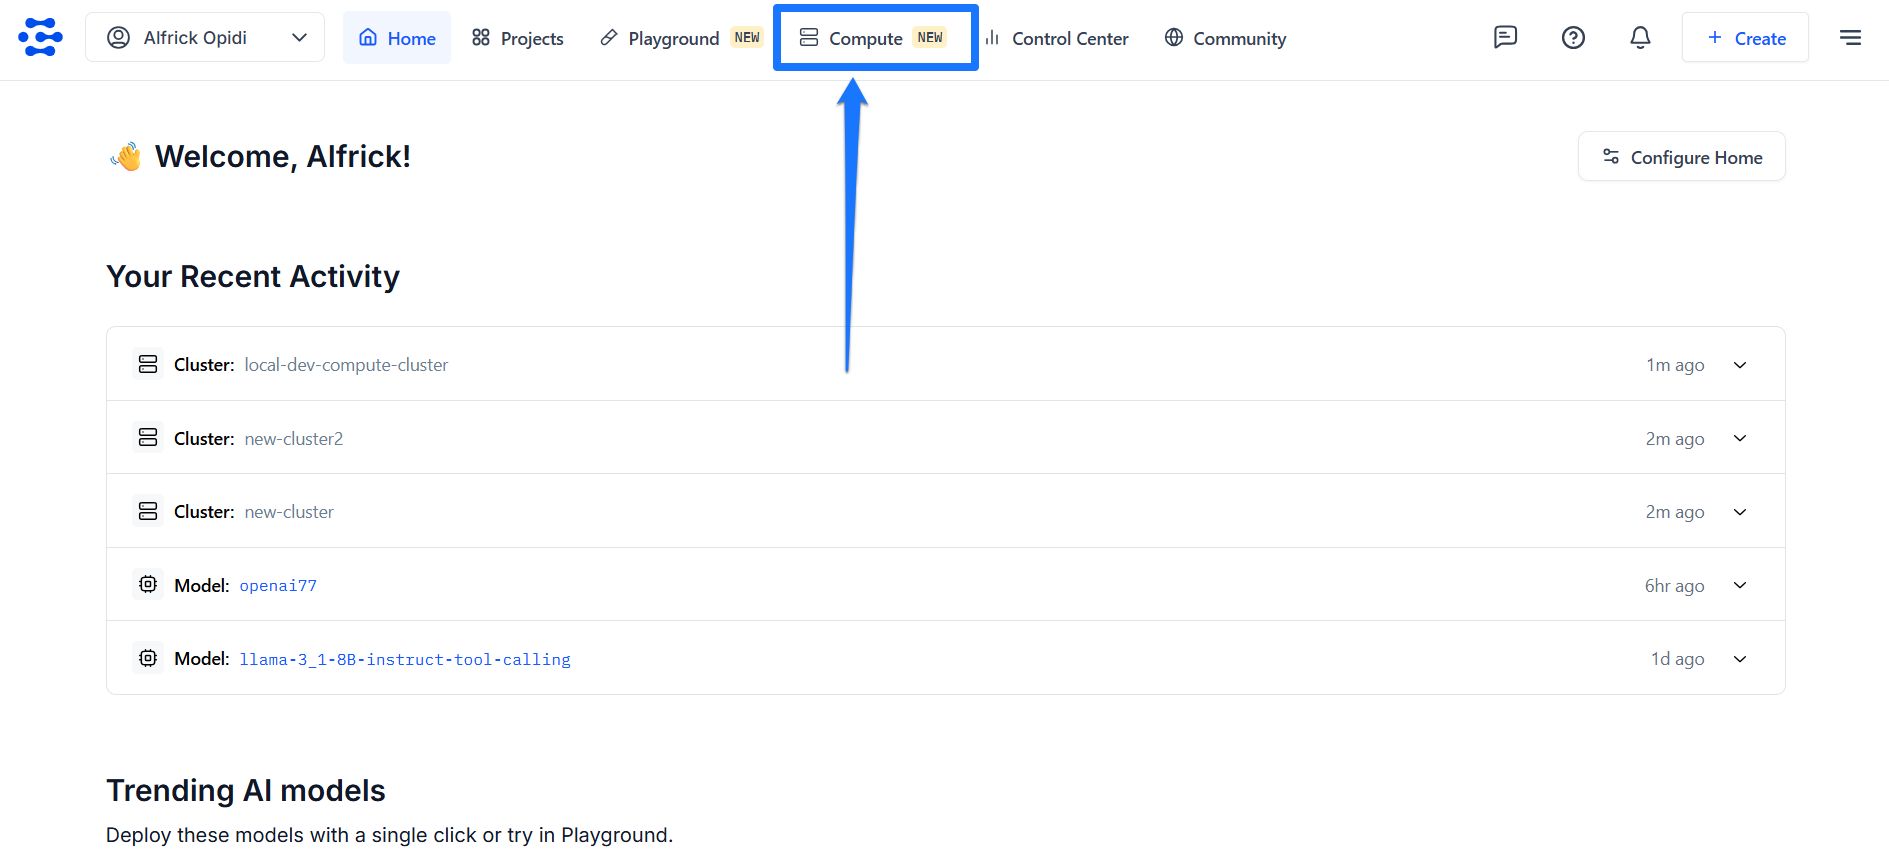
Log in to the Clarifai platform and select the Compute option in the top navigation bar.
You’ll be redirected to the Compute Orchestration page, where you can view and create clusters, nodepools, and deployments.
Step 1: Start Creating a Cluster
Click the Create a Cluster button to begin setting up a new cluster along with its associated nodepool.
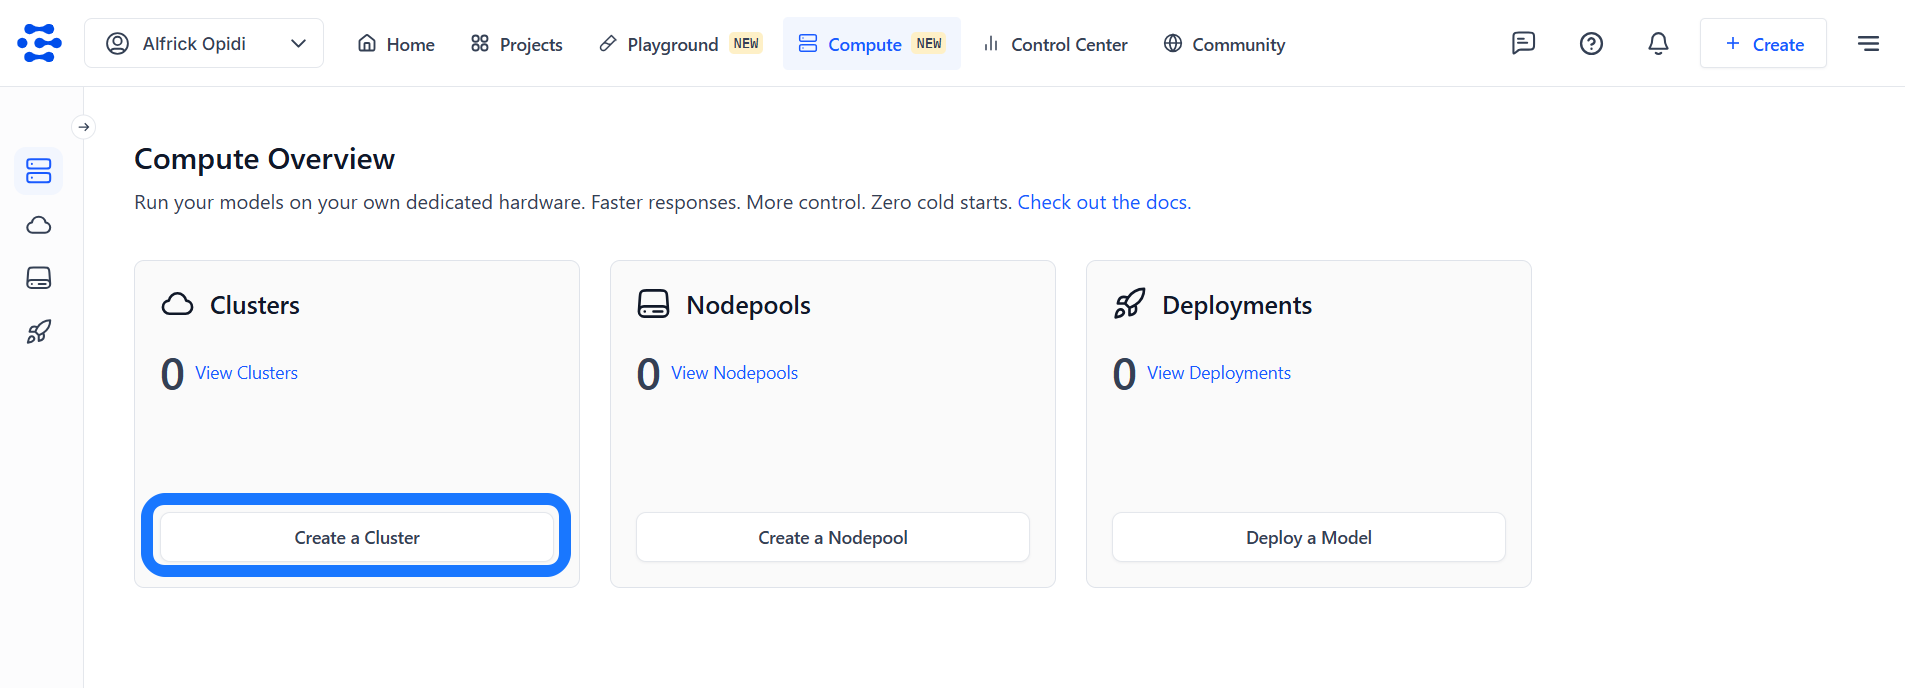
You’ll be redirected to a page, where you can specify the configurations for your new cluster and nodepool.
Step 2: Select an Instance
Select an instance type that aligns with your specific requirements. The table displays essential details for each instance type, which helps you make an informed decision.
See Supported Cloud Instances to learn more about the instance types we provide.
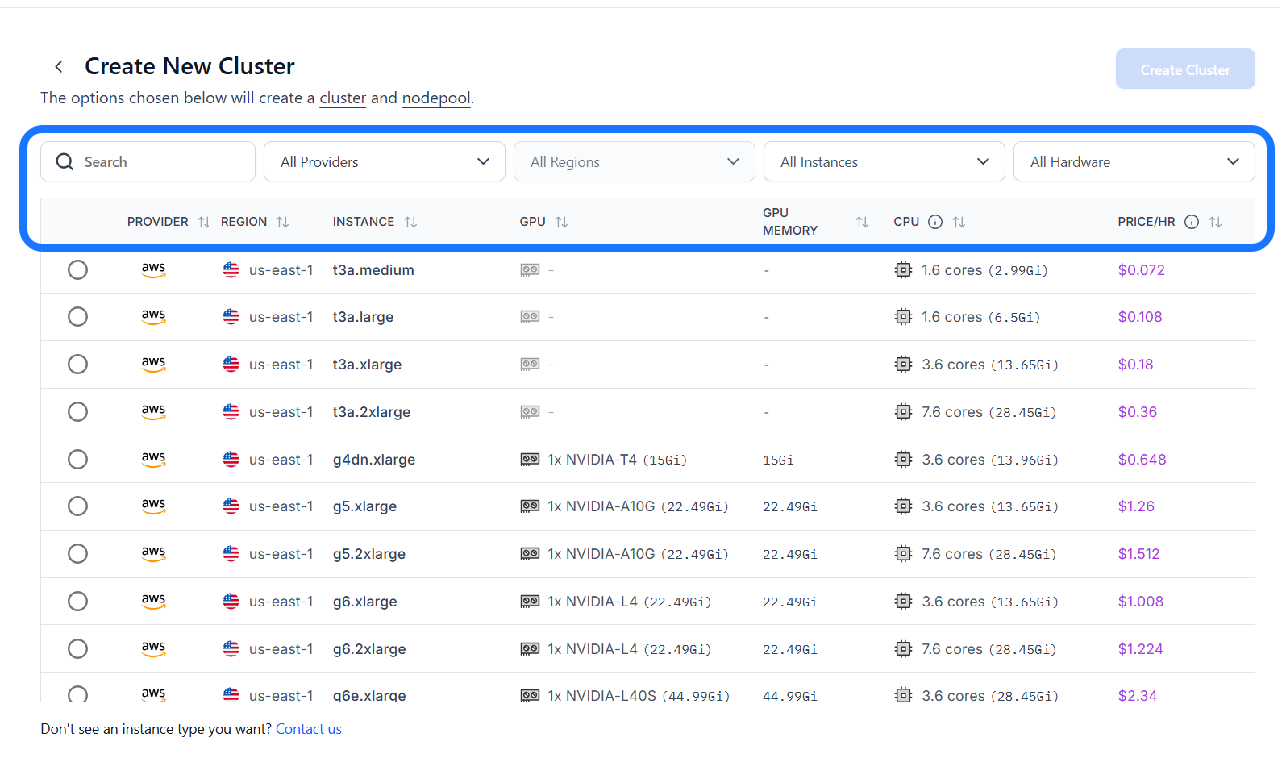
You can narrow down the displayed options using the filters and tools provided in the top bar:
- Search bar — Quickly find instance types by name.
- Provider filter — Choose from available cloud providers to match your preferred infrastructure.
- Region filter — Select the geographic location for the instance. Choosing a region closer to your users can reduce latency and improve performance.
- Instance type filter — Directly filter for a specific instance type if you already know what you're looking for.
- Hardware filter — Filter based on the instance's available hardware, such as CPU or GPU.
- Price/hour filter — Filter instances by their hourly cost, helping you manage your budget.
- Sorting controls — Click the sorting arrows next to each column header to sort values in ascending or descending order, making comparisons easier.
Before making your final choice, here are some key considerations to make:
- Workload requirements (CPU and memory) — For applications demanding significant processing power, opt for instances with a higher number of CPU cores. For example, a
t3a.2xlargeoffers7.6 cores, considerably more than at3a.mediumwith1.6 cores. Also, theGivalue displayed alongside the core count (such as2.99Gi) indicates the amount of RAM in Gigabytes. A higherGivalue signifies more available memory. - Cost sensitivity — The
PRICE/HRcolumn helps you evaluate cost. Choose an instance that balances price and performance according to your budget. - GPU requirements — If your workload involves intensive tasks like running models for video processing or other GPU-heavy tasks, you'll need to select instances equipped with GPUs.
- Regulatory compliance – Ensure the chosen region and instance type comply with any relevant data residency or industry-specific regulations.
Once you've found the right instance, click the circular radio button to the left of the row to select it.
Step 3: Set Node Autoscaling Range
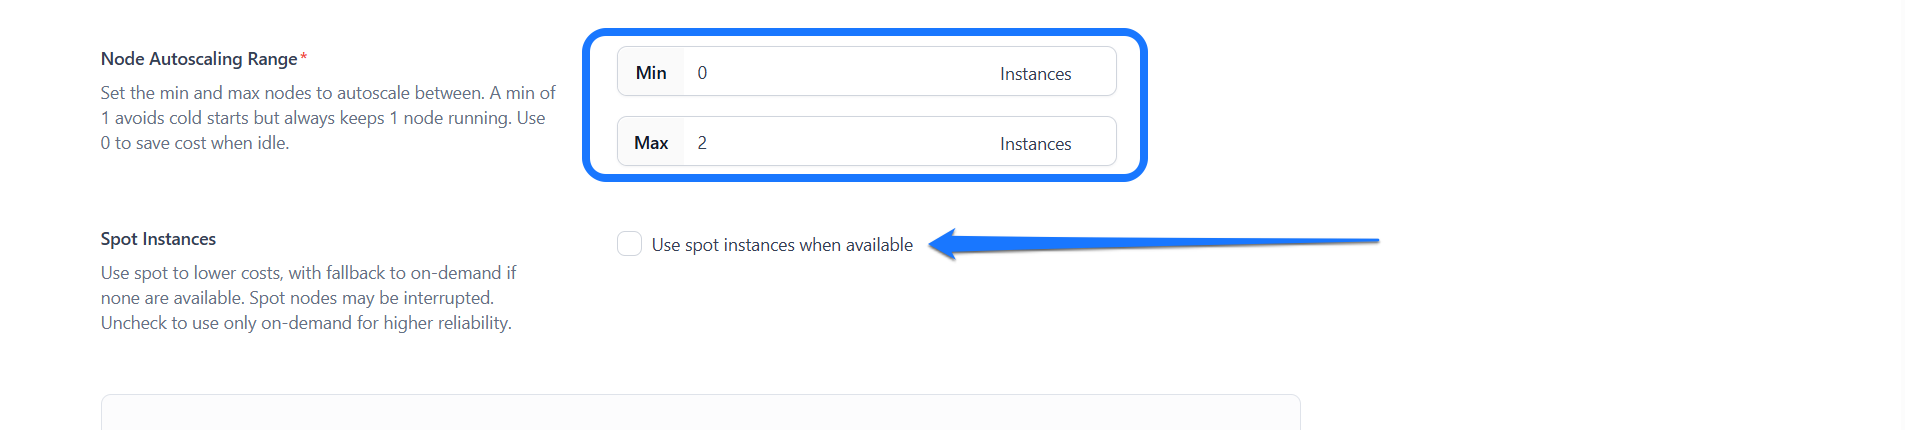
Define the minimum and maximum number of nodes your nodepool can scale to based on workload demand. This ensures your system automatically adjusts its capacity by adding nodes during high traffic and scaling down during low usage, which balances performance and cost.
For example, setting the autoscaling range to 1–5 nodes allows the nodepool to scale up to handle more requests and scale down when demand drops.
-
Setting a minimum of 1 ensures that at least one node is always running. This helps avoid cold start delays after periods of inactivity, which is crucial for maintaining low-latency response times. However, it also means incurring continuous compute costs.
-
Setting a minimum of 0 reduces costs during idle periods, as no nodes will be running. Keep in mind this can introduce cold starts when traffic resumes, potentially impacting response times.
Choose your range based on the balance you need between cost-efficiency and responsiveness.
Click here to learn how to configure model replicas to distribute your workload efficiently across multiple instances of a model.
Step 4: Enable Spot Instances
You can enable this option (default is off) if you want to rent spare, unused compute capacity at significantly lower prices compared to regular on-demand instances.
These spot instances are sourced from the underlying cloud provider (such as AWS or GCP) based on the region and instance type you've selected.
If spot instances are unavailable, Clarifai will automatically fall back to on-demand instances to maintain service continuity.
Keep in mind that spot instances can be terminated at any time if the capacity is reclaimed by the provider, which may cause temporary disruptions. For higher reliability and uninterrupted service, it's recommended to leave this option disabled and use on-demand instances only.
Step 5: Provide Cluster and Nodepool Details
Fill out the form to specify the details for your cluster and nodepool.

- Cluster ID — Enter a unique identifier for your cluster. This ID is used when deploying models and should reflect the cluster’s purpose or workload. It is auto-filled based on your selected instance type, but you can modify it as needed.
- Cluster Description — Optionally, provide a short description that summarizes the details related to the cluster.
- Nodepool ID — Enter a unique identifier for your nodepool. This ID is used when deploying models and should reflect the nodepool’s purpose or workload. It is auto-filled based on your selected instance type, but you can modify it as needed.
- Nodepool Description — Optionally, provide a short description that summarizes the details related to the nodepool.
- Personal Access Token (PAT) — Select a PAT to authenticate your identity when connecting to the cluster. The token must have the necessary permissions to manage compute resources. If the selected PAT is deleted, any associated compute functionality will stop working. Click the dropdown to view available PATs, or generate a new one by selecting "Create new Personal Access Token" or by visiting the Security section of your Personal Settings.
Step 6: Finalize and Create the Cluster
Before you enter the required details for creating a cluster, the Create Cluster button in the upper-right corner will be disabled (greyed out).
After providing the details, the button will become active. Click it to launch your cluster and nodepool.
You'll then be redirected to your newly created cluster's page, where its associated nodepool will be listed in a table.
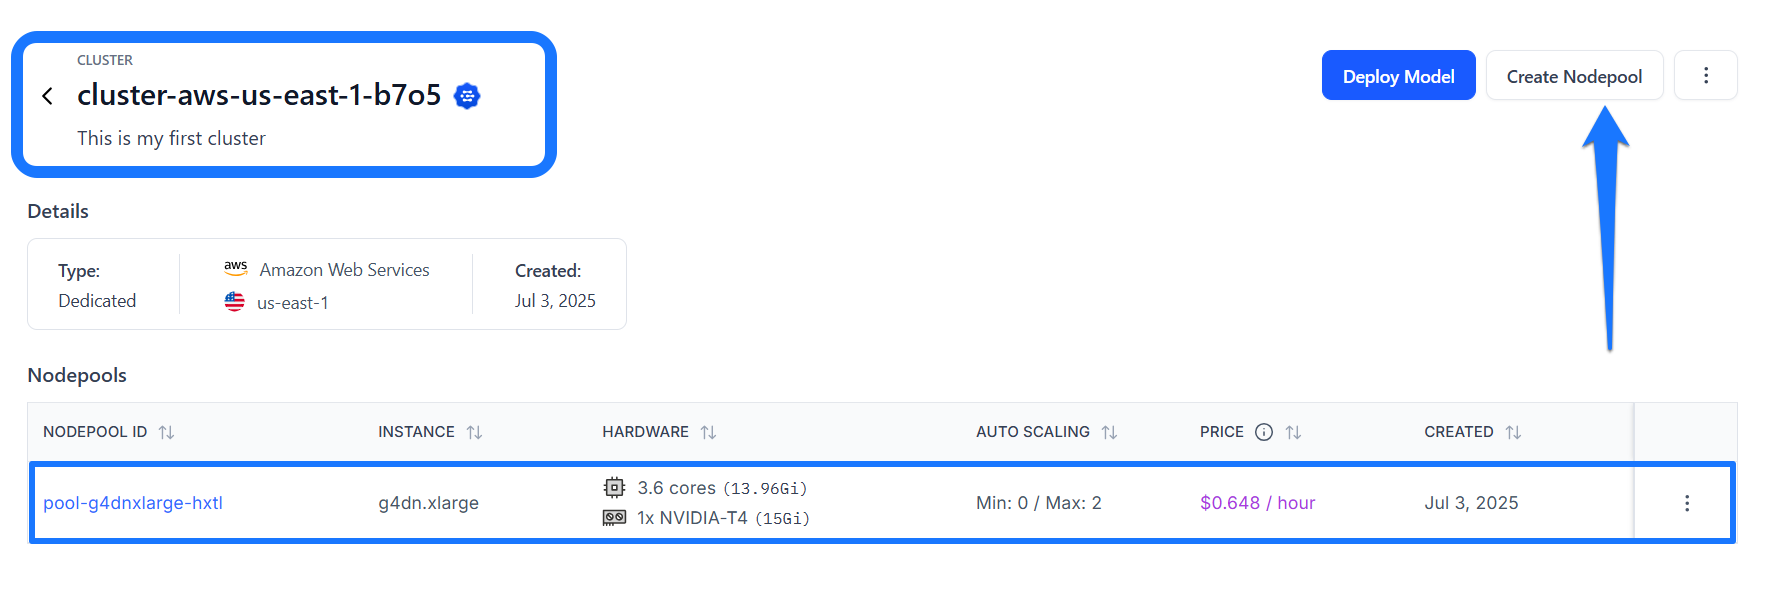
Note: Alternatively, you can create a new nodepool from an existing cluster by clicking the Create Nodepool button in the upper-right corner of the cluster's page.You’ll be redirected to a page where you can specify the configurations for your new nodepool.
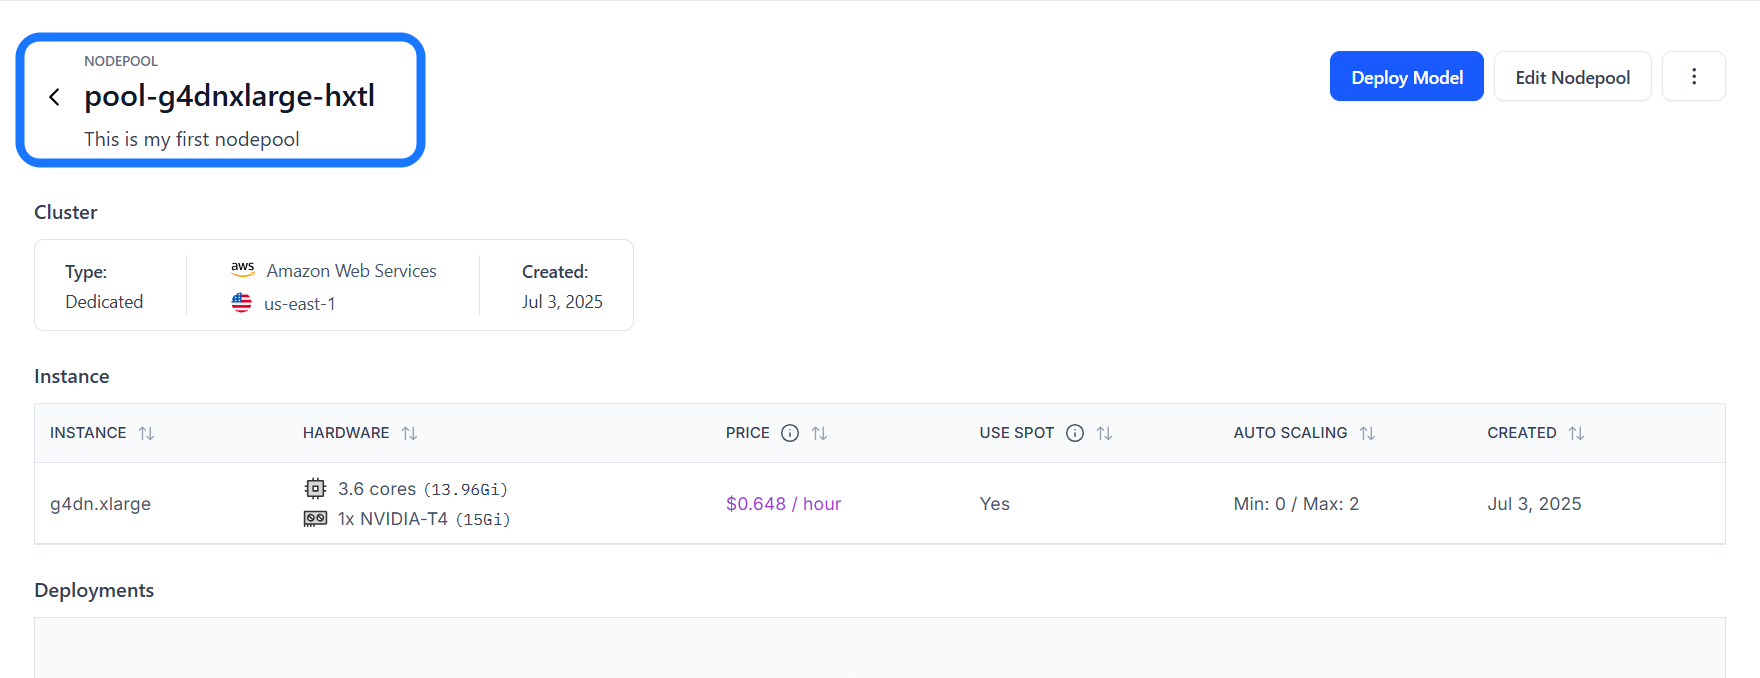
If you click on a nodepool listed in the table, you'll be taken to its individual page, where you can view its detailed information, such as the cluster type, instance type, and any resource deployments associated with it.
Via the API
Prerequisites
Installation
To begin, install the latest version of the clarifai Python package.
pip install --upgrade clarifai
Note that if you want to use the Clarifai CLI, you'll need to authenticate your CLI session with Clarifai. Learn how to do that here.
Get a PAT
You need a PAT (Personal Access Token) key to authenticate your connection to the Clarifai platform. You can generate it in your Personal Settings page by navigating to the Security section.
Then, set it as an environment variable in your script.
import os
os.environ["CLARIFAI_PAT"] = "YOUR_PAT_HERE" # replace with your own PAT key
Set up Project Directory
- Create an overarching directory to store your project files.
- Inside this directory, create a Python file for your Compute Orchestration code.
- Create a
configsfolder to store your YAML configuration files for clusters, nodepools, and deployments.
Then, create the following files in the configs folder:
1. compute_cluster_config.yaml:
- YAML
compute_cluster:
  id: "test-compute-cluster"
  description: "My AWS compute cluster"
  cloud_provider:
      id: "aws"
  region: "us-east-1"
  managed_by: "clarifai"
  cluster_type: "dedicated"
  visibility:
    gettable: 10
2. nodepool_config.yaml:
- YAML
nodepool:
  id: "test-nodepool"
  compute_cluster:
    id: "test-compute-cluster"
  description: "First nodepool in AWS in a proper compute cluster"
  instance_types:
    - id: "g5.xlarge"
      compute_info:
        cpu_limit: "8"
        cpu_memory: "16Gi"
        accelerator_type:
          - "a10"
        num_accelerators: 1
        accelerator_memory: "40Gi"
  node_capacity_type:
    capacity_types:
      - 1
      - 2
  max_instances: 1
3. deployment_config.yaml:
We'll use this later to deploy the model.
- YAML
deployment:
 id: "test-deployment"
 description: "some random deployment"
 autoscale_config:
   min_replicas: 0
   max_replicas: 1
   traffic_history_seconds: 100
   scale_down_delay_seconds: 30
   scale_up_delay_seconds: 30
   disable_packing: false
 worker:
   model:
     id: "apparel-clusterering"
     model_version:
       id: "cc911f6b0ed748efb89e3d1359c146c4"
     user_id: "clarifai"
     app_id: "main"
 scheduling_choice: 4
 nodepools:
   - id: "test-nodepool"
     compute_cluster:
         id: "test-compute-cluster"
Create a Cluster
To create a new compute cluster, pass the compute_cluster_id and config_filepath as arguments to the create_compute_cluster method of the User class.
- Python
- CLI
from clarifai.client.user import User
import os

# Set the PAT key
os.environ["CLARIFAI_PAT"] = "YOUR_PAT_HERE"

# Initialize the client
client = User(
    user_id="YOUR_USER_ID_HERE",
    base_url="https://api.clarifai.com"
)

# Create a new compute cluster
compute_cluster = client.create_compute_cluster(
    compute_cluster_id="test-compute-cluster",
    config_filepath="./configs/compute_cluster_config.yaml"
)
clarifai computecluster create --config <compute-cluster-config-filepath>
After creating it, initialize the ComputeCluster class by providing the user_id and compute_cluster_id parameters.
Initialization is essential because it establishes the specific user and compute cluster context, which allows the subsequent operations to accurately target and manage the intended resources.
- Python
from clarifai.client.compute_cluster import ComputeCluster

# Initialize the ComputeCluster instance
compute_cluster = ComputeCluster(
    user_id="YOUR_USER_ID_HERE",
    compute_cluster_id="test-compute-cluster",
    base_url="https://api.clarifai.com"
)
Create a Nodepool
To create a new nodepool, use the create_nodepool method with the nodepool_id and config_filepath parameters.
- Python
- CLI
from clarifai.client.compute_cluster import ComputeCluster
import os

# Set the PAT key
os.environ["CLARIFAI_PAT"] = "YOUR_PAT_HERE"

# Initialize the ComputeCluster instance
compute_cluster = ComputeCluster(
    user_id="YOUR_USER_ID_HERE",
    compute_cluster_id="test-compute-cluster",
    base_url="https://api.clarifai.com"
)

# Create a new nodepool
nodepool = compute_cluster.create_nodepool(
    nodepool_id="test-nodepool",
    config_filepath="./configs/nodepool_config.yaml"
)
clarifai nodepool create --config <nodepool-config-filepath>
After creating it, initialize the Nodepool class by providing the user_id and nodepool_id parameters.
- Python
from clarifai.client.nodepool import Nodepool

# Initialize the Nodepool instance
nodepool = Nodepool(
    user_id="YOUR_USER_ID_HERE",
    nodepool_id="test-nodepool",
    base_url="https://api.clarifai.com"
)