Deploy Your First Model via UI
Quickly set up infrastructure for inference
Clarifai provides an intuitive interface that makes it easy to provision compute infrastructure for running your models.
Deployment allows you to configure and activate the infrastructure needed to serve model predictions. With just a few simple steps, you can deploy a trained model and start generating predictions.
Step 1: Sign Up or Log In
Start by logging in to your Clarifai account, or sign up for a new one to unlock access to the platform’s powerful AI capabilities.
Step 2: Choose a Model
Clarifai’s Model Library provides a curated collection of the latest AI models ready for testing and integration. Browse the library to quickly find a model by capability (such as text, vision, or multimodal), provider, or any other use case.
For this guide, we’ll choose the Llama-3.2-3B-Instruct model.
After finding a model, click the Deploy Model button in the upper-right corner of the page.

Step 3: Configure Your Deployment
You’ll be redirected to the deployment creation page, where the fields are pre-filled for you — such as the Deployment ID, PAT (for authentication), and Nodepool.
You can adjust these settings as needed.
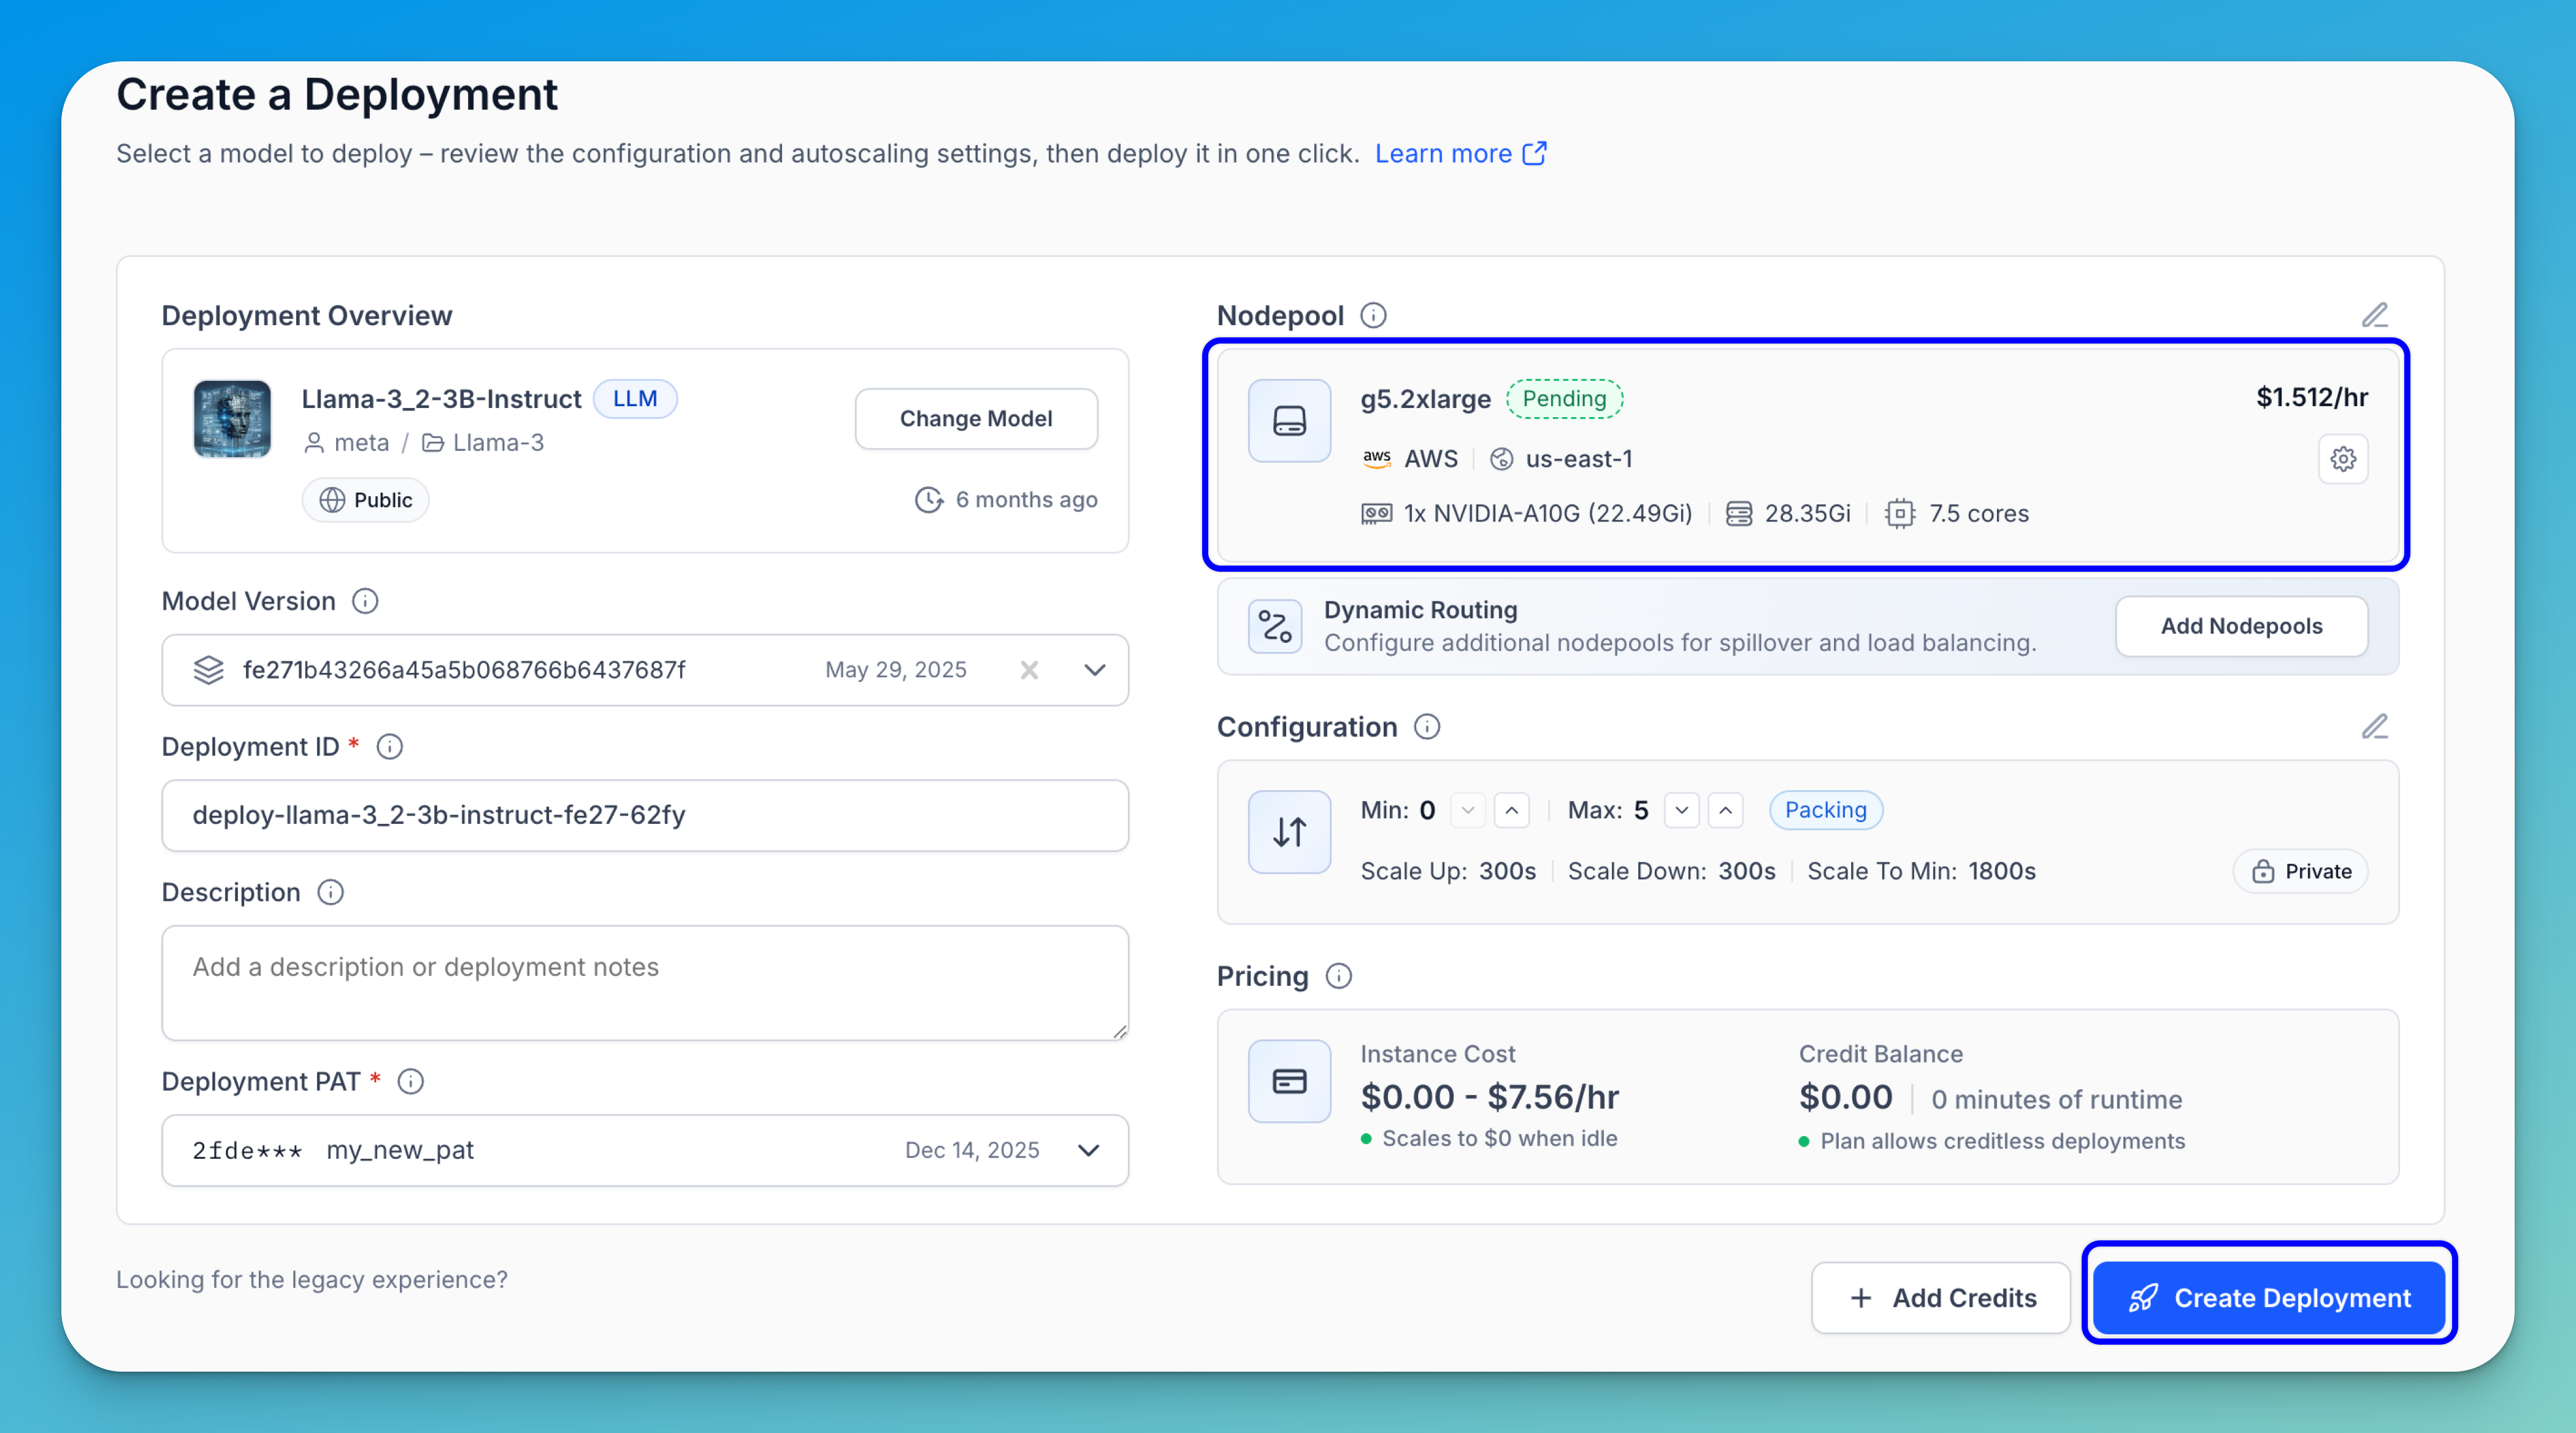
Note: A cloud instance and hardware to host your deployment will be assigned automatically. If no compatible nodepool exists in your account, one will be created as part of the deployment process and assigned a
Pendingstatus. If a compatible nodepool already exists, it will be selected automatically and assigned aProvisionedstatus — meaning the instance is set up and ready to use.
Finally, click Create Deployment in the bottom-right corner of the page to launch your deployment.
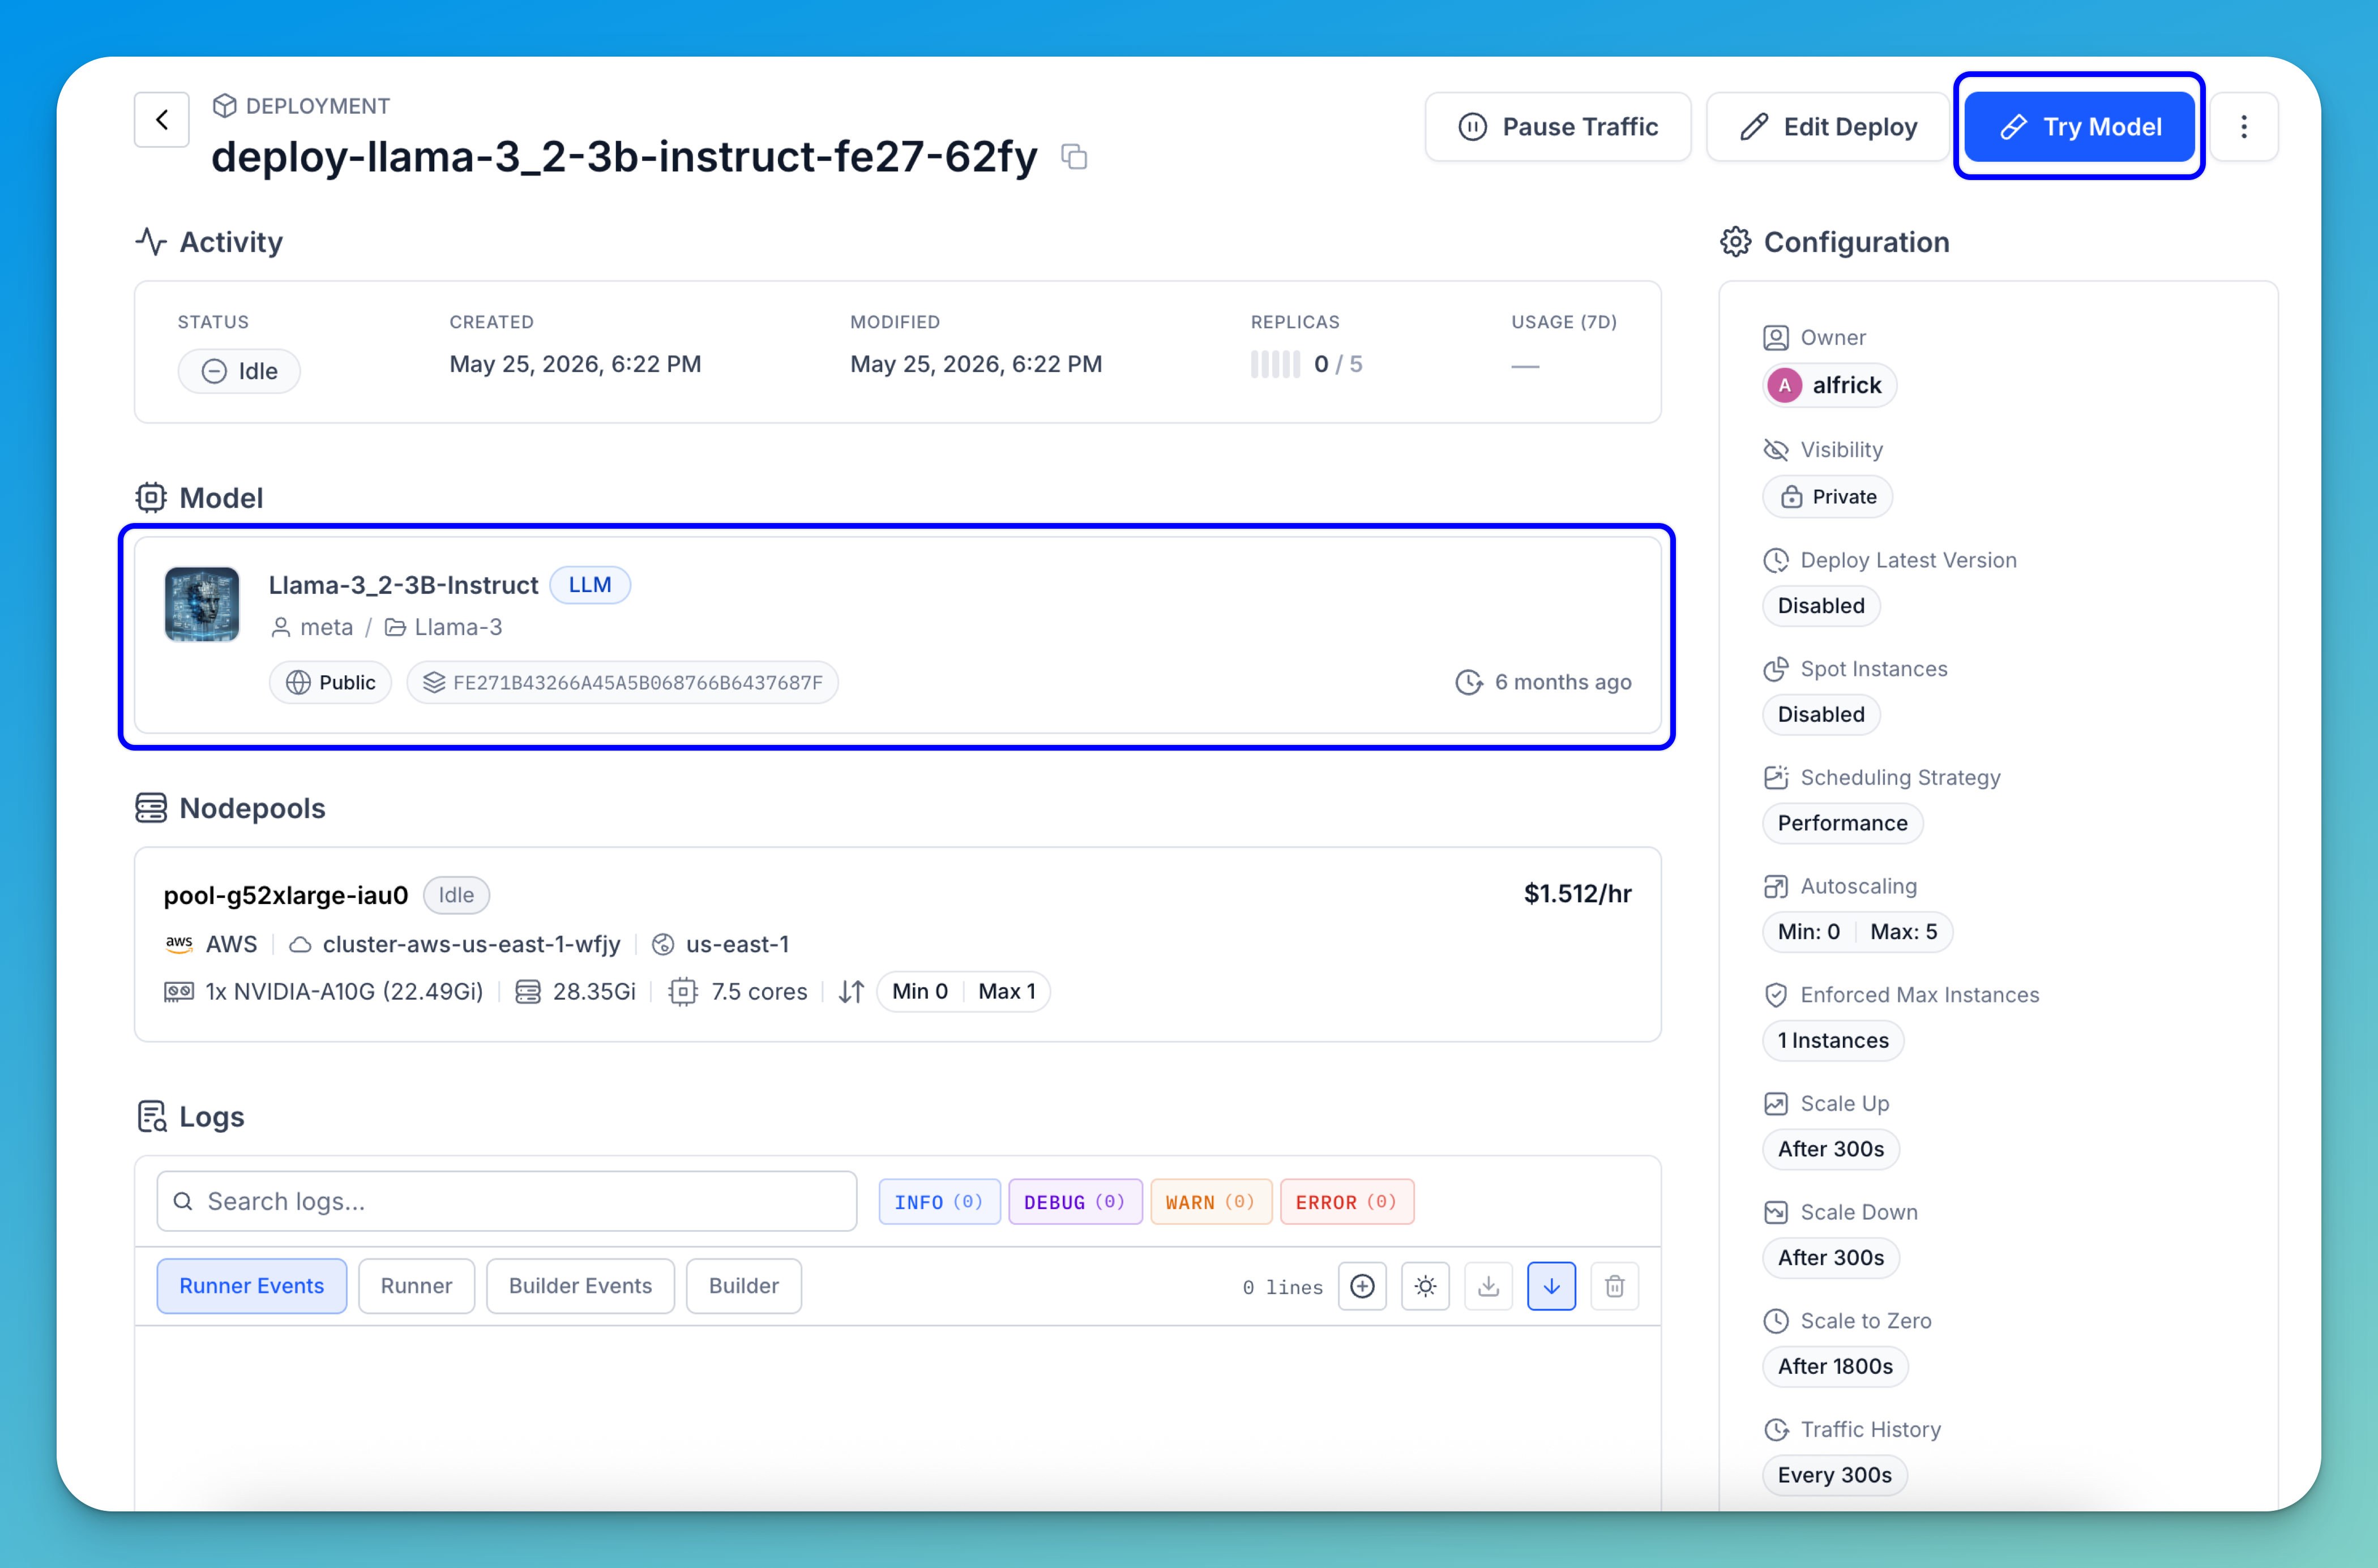
A toast notification will appear at the top of the page confirming that the cluster and nodepool have been successfully created using the provided settings, and the model has been deployed within this infrastructure.
You’ll then be automatically redirected to the newly created deployment page, where you can view your compute settings and the deployed model.
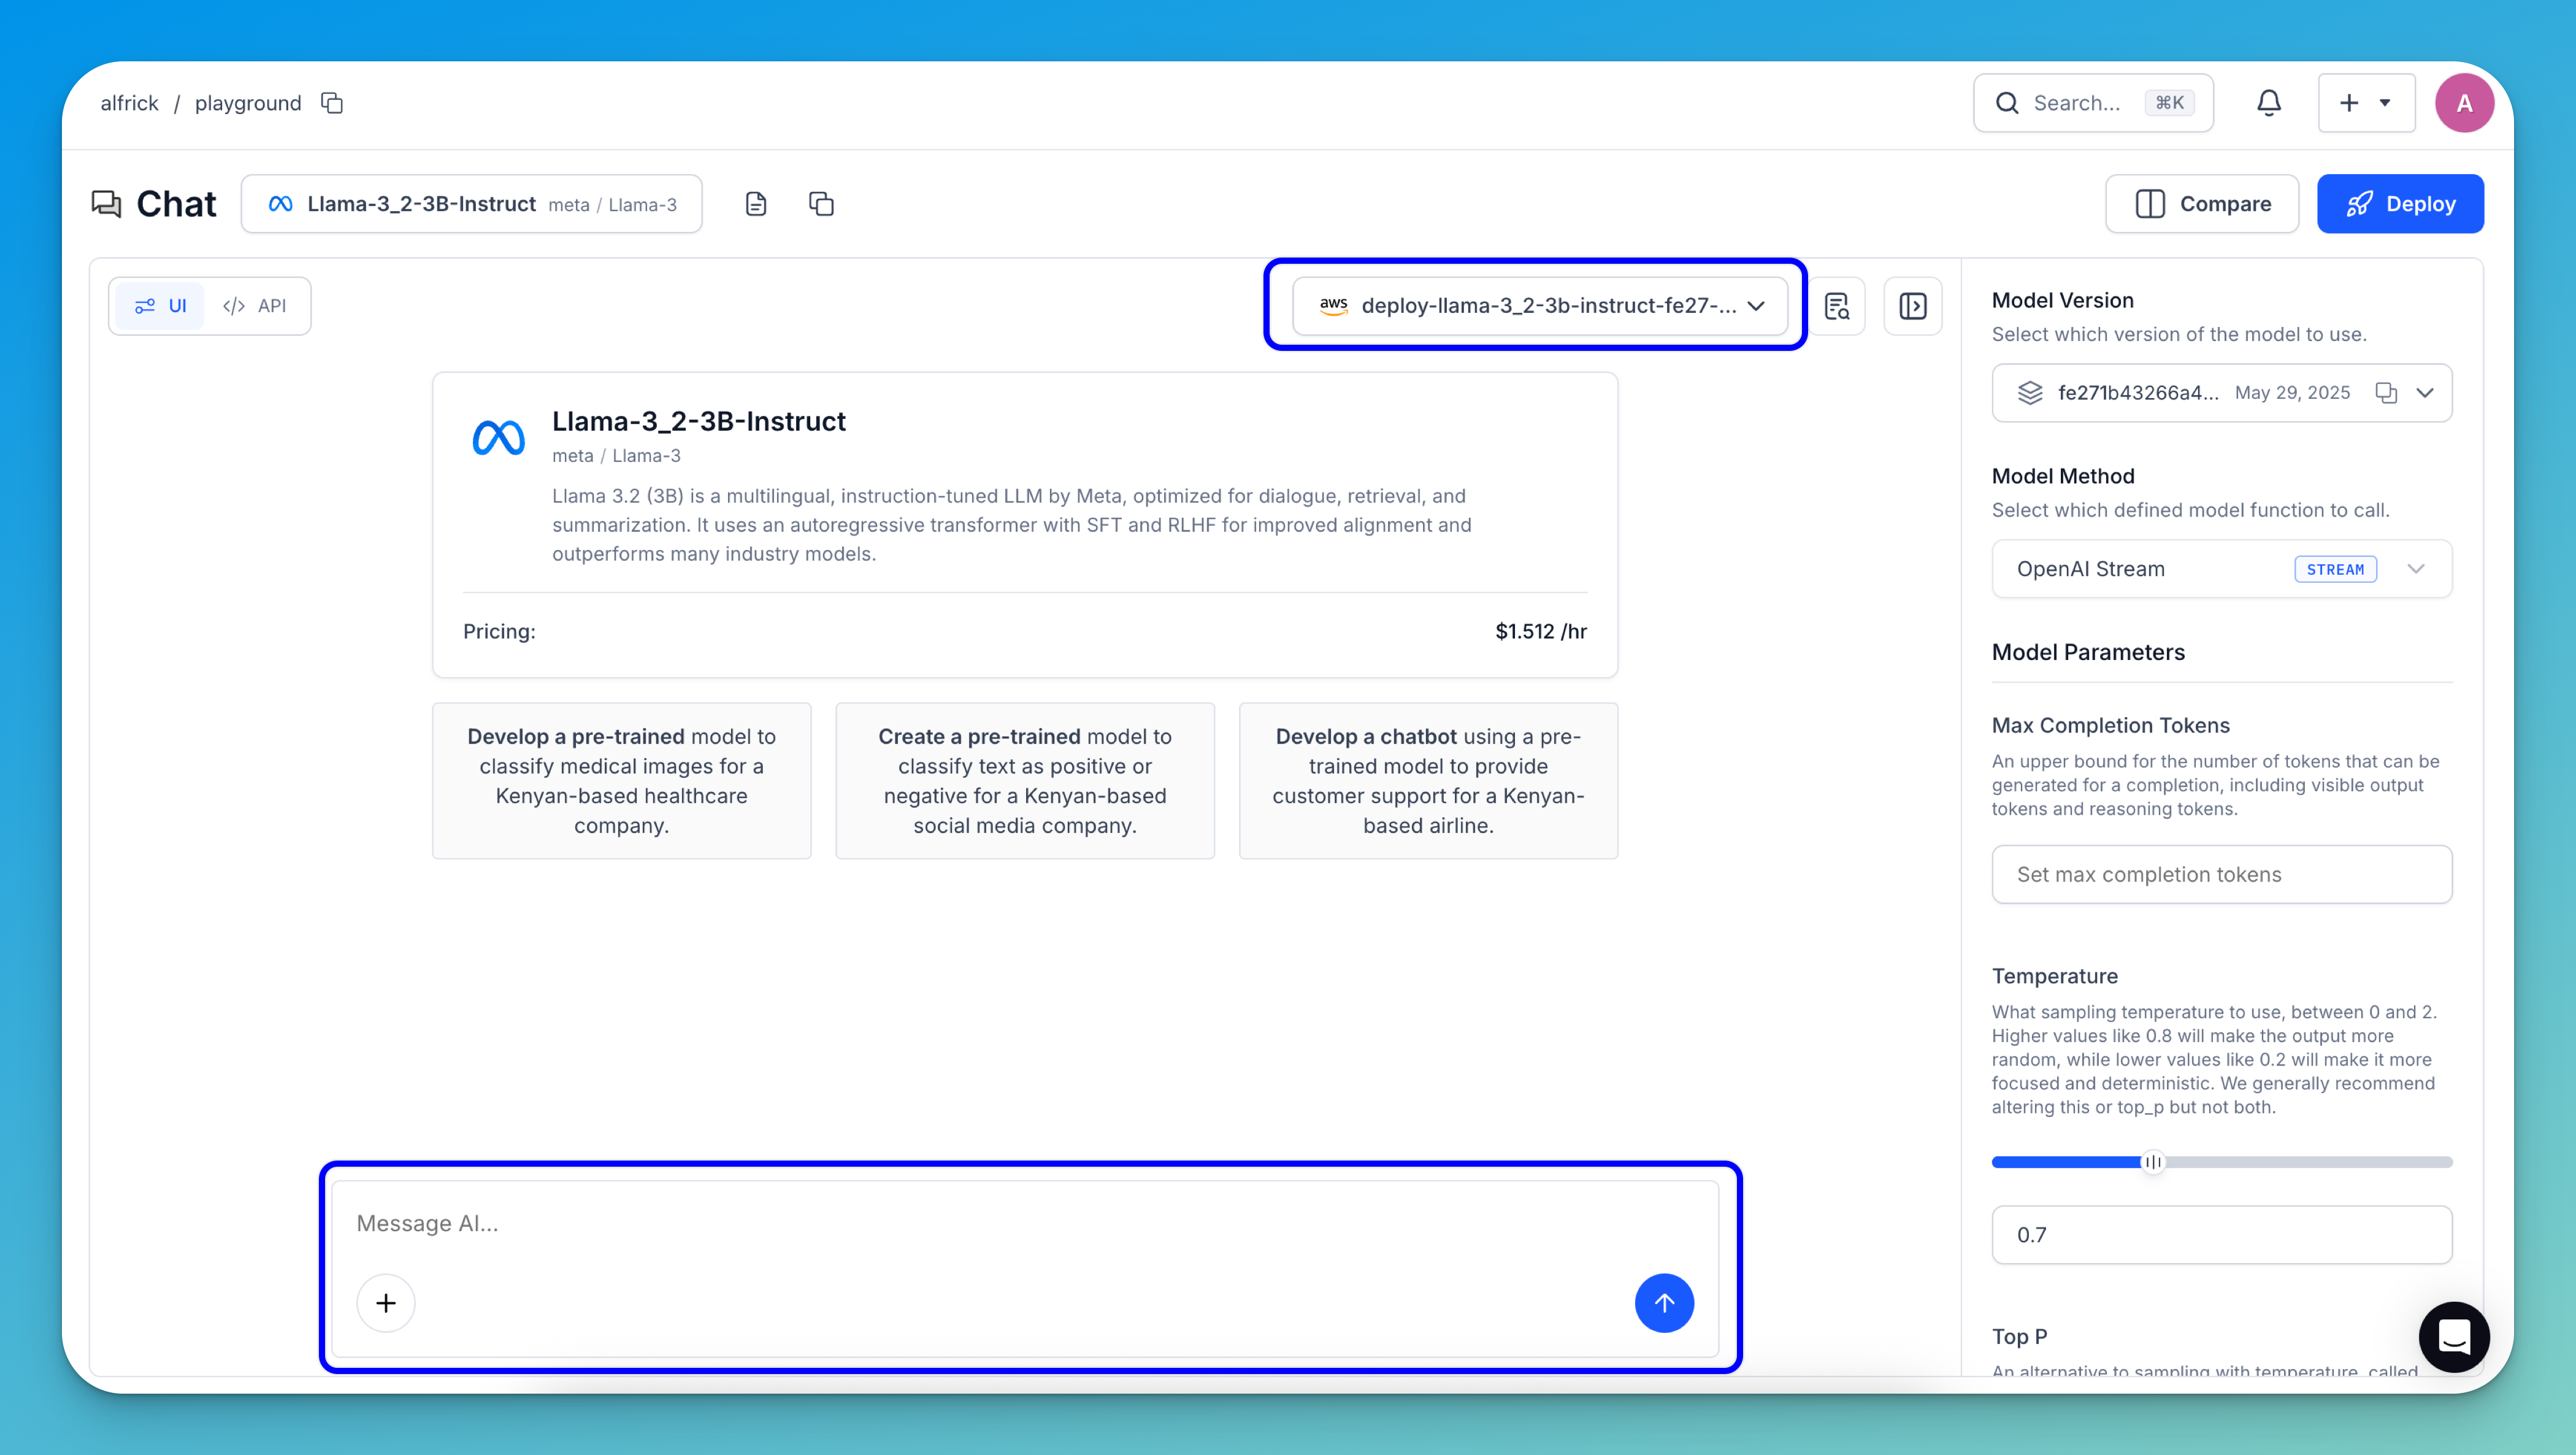
Step 4: Run Inferences
To run a prediction with your deployed model, click the Try Model button — either on the deployment page or in the upper-right corner of the model's individual page.

You’ll be taken to the Playground interface, where you can enter your prompt in the message box to run inferences using your deployed model.
See how to deploy your models on Clarifai using the UI for more details.