Set Up Compute Quickly
Set up your computing infrastructure easily and fast for inference
Clarifai makes it easy to provision and manage your own computing infrastructure. With just a few clicks, you can spin up pre-configured compute resources and use them for deploying your models for inference.
Step 1: Sign Up or Log In
Start by logging in to your existing Clarifai account, or sign up for a new one to unlock access to the platform’s powerful AI capabilities.
Step 2: Choose Quick Compute Option
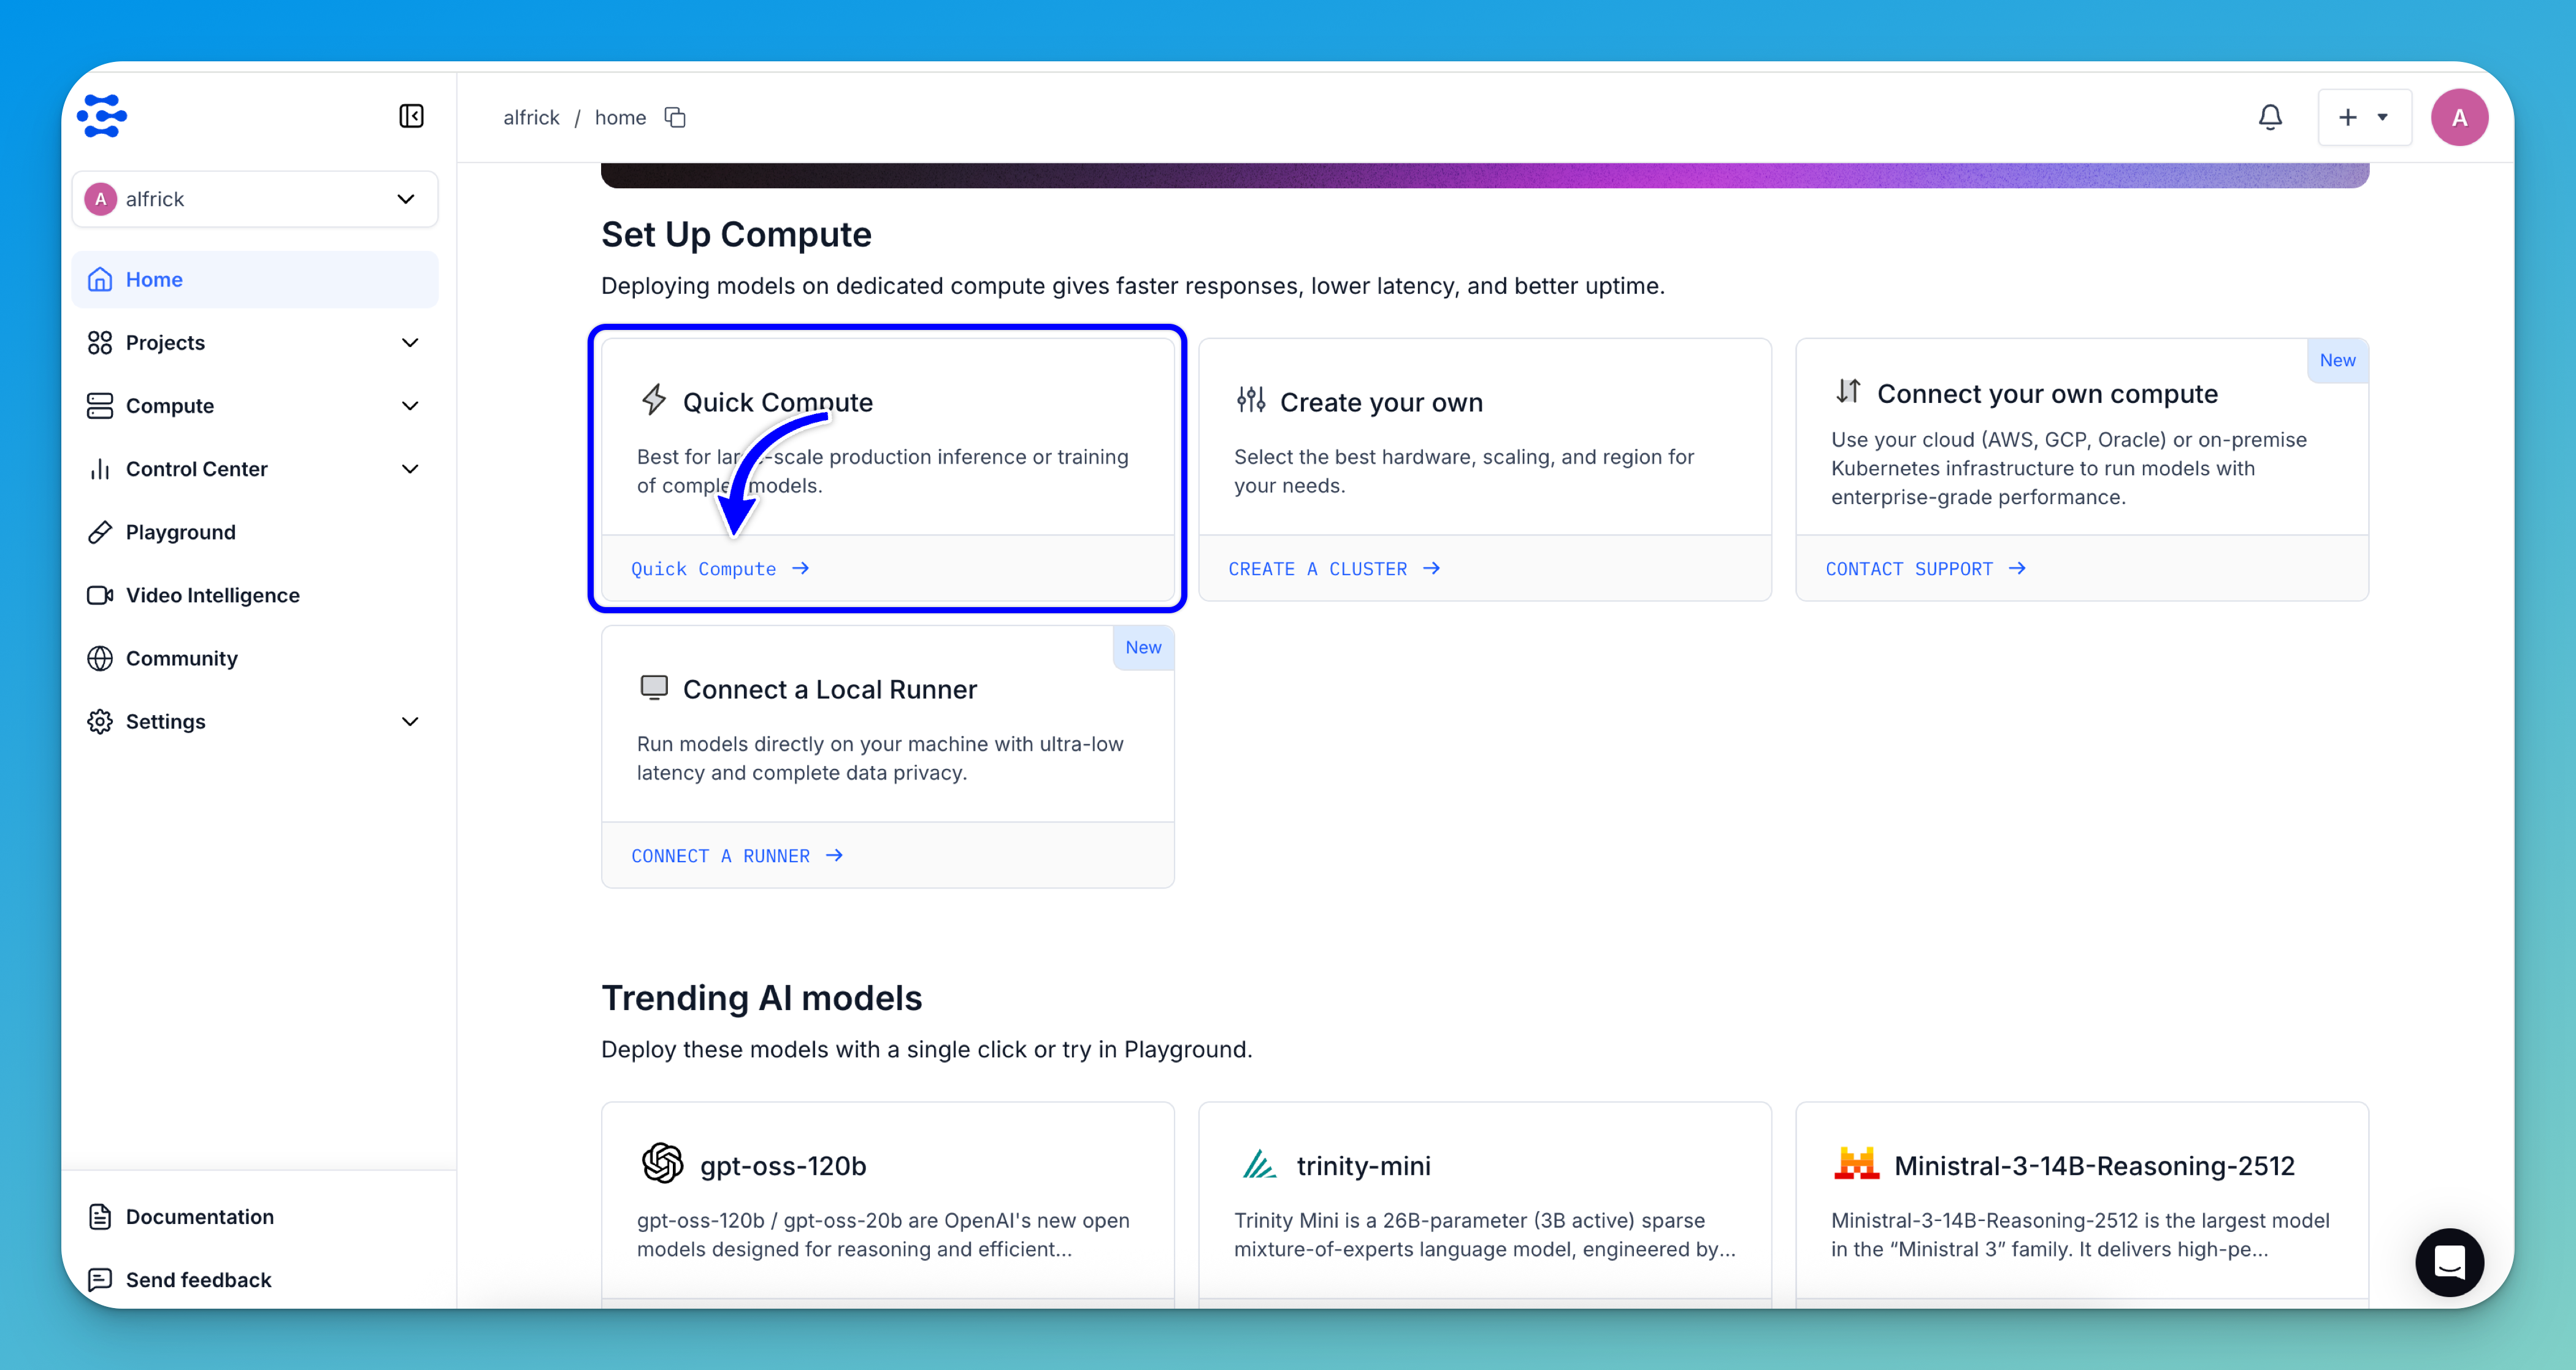
Navigate to the Set Up Compute section. You can access the section in any of the following ways:
- From the platform's homepage, go to the Set Up Compute section.
- From an individual model's page, such as for Llama-3_2-3B-Instruct, go to the Compute tab and scroll to the Set Up Compute section at the bottom.

Then, click the Quick Compute button located in the bottom-left corner of the Quick Compute information card.
Note: If the quick, pre-configured compute option don’t fully meet your requirements, you can select the Create your own option to customize the infrastructure according to your specific needs.
Step 3: Review Your Compute Instance
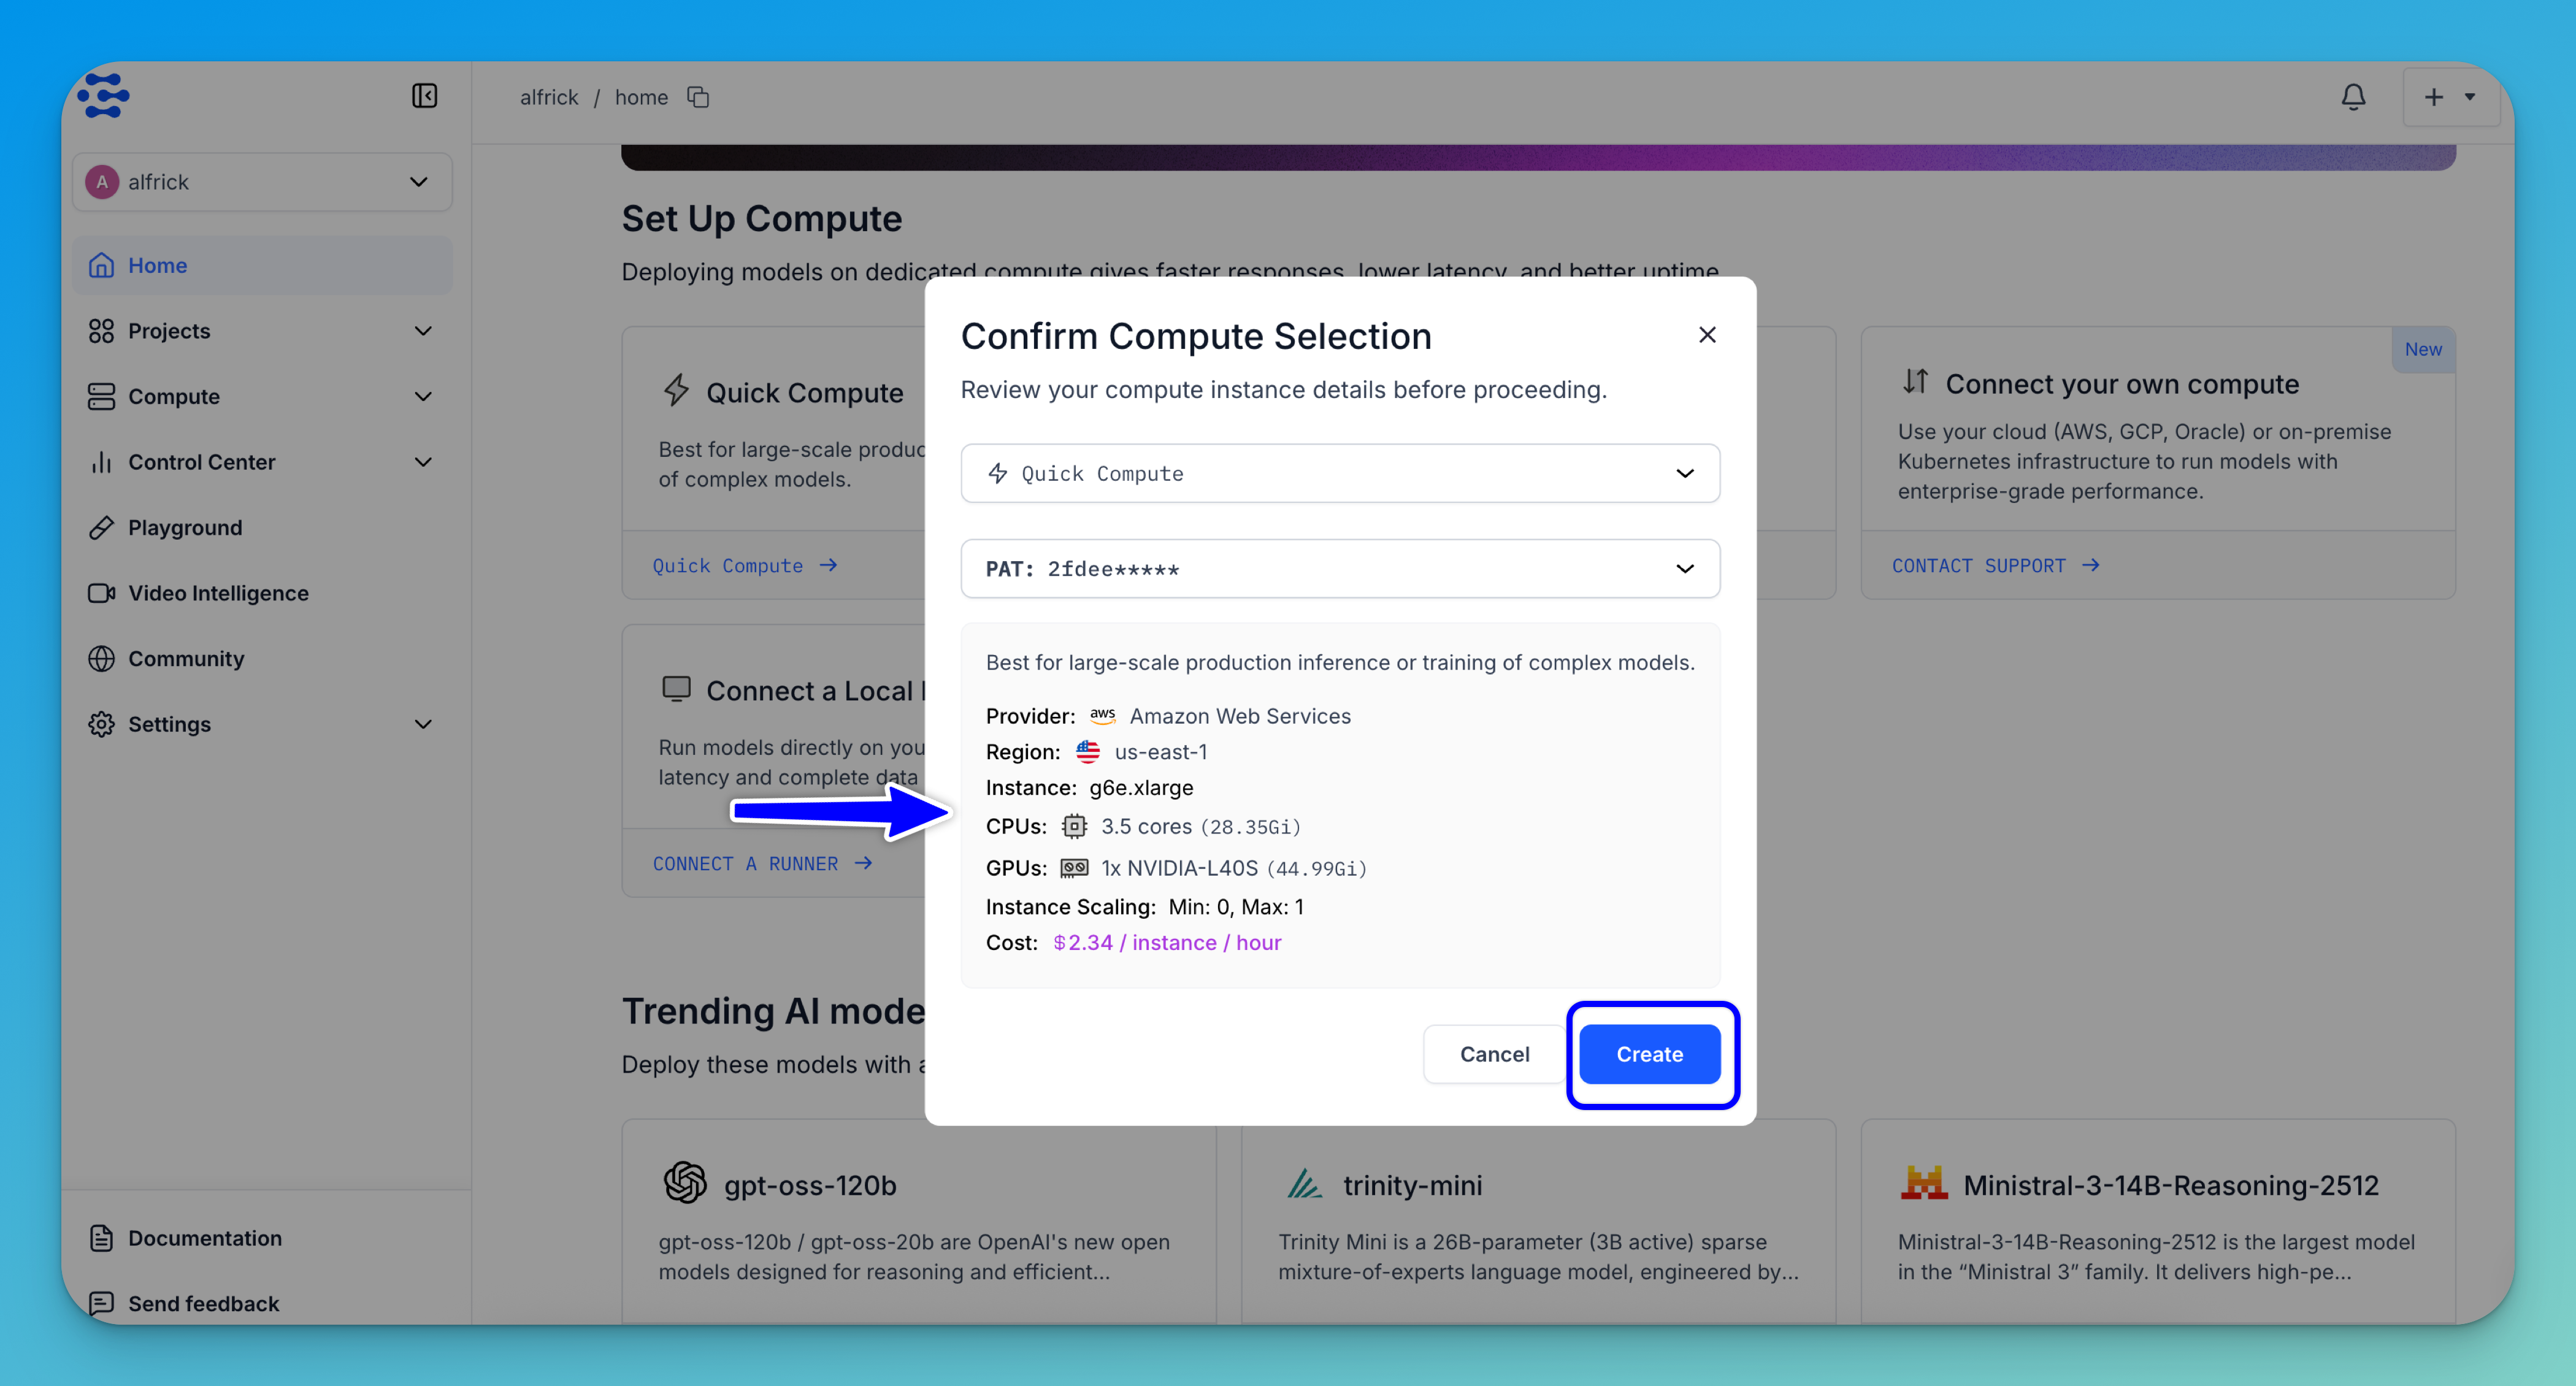
After clicking the button, a pop-up window will appear, displaying your pre-configured compute instance and its settings.
A Personal Access Token (PAT) will be pre-populated for your convenience. If needed, you can select a different token from the dropdown list or create a new one.

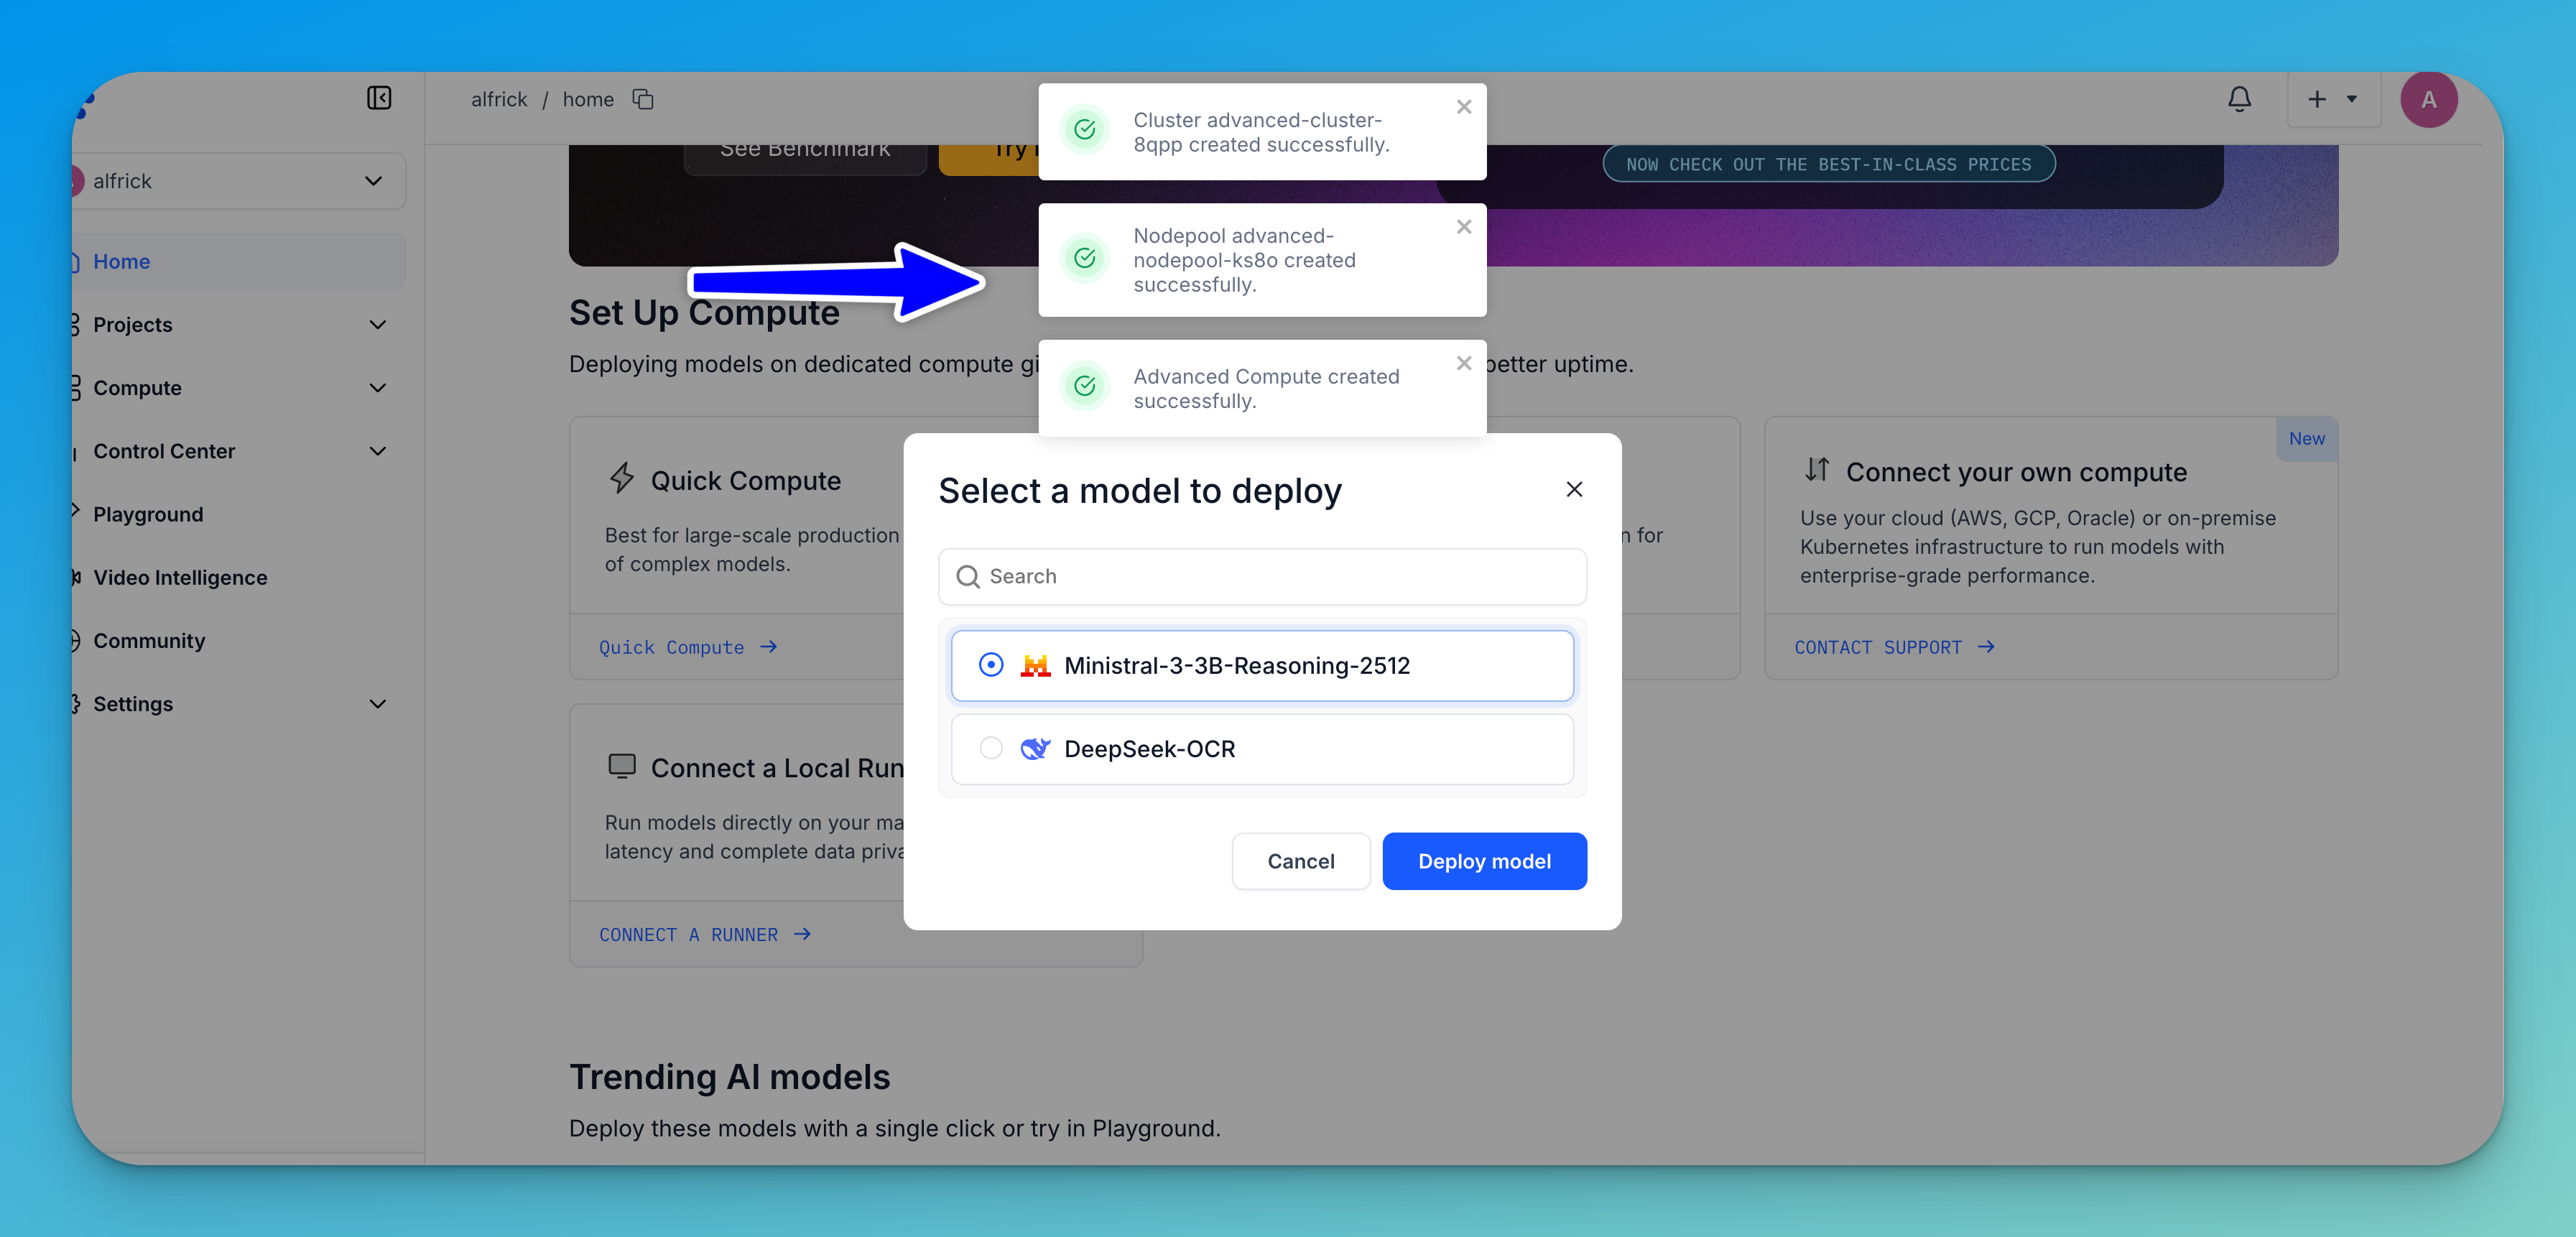
After reviewing your compute instance details, click the Create button. This will automatically generate a compute cluster and nodepool based on the pre-configured settings.

Note: If you want to deploy a model right away, use the modal that appears to select a model, then click the Deploy model button.
Step 4: Use Your Compute Instance
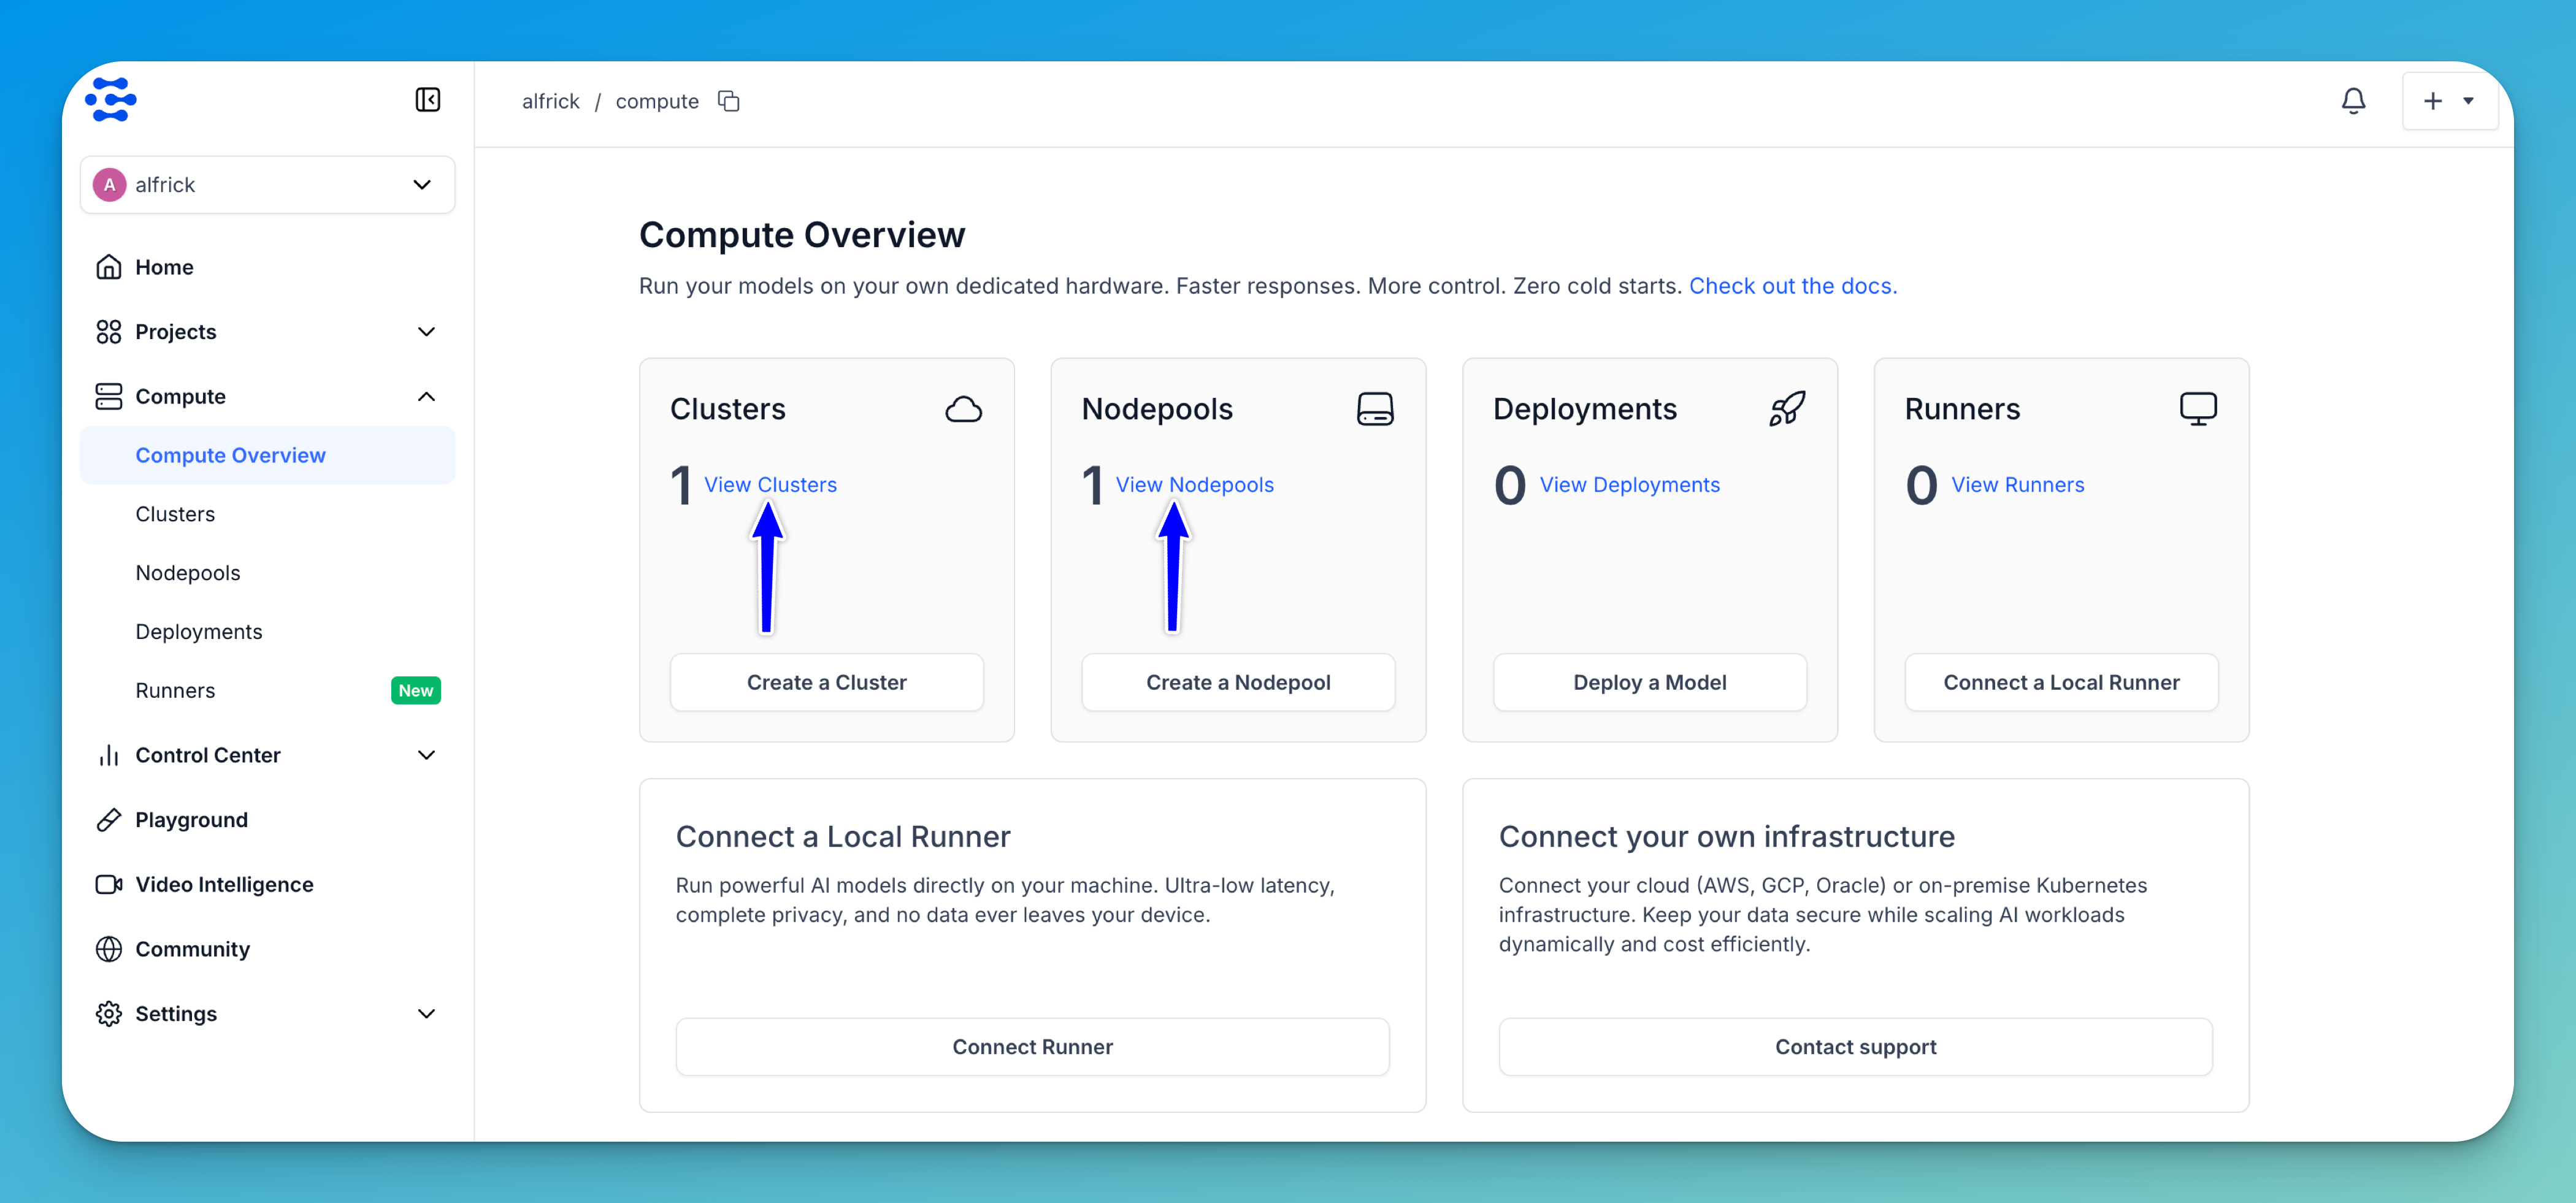
Once your compute cluster and nodepool are created, you can open the Compute section from the collapsible left sidebar and select Compute Overview to view them.

You can then use these resources to deploy models and run inference.