Quick Start With Playground
Start running inferences in just a few simple steps
Clarifai's AI Playground is an intuitive interface that allows you to experience powerful AI models in action without requiring additional setup.
This interactive battleground brings together a curated selection of cutting-edge models, spanning vision, language, and multimodal tasks.
You can quickly test performance, experiment with real inputs, and explore Clarifai’s full capabilities — directly from your browser.
Step 1: Sign Up or Log In
Start by logging in to your existing Clarifai account, or sign up for a new one to unlock access to the platform’s powerful AI capabilities. New users receive a welcome bonus to kickstart their exploration.
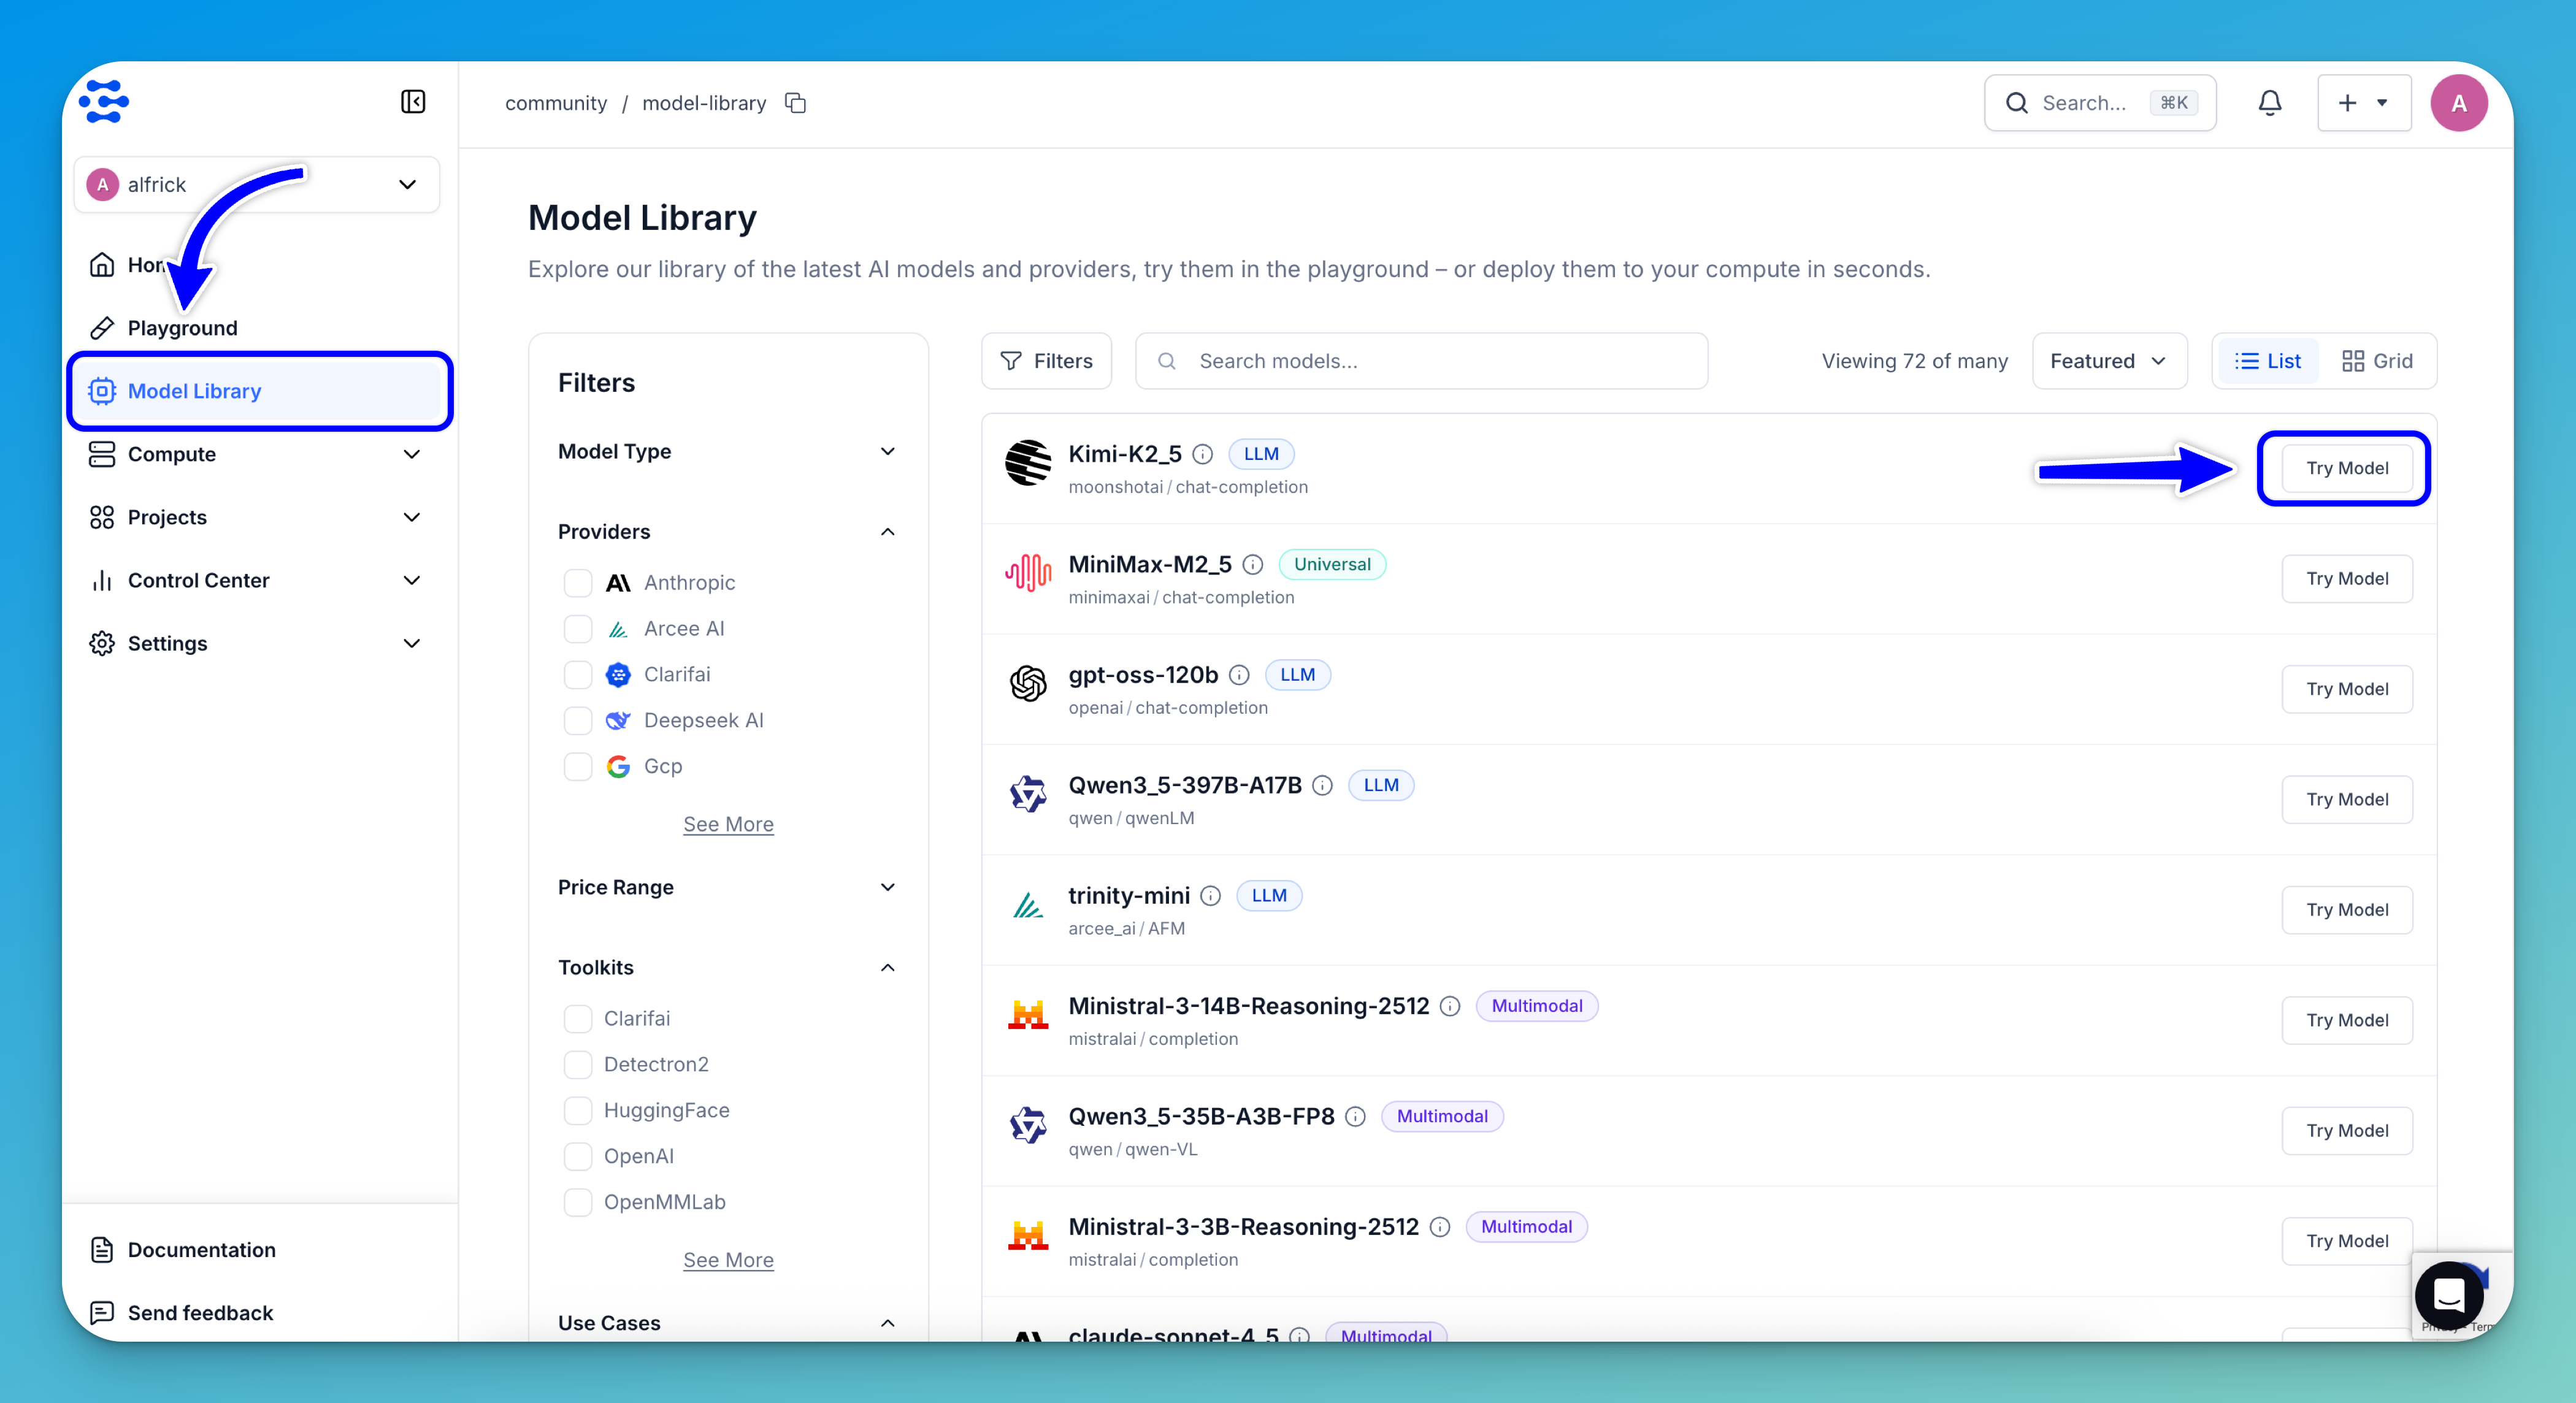
Step 2: Get a Model
Clarifai’s Model Library provides a curated collection of the latest AI models ready for testing and integration.
To get started, browse the library to discover models by provider, capability, use case, or any other parameter. Once you’ve found a suitable model, click the Try Model button on the far right of its row.
For this guide, we’ll use the Kimi-K2_5 model.
Alternatively: You can select the Playground option in the collapsible left sidebar.
Step 3: Run Your Inference
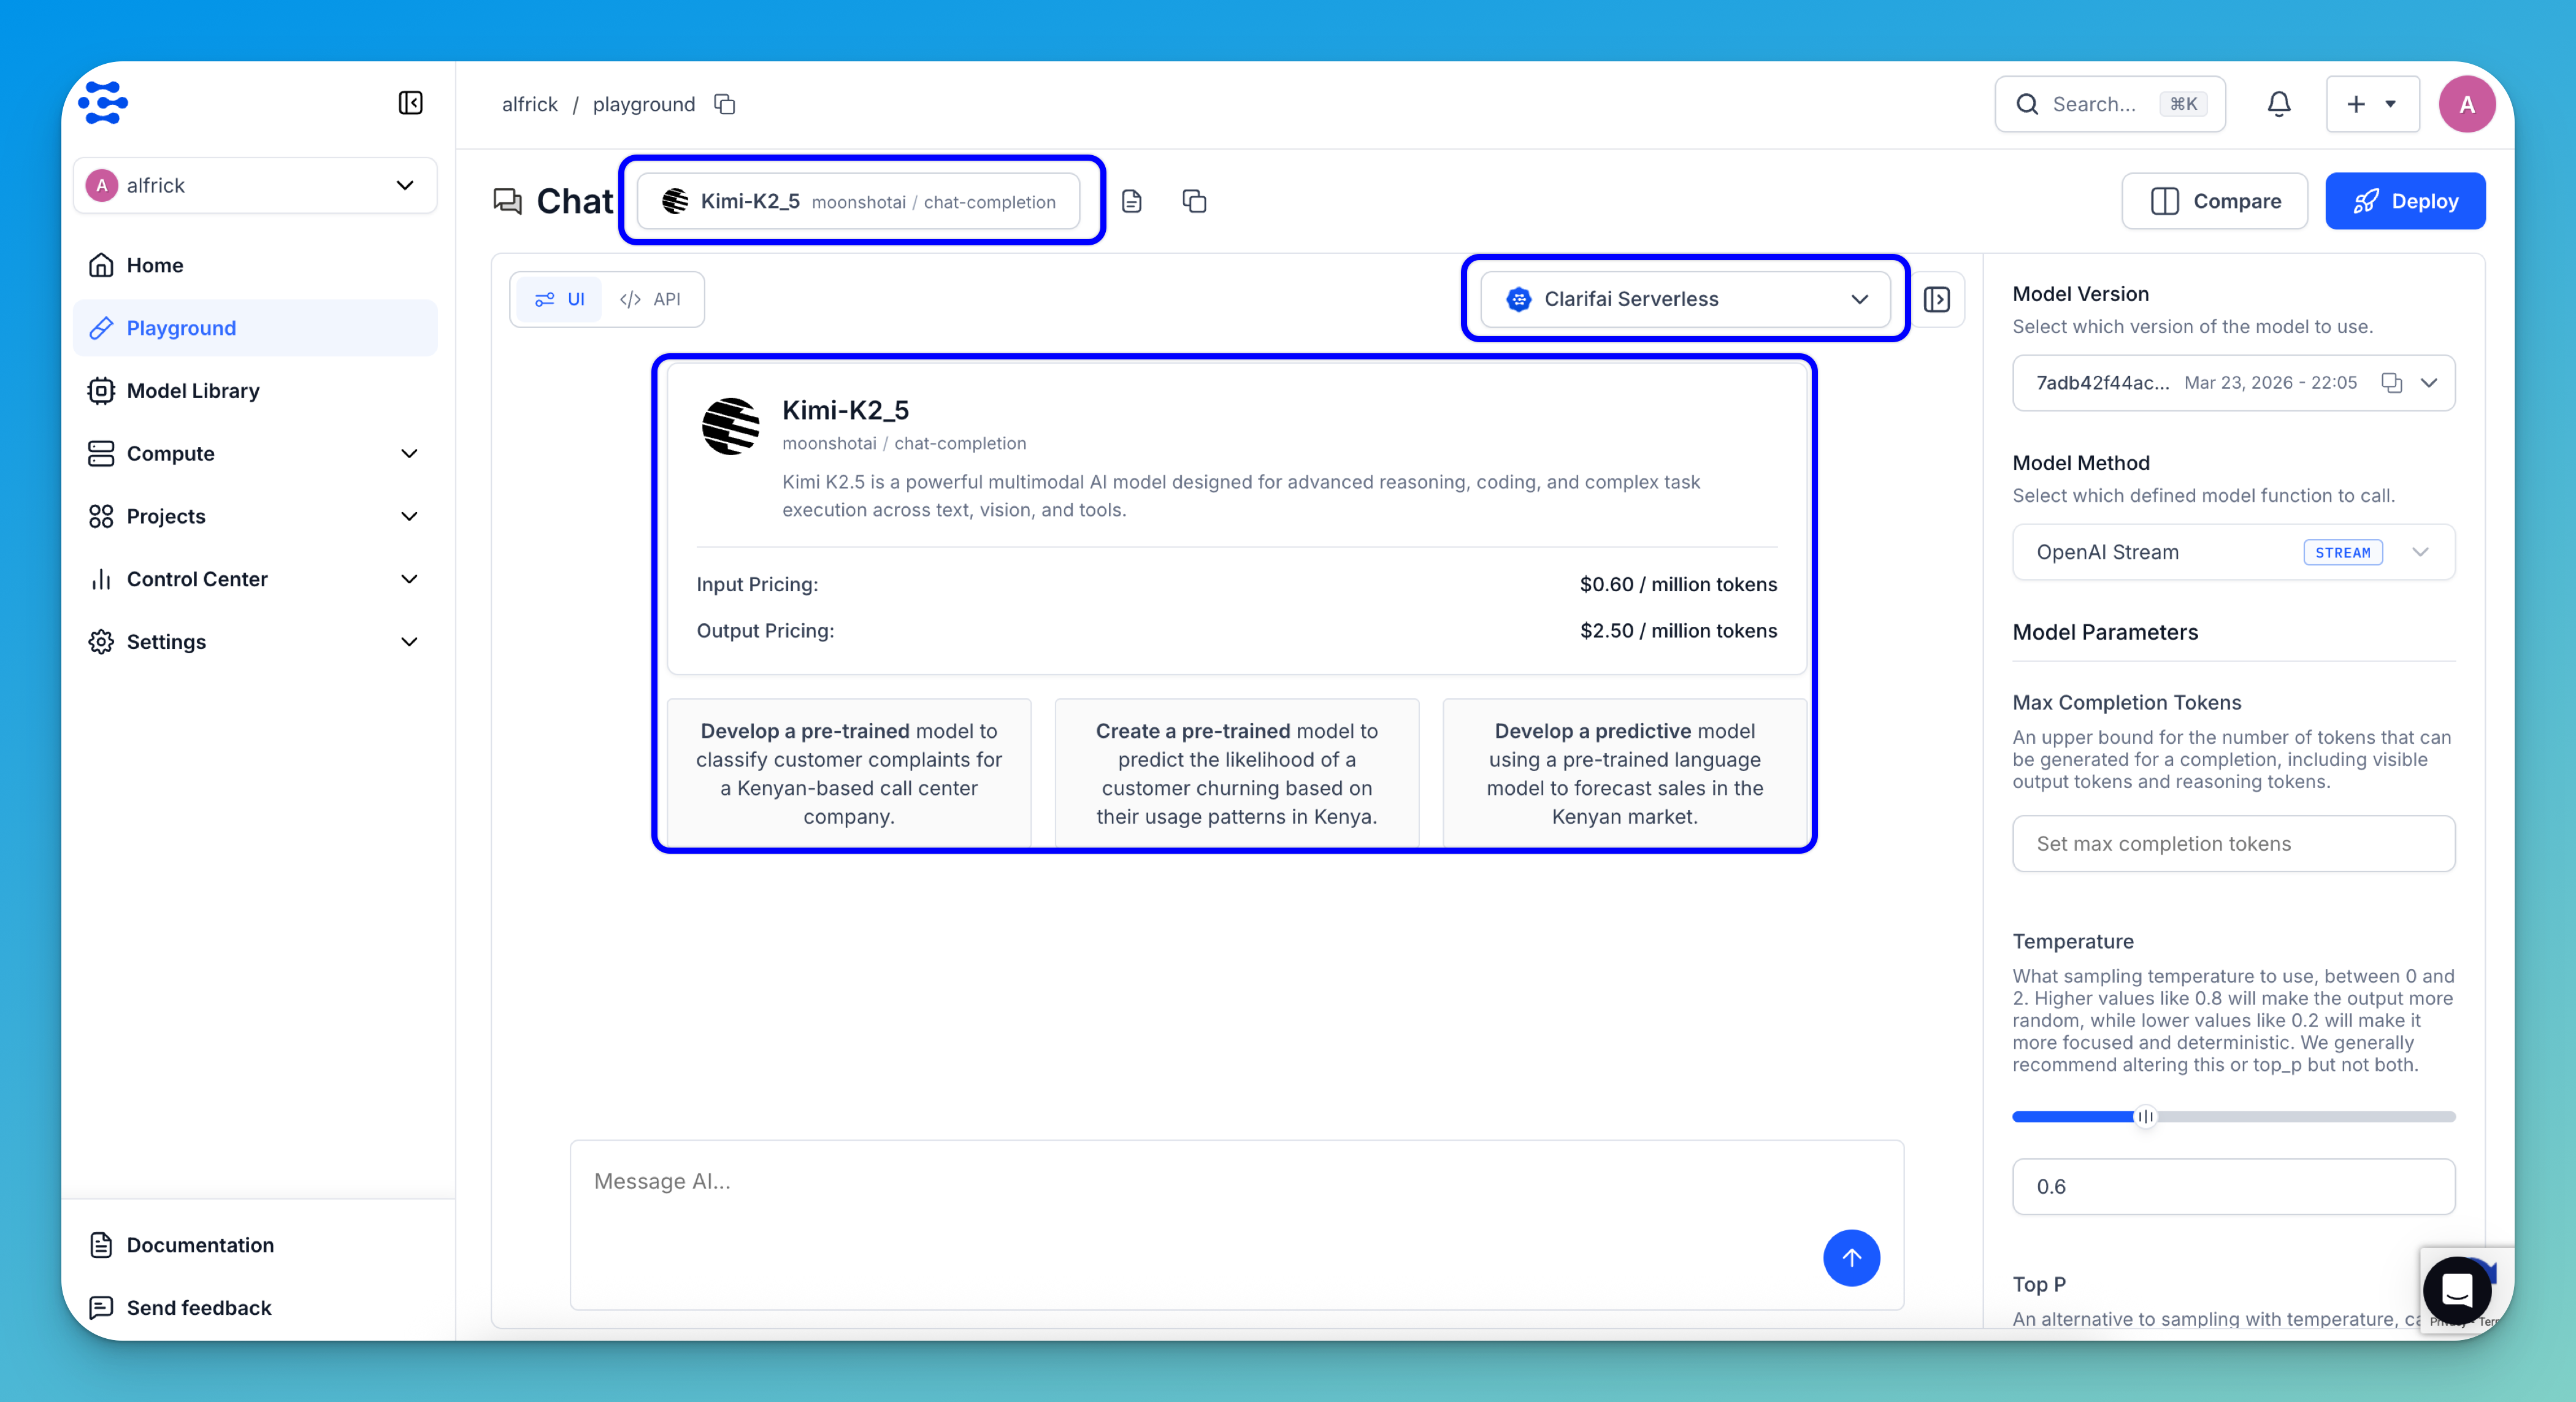
You'll be taken to the AI Playground interface.
Once the interface opens, you’ll see an information card that gives you a quick overview of the model, including input and output pricing, and links to the model page and pricing details. You’ll also find predefined prompt examples you can use right away.
In the upper-left section of the Playground, you can use the search bar to find a model for inference. Clicking the search bar opens a selection modal.
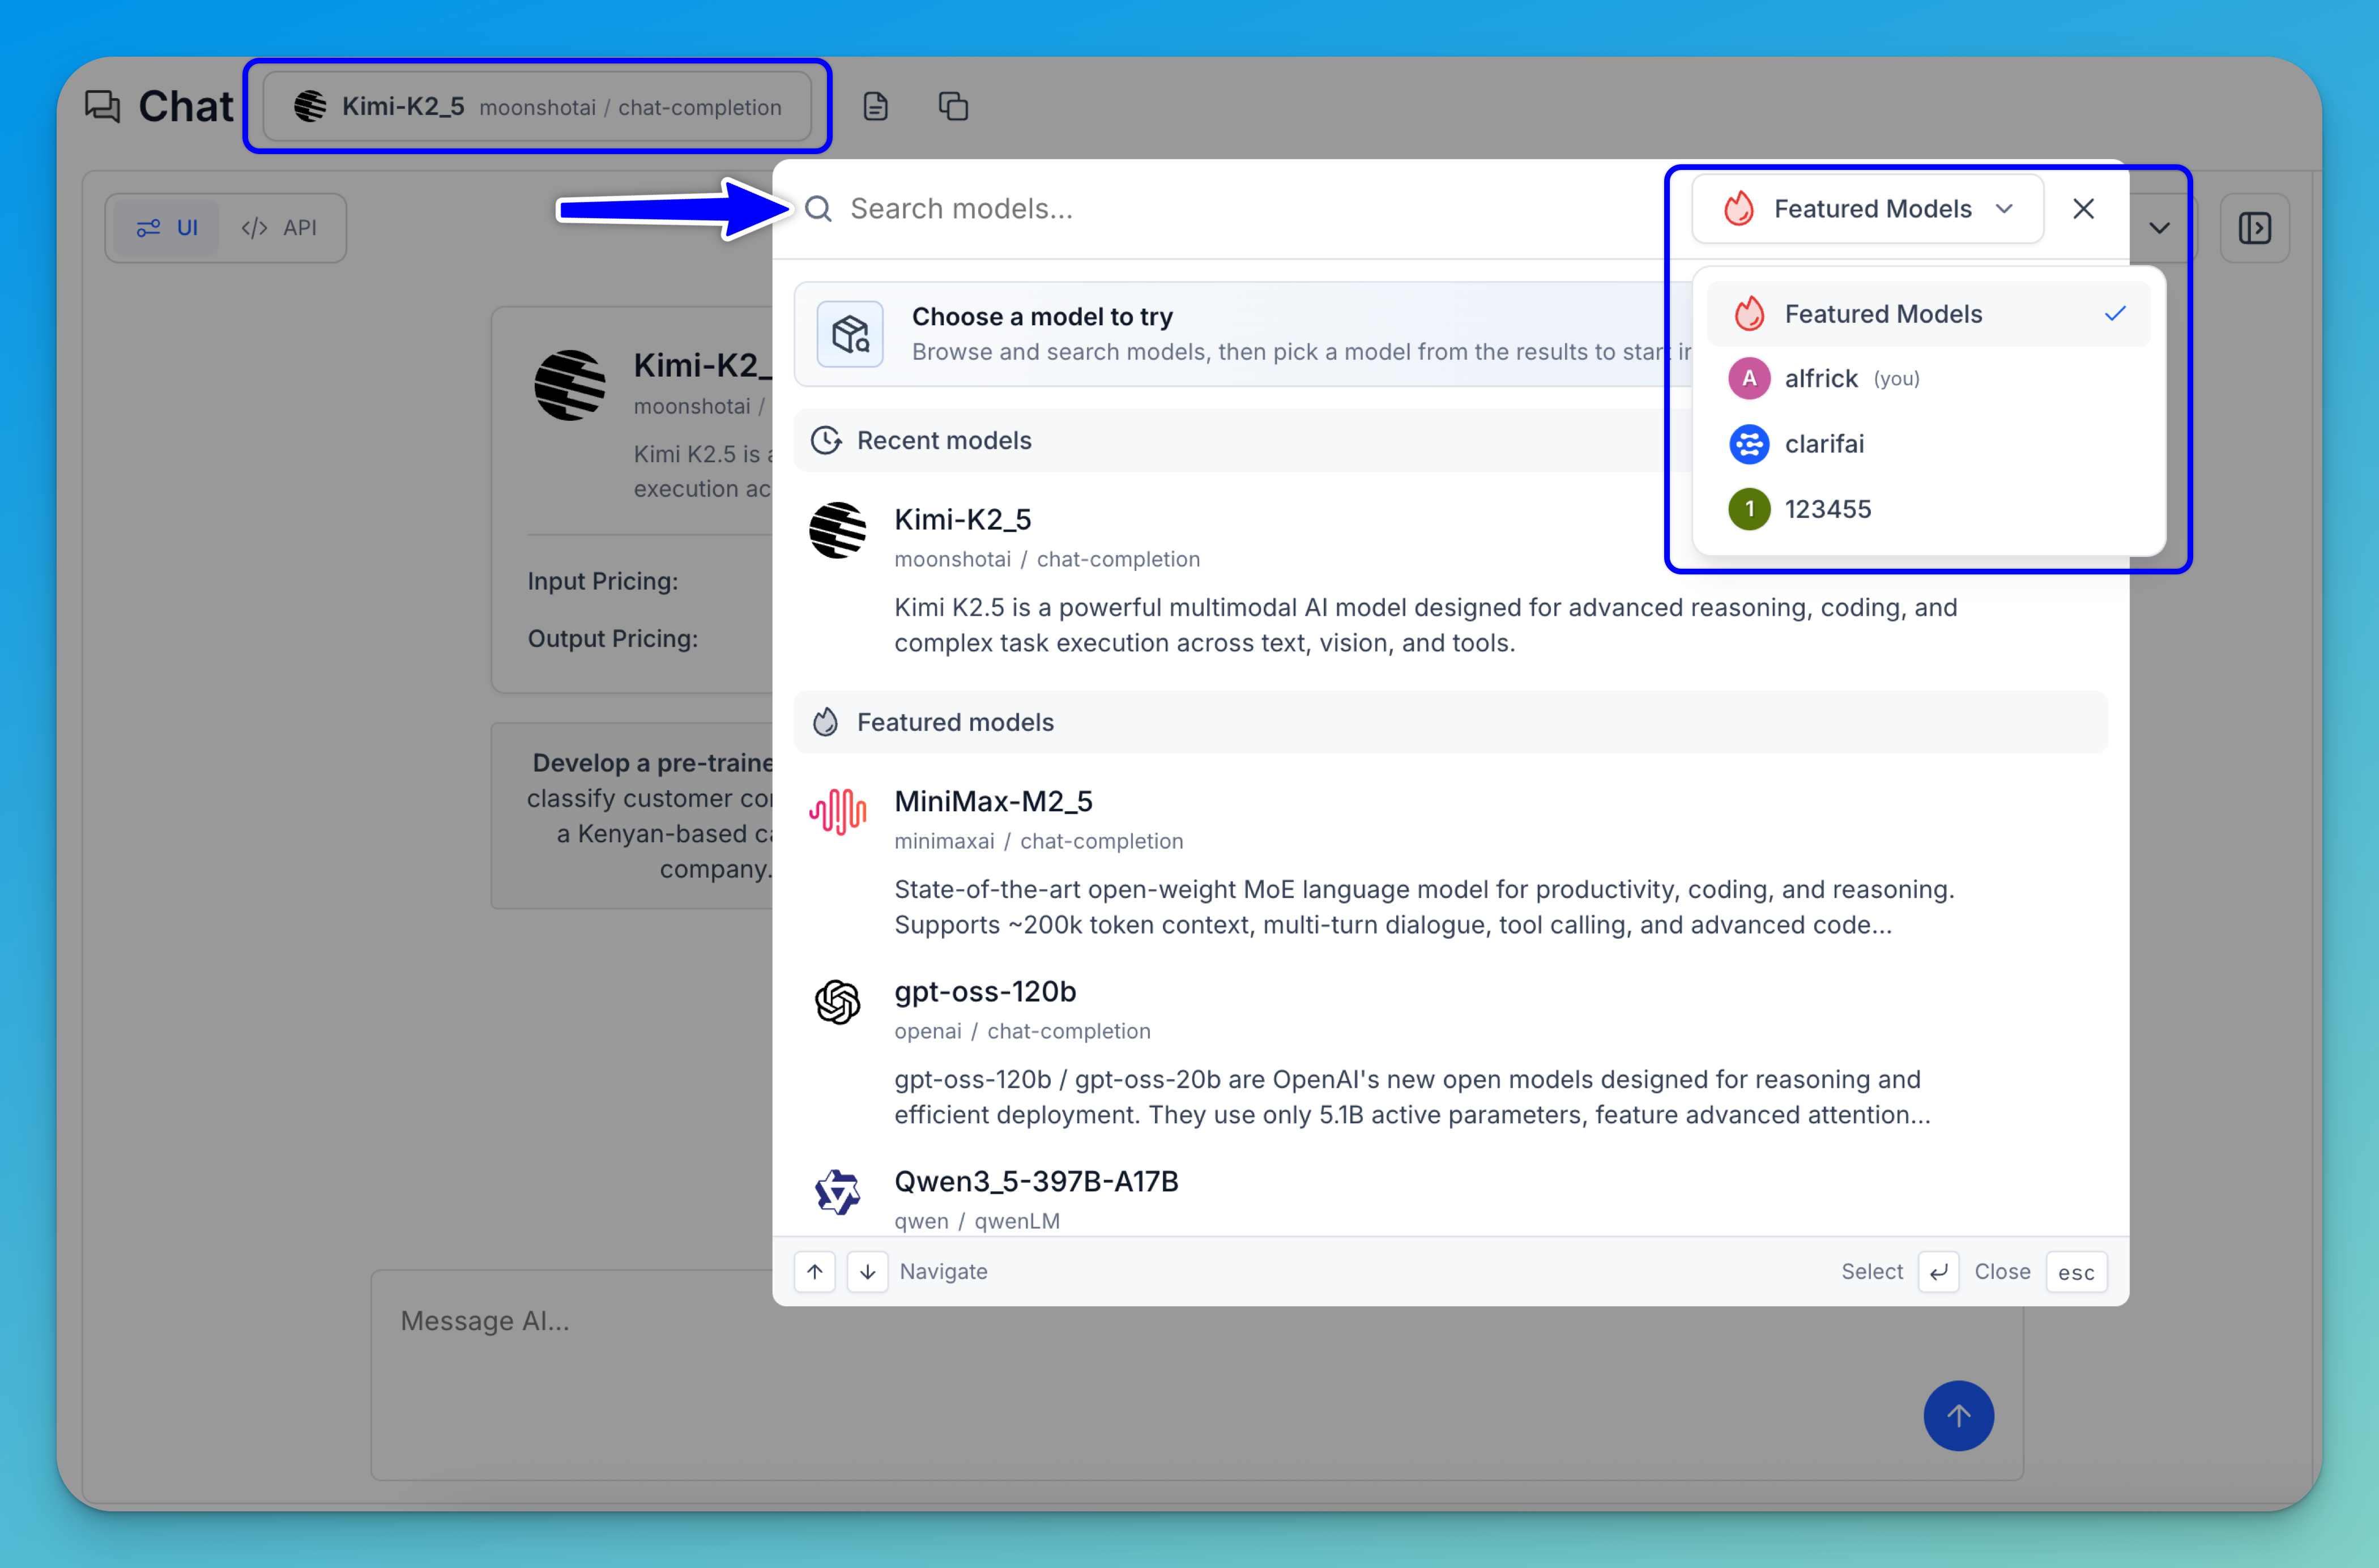
In the upper-right corner of the modal, there’s an account selector that lets you switch between different sources — such as featured models, your personal workspace, any organizations you belong to, or the public Clarifai model library. Selecting a different source updates the list to show the available models from that account or library.
Note: You can use the keyboard shortcuts shown at the bottom of the modal to navigate and select models:
↑ / ↓ (Navigate)— Use the up and down arrow keys to move through the model list without using your mouse.↵ (Select)— Press Enter to select the currently highlighted model.Esc (Close)— Press Escape to close the dialog without making a selection.
Next, in the message box at the bottom of the Playground, enter your desired prompt to generate a response with the selected model.
Note: If your chosen model supports image or video inputs as prompts, you can also upload them directly into the interface.
Then, submit your request by clicking the arrow icon in the message box or pressing Enter on your keyboard.
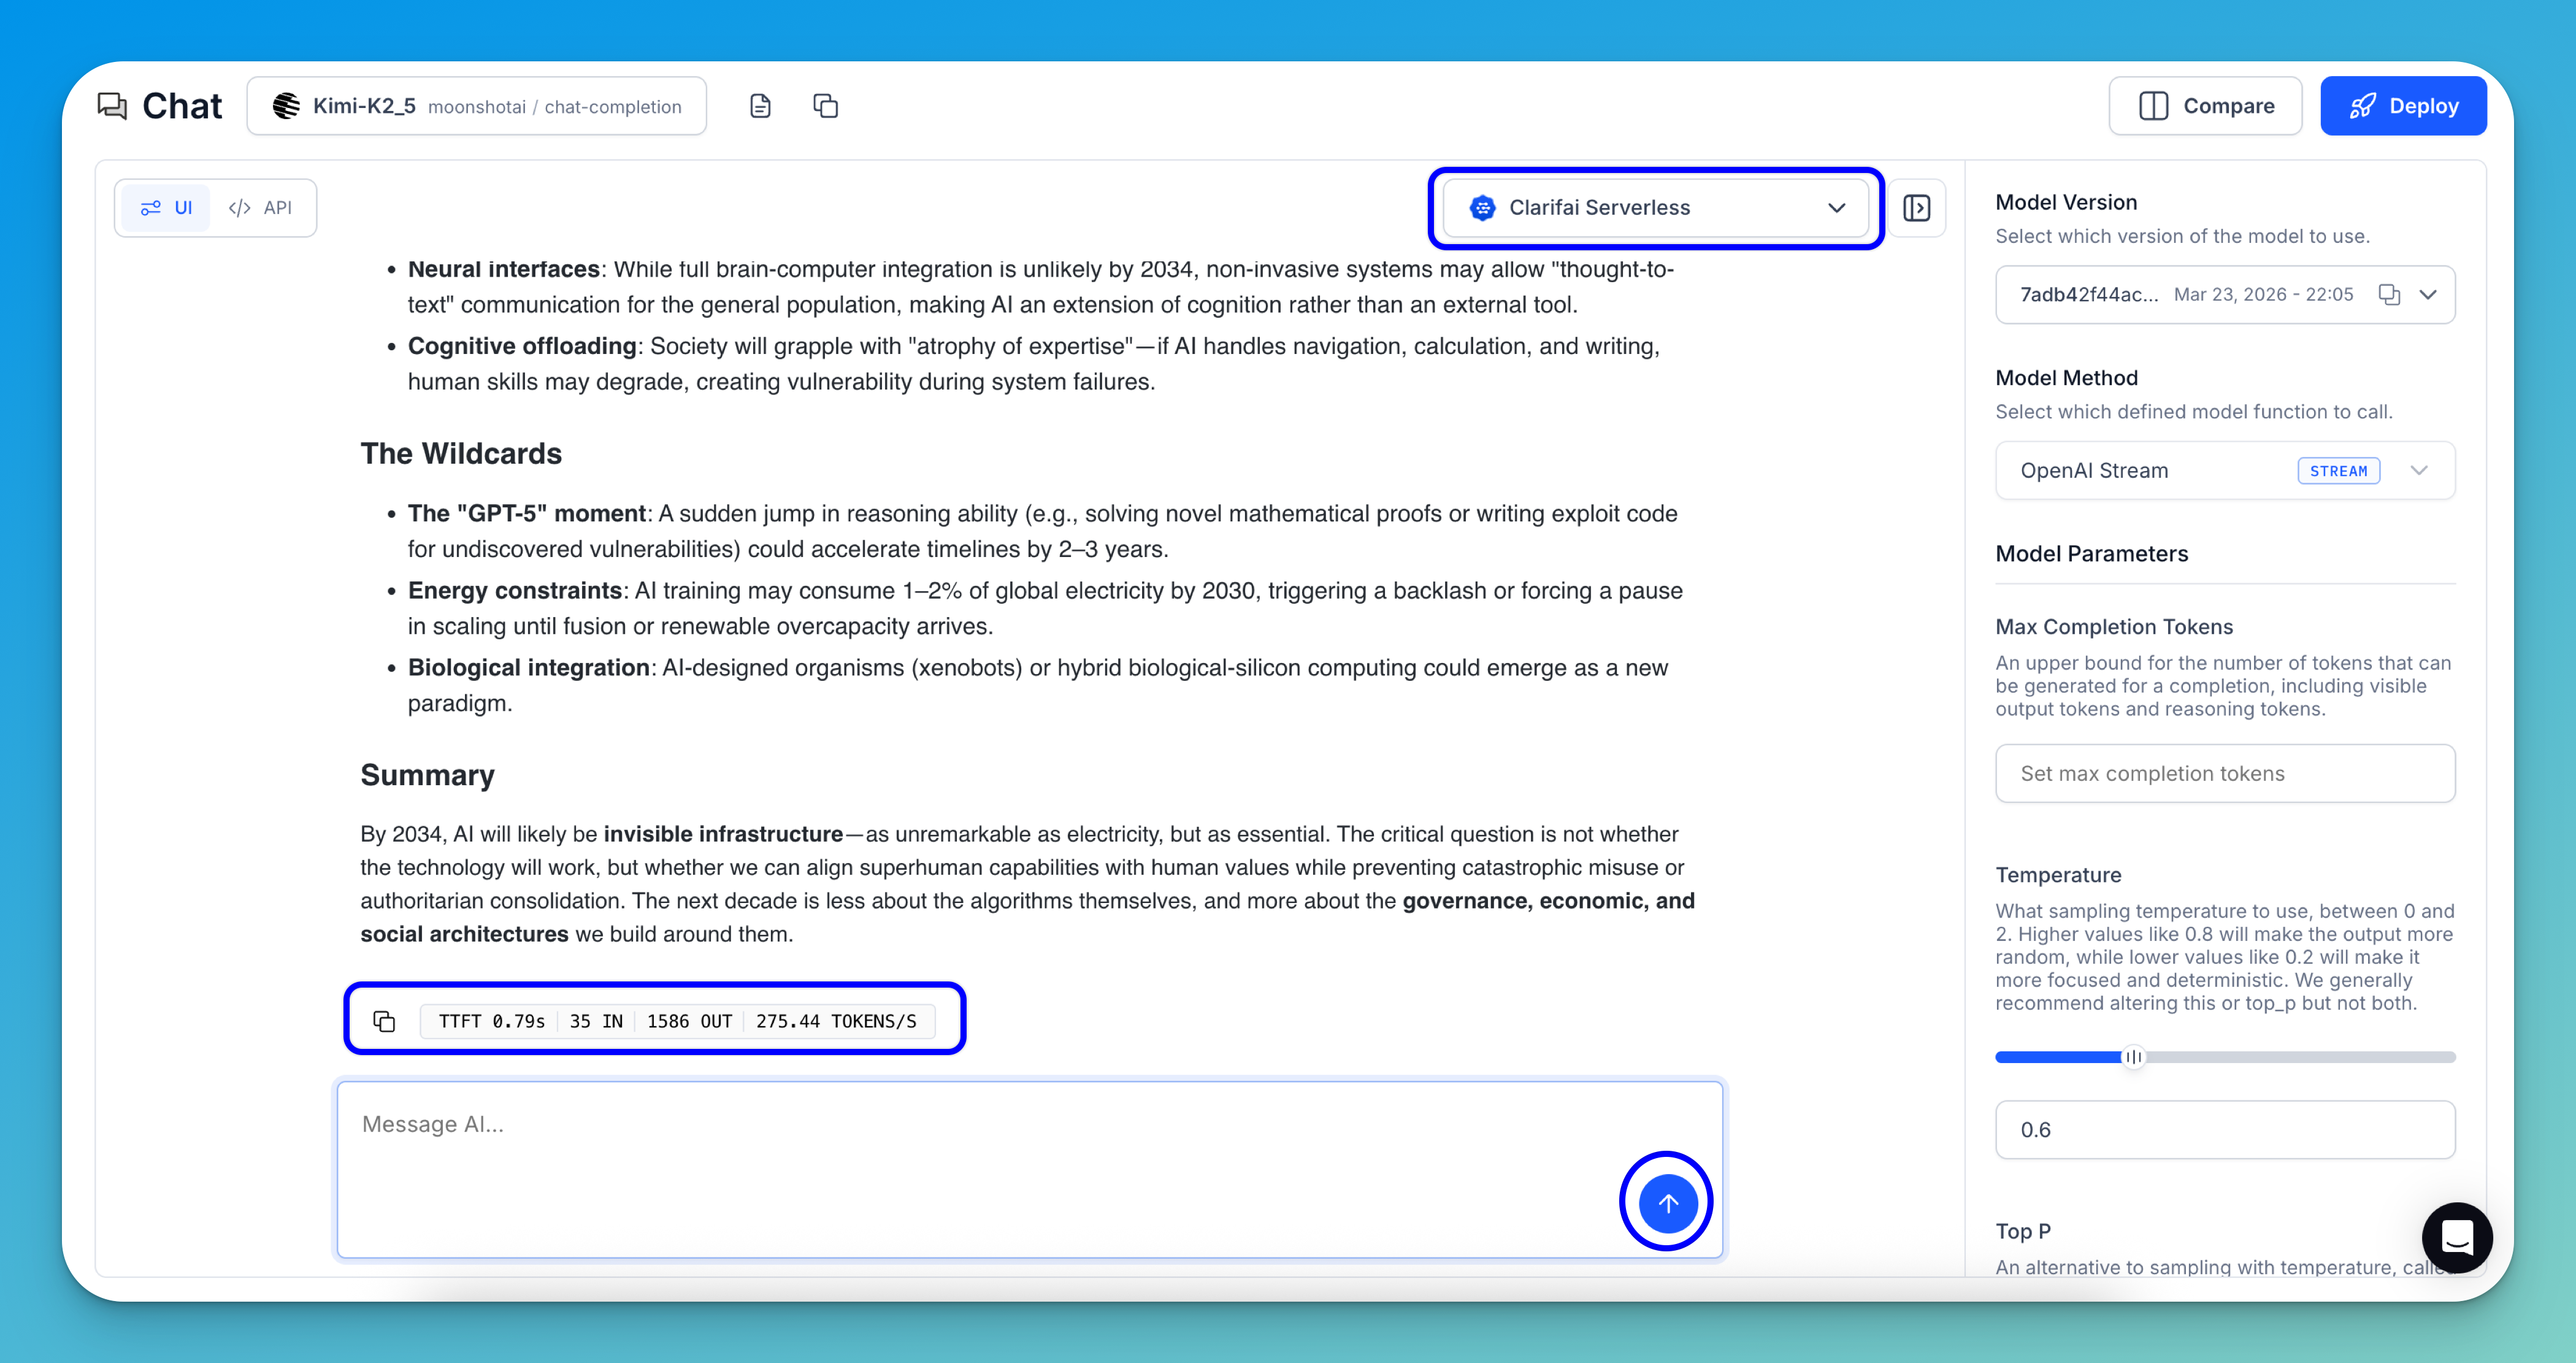
For this example, we're using the default settings for inferencing — Clarifai Serverless deployment and default inference parameters. You can customize these settings as needed for more advanced use cases.
The results will stream directly in the interface, allowing you to see the generated output token by token, in real time.
Note that the model’s chain-of-thought preview is shown to help you understand how the model interpreted your request.
At the bottom of the response, you’ll also see the following token and performance metrics:
- TTFT (Time to First Token)
- IN (input token count)
- OUT (output token count)
- TOKENS/S (generation speed)
Additional Playground Features
Playground Settings
The Playground's right sidebar lets you adjust settings and inference parameters to customize model behavior.
- Model Version — Choose the specific version of the model you want to run.
- Model Method — Select which model function to call:
- OpenAI Fetch — Sends an OpenAI-compatible request to the appropriate OpenAI endpoint. Accepts a JSON string with request parameters (including
openai_endpoint) and returns a JSON string containing the response or error. - OpenAI Stream (default) — Sends an OpenAI-compatible request and returns a streaming response with cancellation support.
- Predict — Runs a single prompt completion using the OpenAI client.
- Generate — Streams a completion response using the OpenAI client.
- OpenAI Fetch — Sends an OpenAI-compatible request to the appropriate OpenAI endpoint. Accepts a JSON string with request parameters (including
- Max Completion Tokens — Sets the maximum number of tokens the model can generate for a completion. This includes both the visible output tokens and any reasoning tokens produced.
- Temperature — Adjusts the randomness of the output, with values ranging from 0 to 2. Higher temperatures (e.g., 0.8) produce more diverse, creative responses, while lower values (e.g., 0.2) produce more focused, deterministic outputs. We generally recommend adjusting either this or
top_p, but not both. - Top P — Controls nucleus sampling, an alternative to temperature-based sampling. The model selects from the smallest set of tokens whose cumulative probability reaches
top_p. For example, a value of 0.1 limits choices to the top 10% most probable tokens. As with temperature, we recommend modifying eithertop_por temperature, but not both.
Compare Models
The AI Playground includes a side-by-side comparison view, making it easy to test different models — or even the same model across multiple versions and instances — to identify the best fit for your needs. You can directly compare factors such as speed, accuracy, and overall performance.
Click the Compare button in the upper-right corner of the Playground to launch the side-by-side comparison.

Next, choose a model for the left panel and another for the right. When you’re done, close the comparison by clicking the X button in the upper-right corner of the right panel.
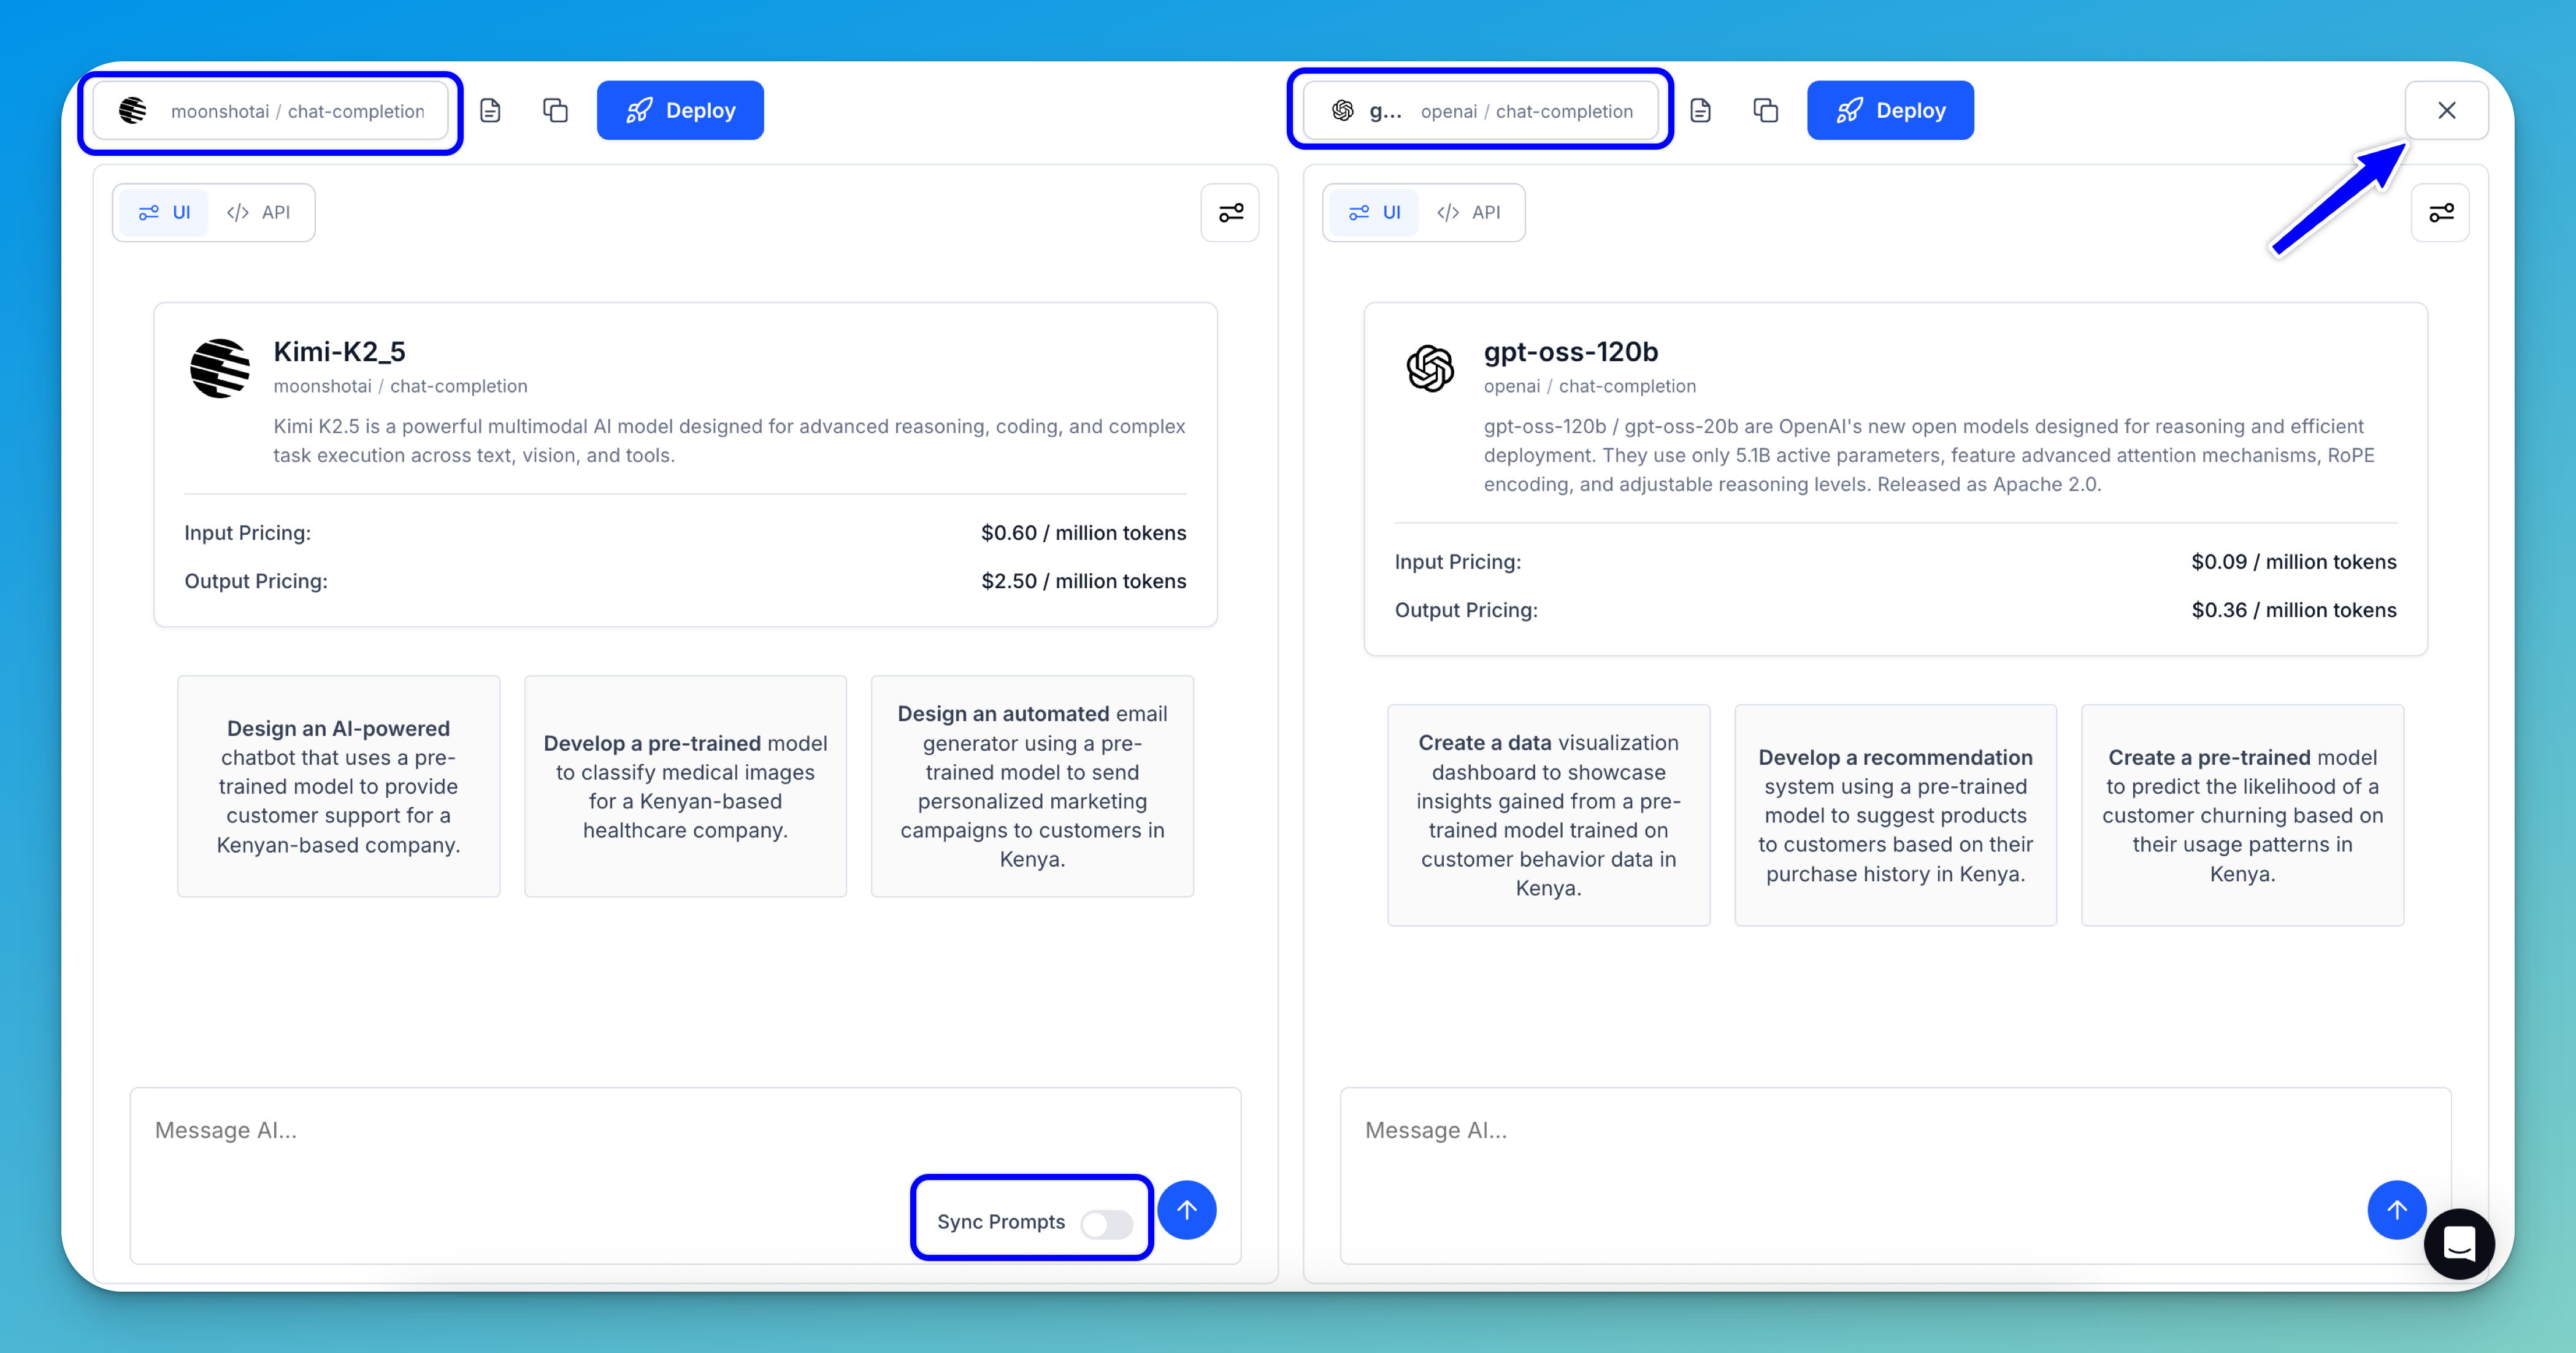
Note: If you enable the Sync Prompts option, the prompt you enter for the first model will automatically be mirrored to the second one, removing the need to manually copy prompts between models.
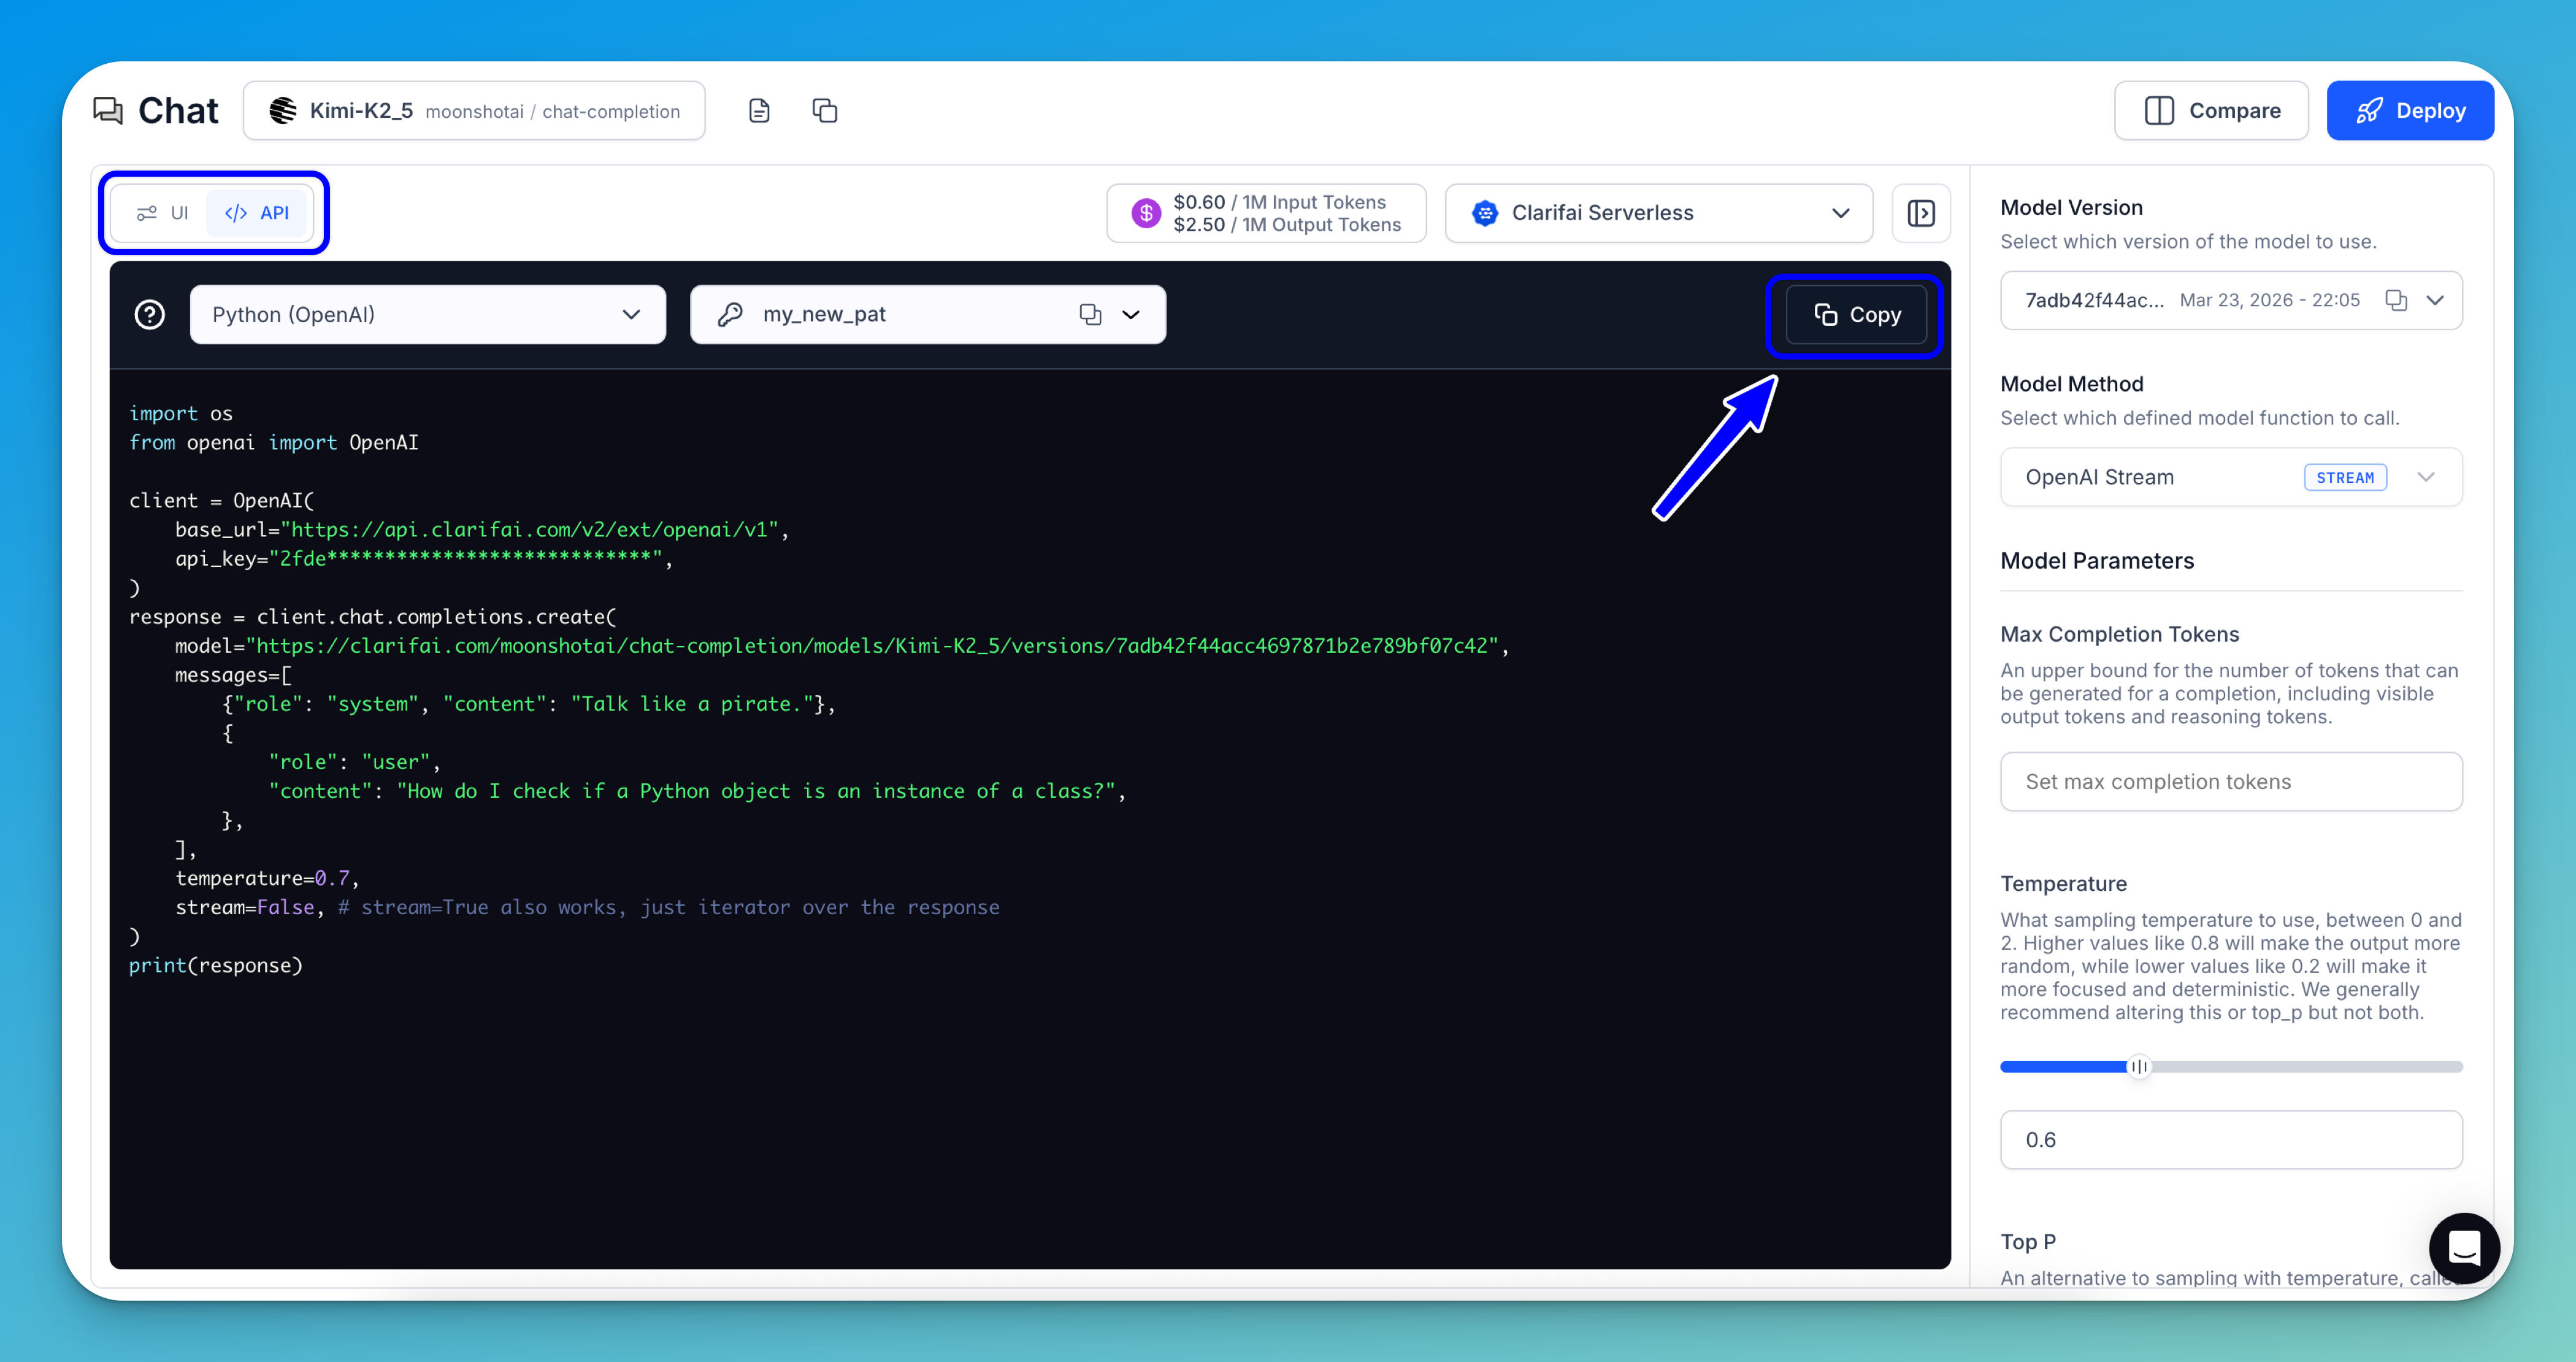
Get Code Snippets
You can toggle the button in the upper-left section of the Playground to display ready-to-use API code snippets in various programming languages.
Simply copy and use them in your project.