Apps Creation
Learn how to create a Clarifai application
As mentioned previously, an app on the Clarifai platform acts as a central repository for models, datasets, inputs, and other resources.
Create via the UI
To create an app, start by logging in to to your account.
Next, click the plus (+) button in the upper-right corner of the Clarifai platform dashboard. A dropdown menu will appear with several options. From the list, select New Application.
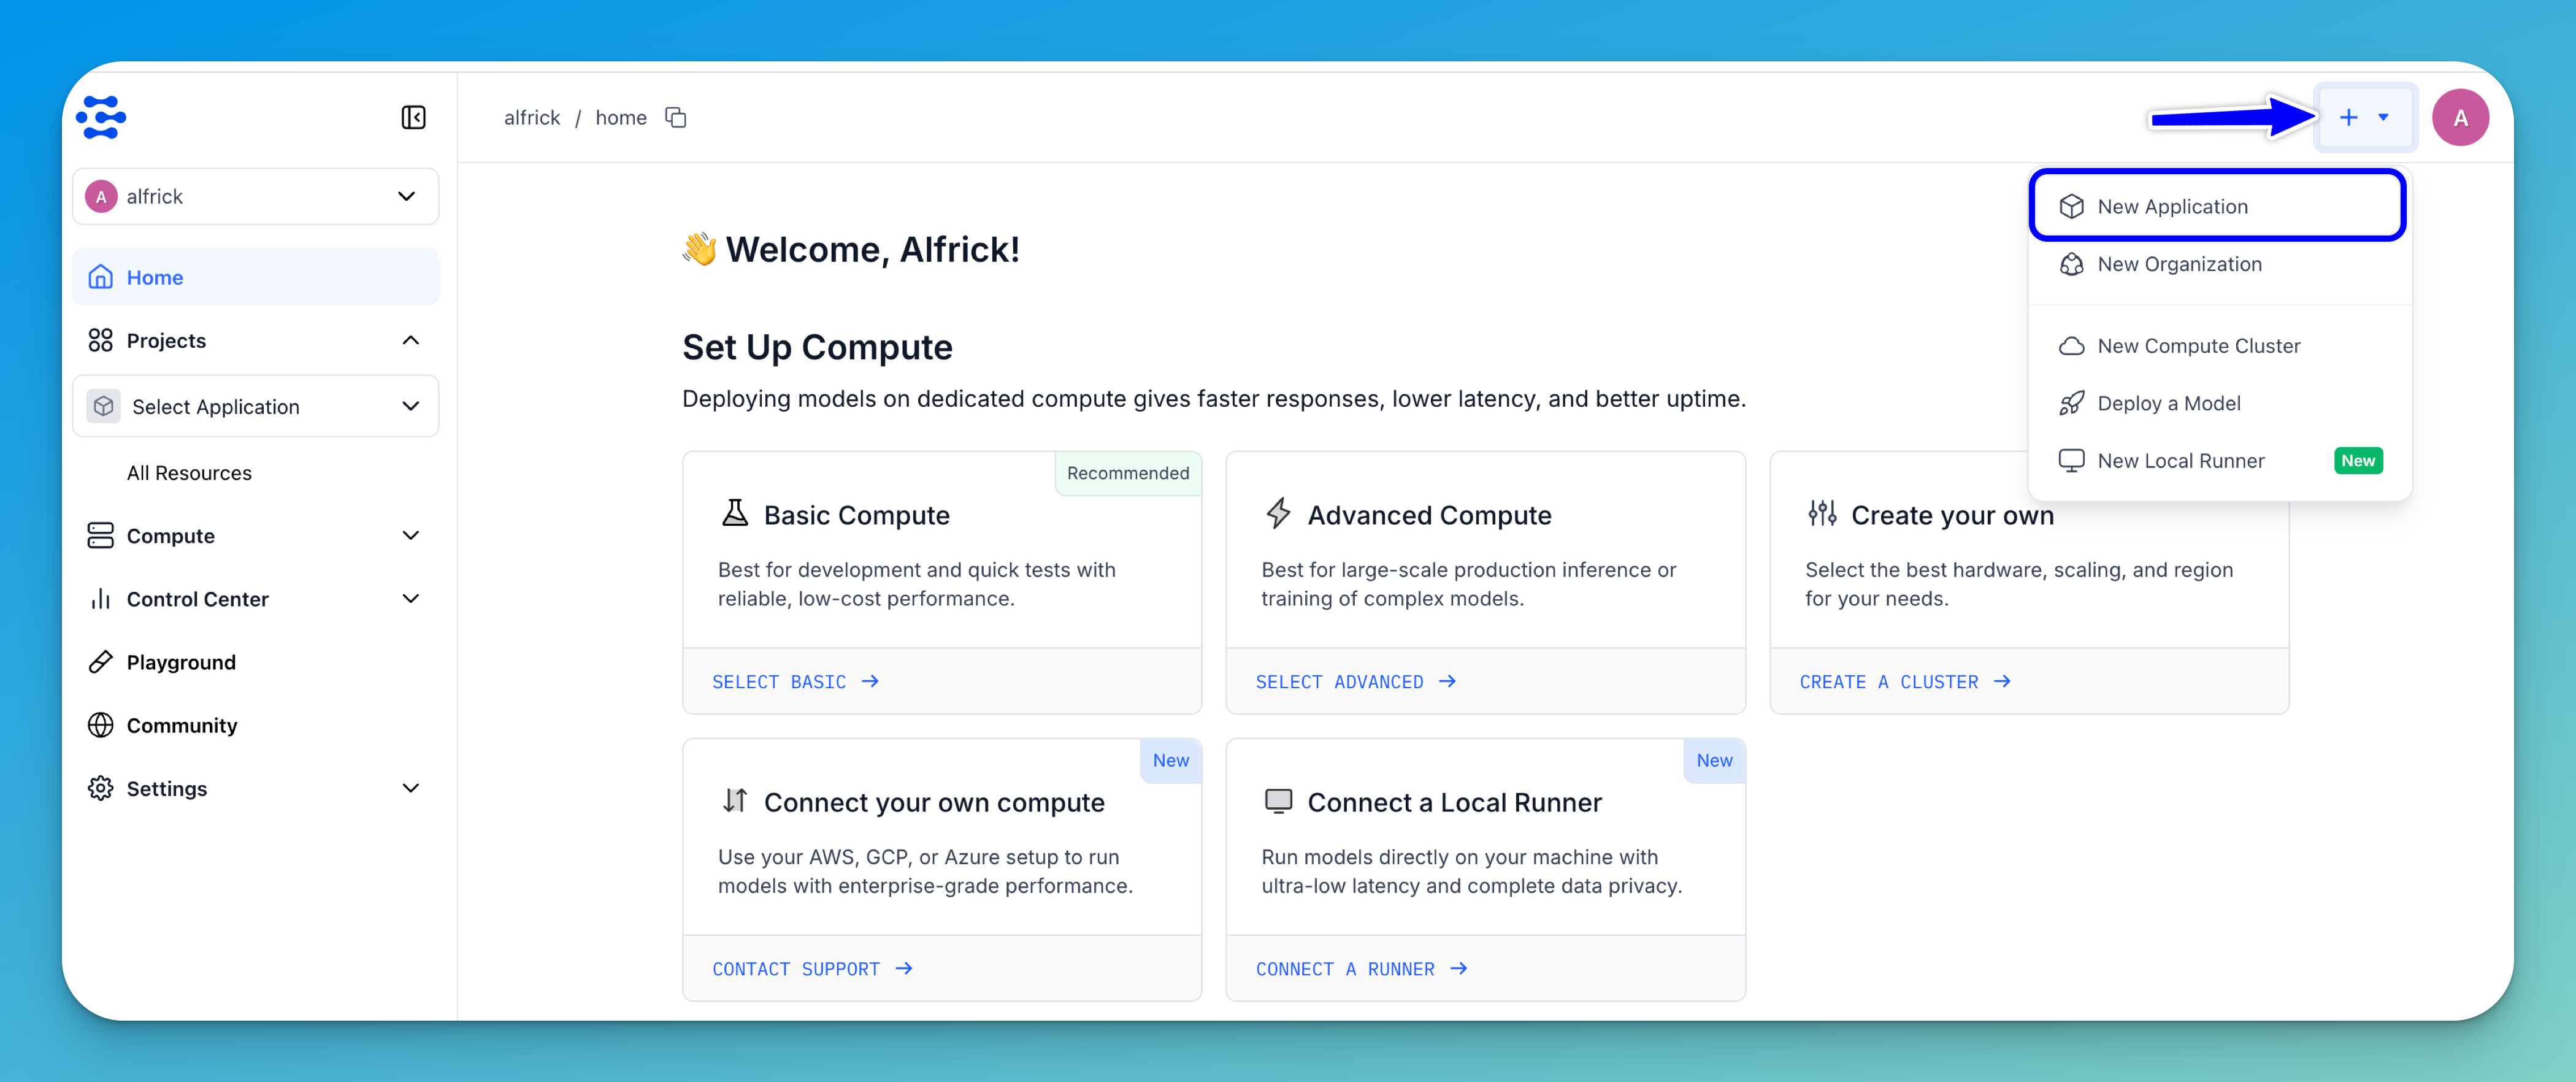
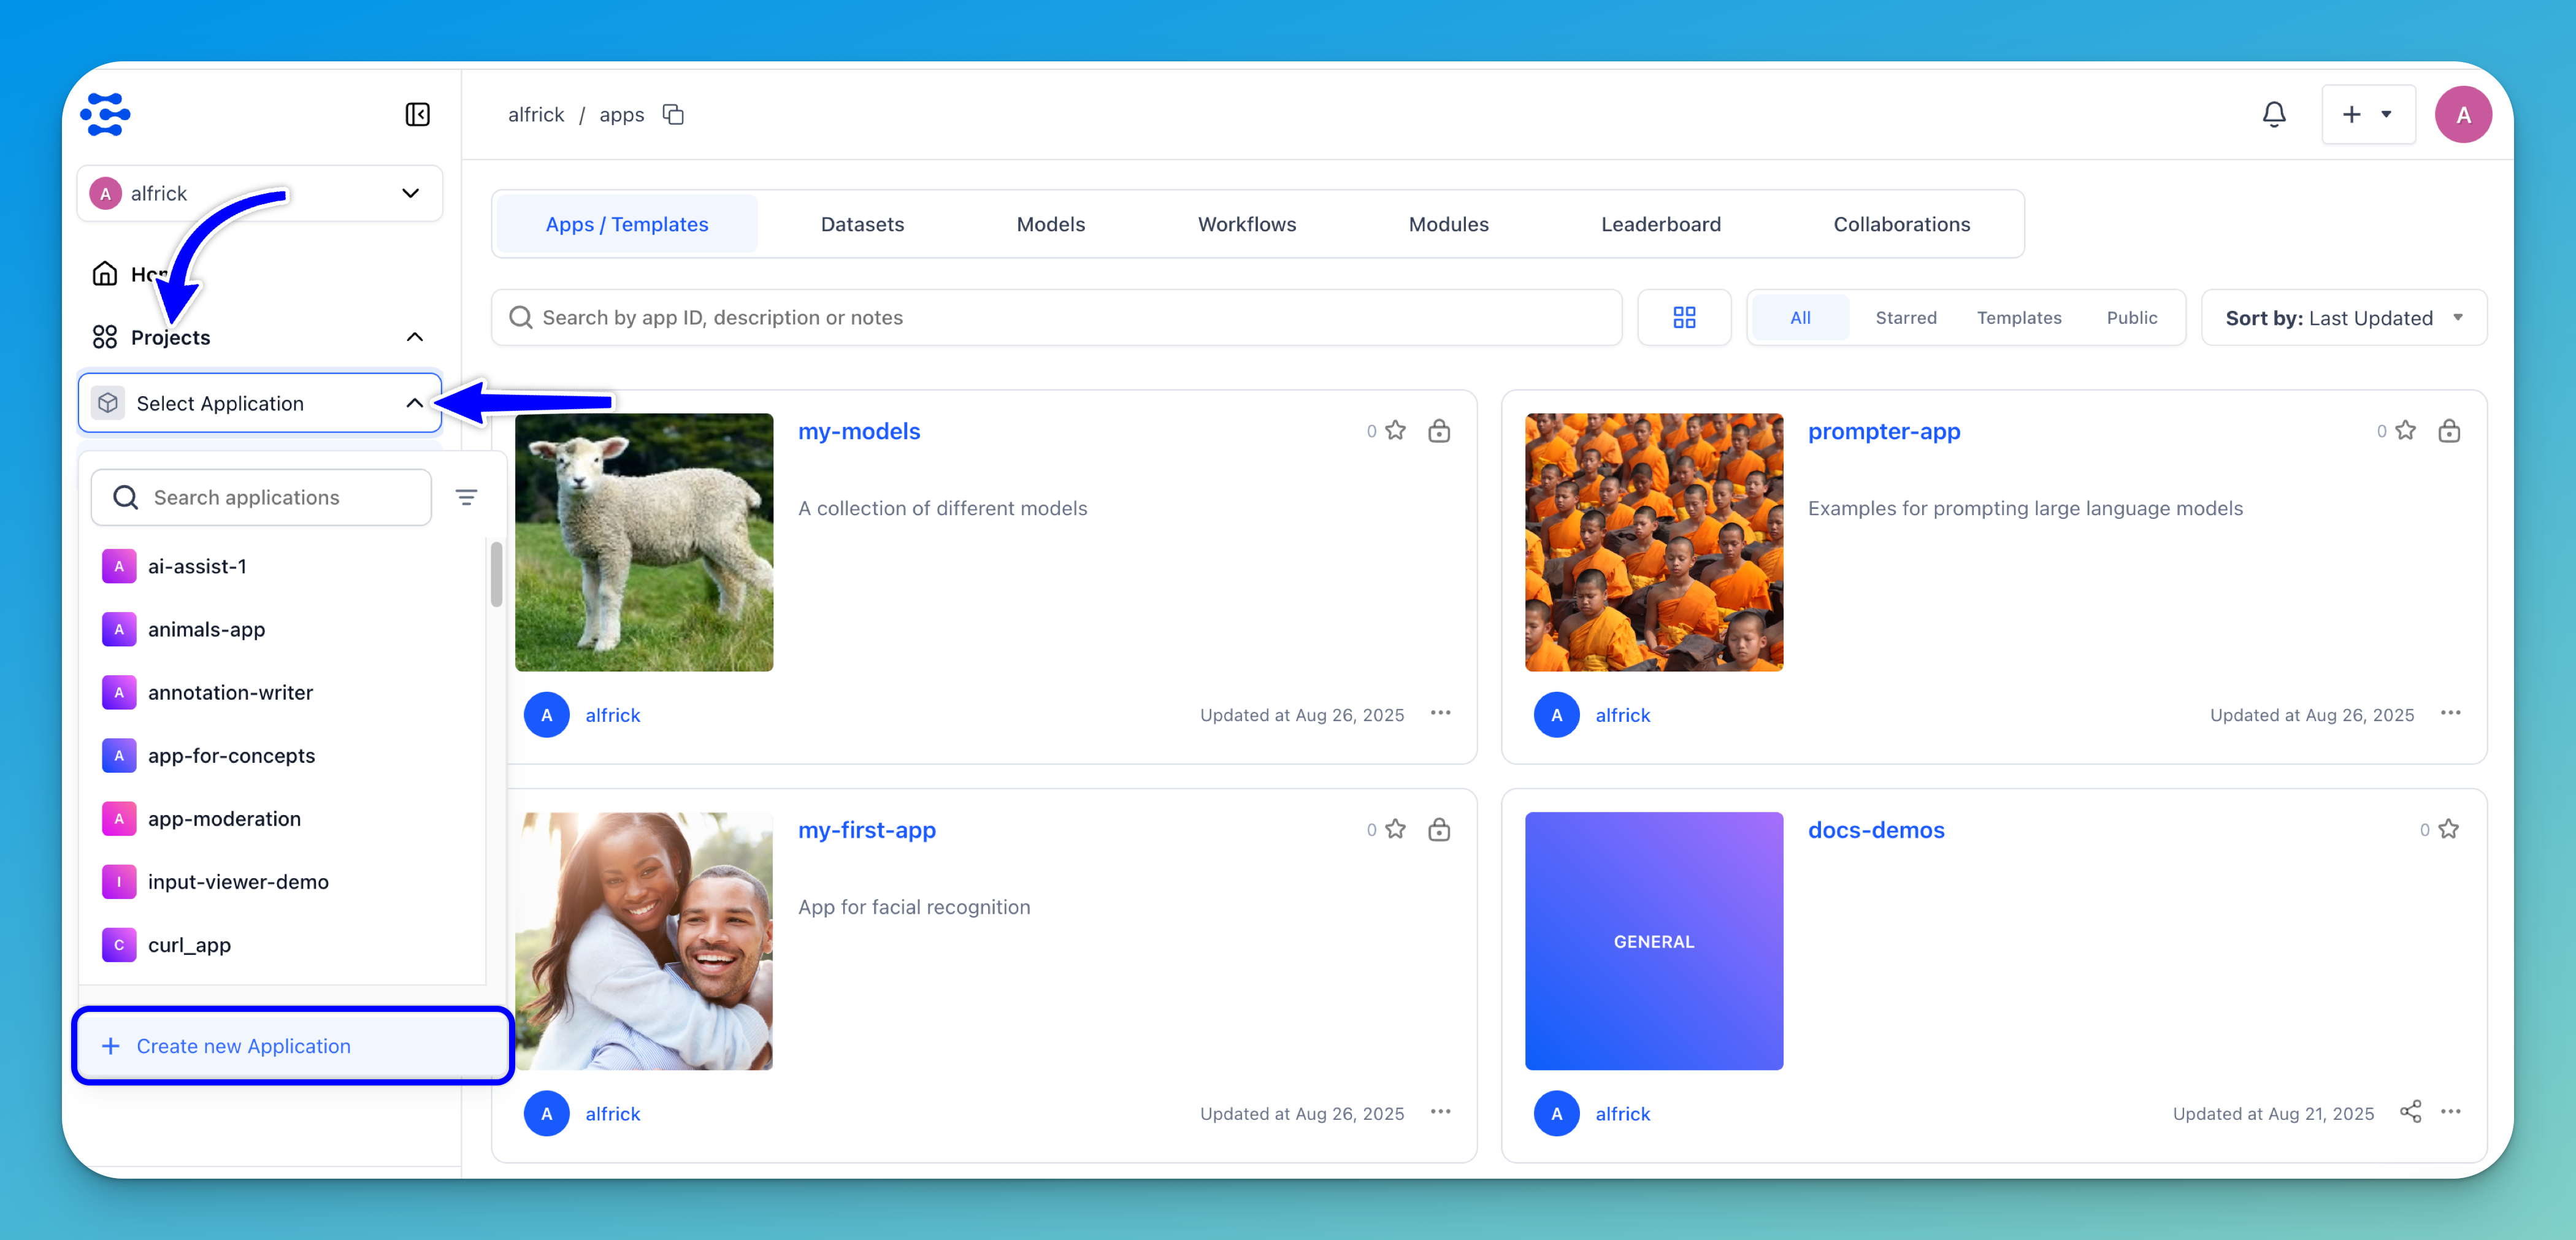
Alternatively: Open the collapsible left sidebar and select Projects. From the dropdown that appears, choose Select Application to open a panel displaying a searchable list of your existing applications. Scroll to the bottom of this list and click the Create new Application option, marked with a + icon.
Next, on the window that pops up, select the Start with a Blank App option to create a new application from scratch.
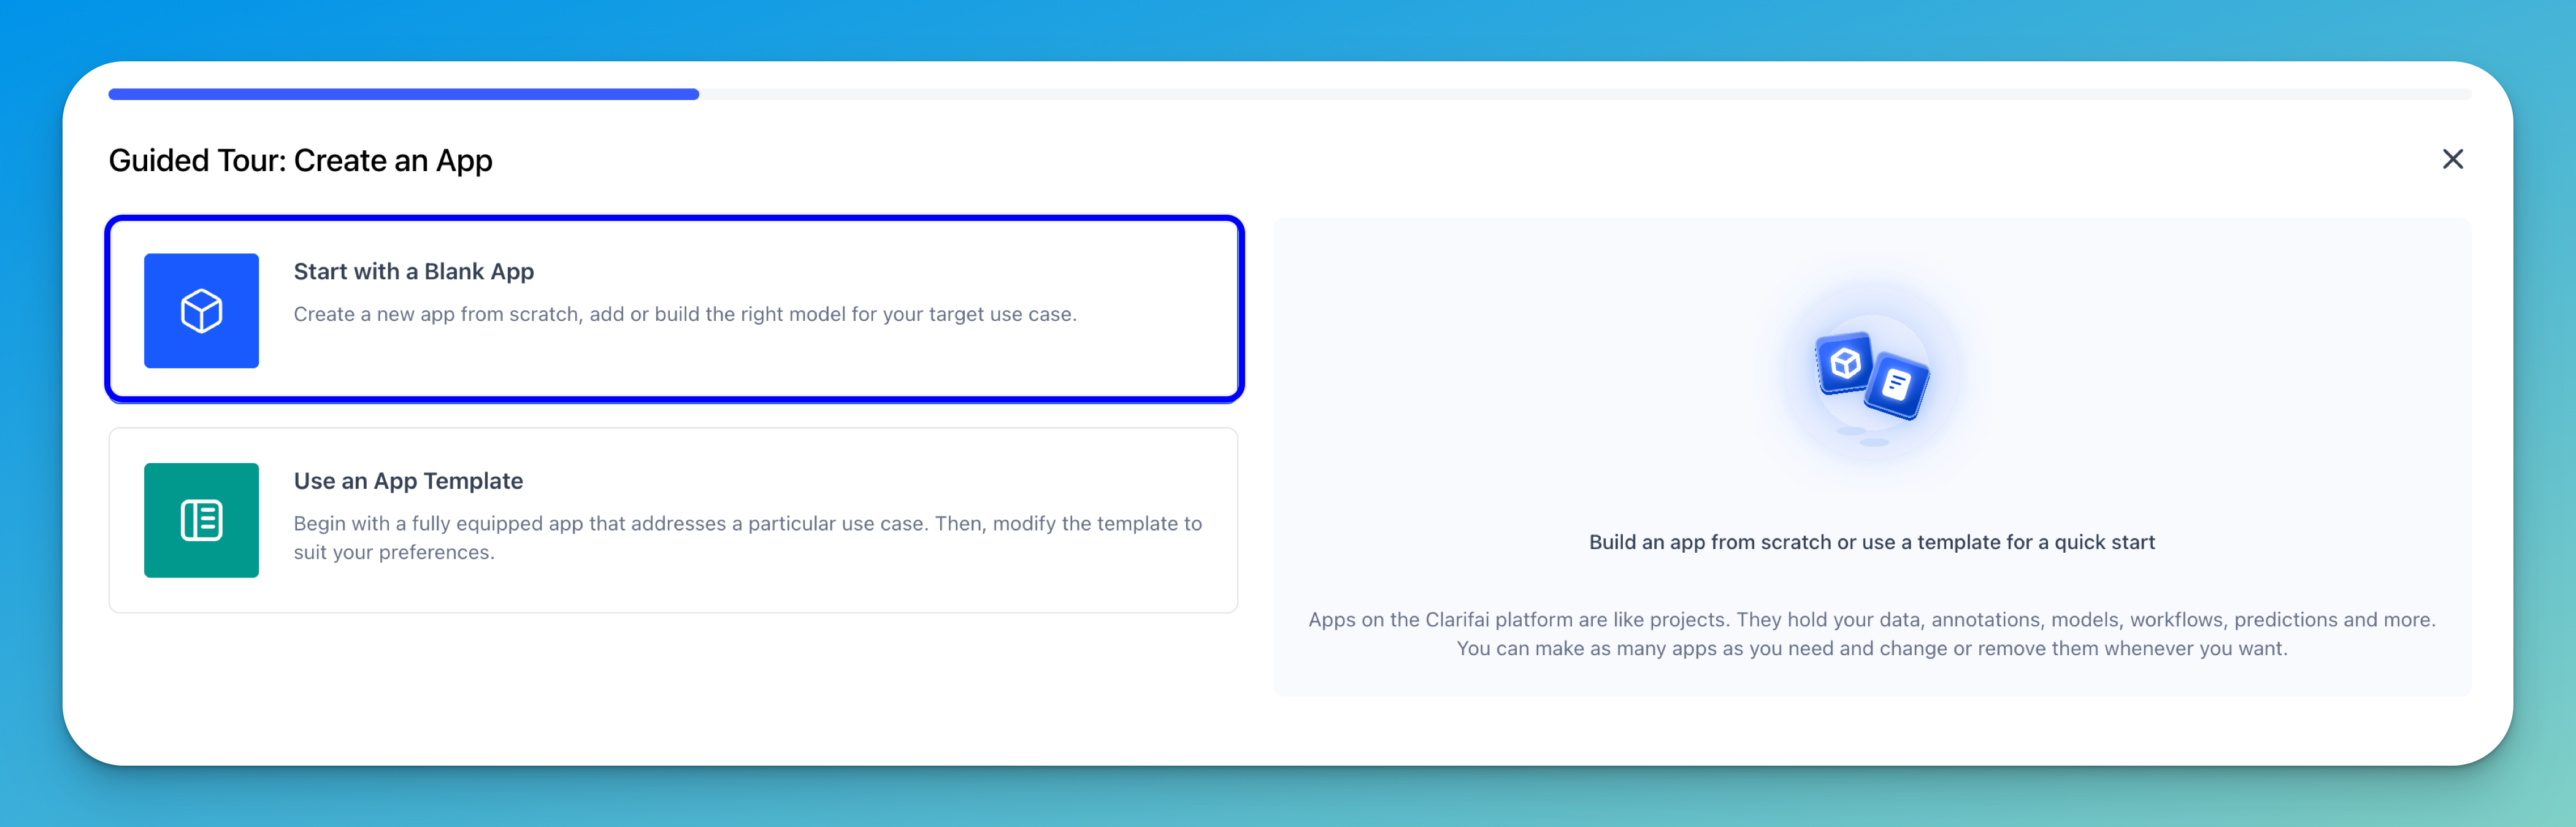
Tip: You can also select the Use an App Template option to use a template to create a new application.
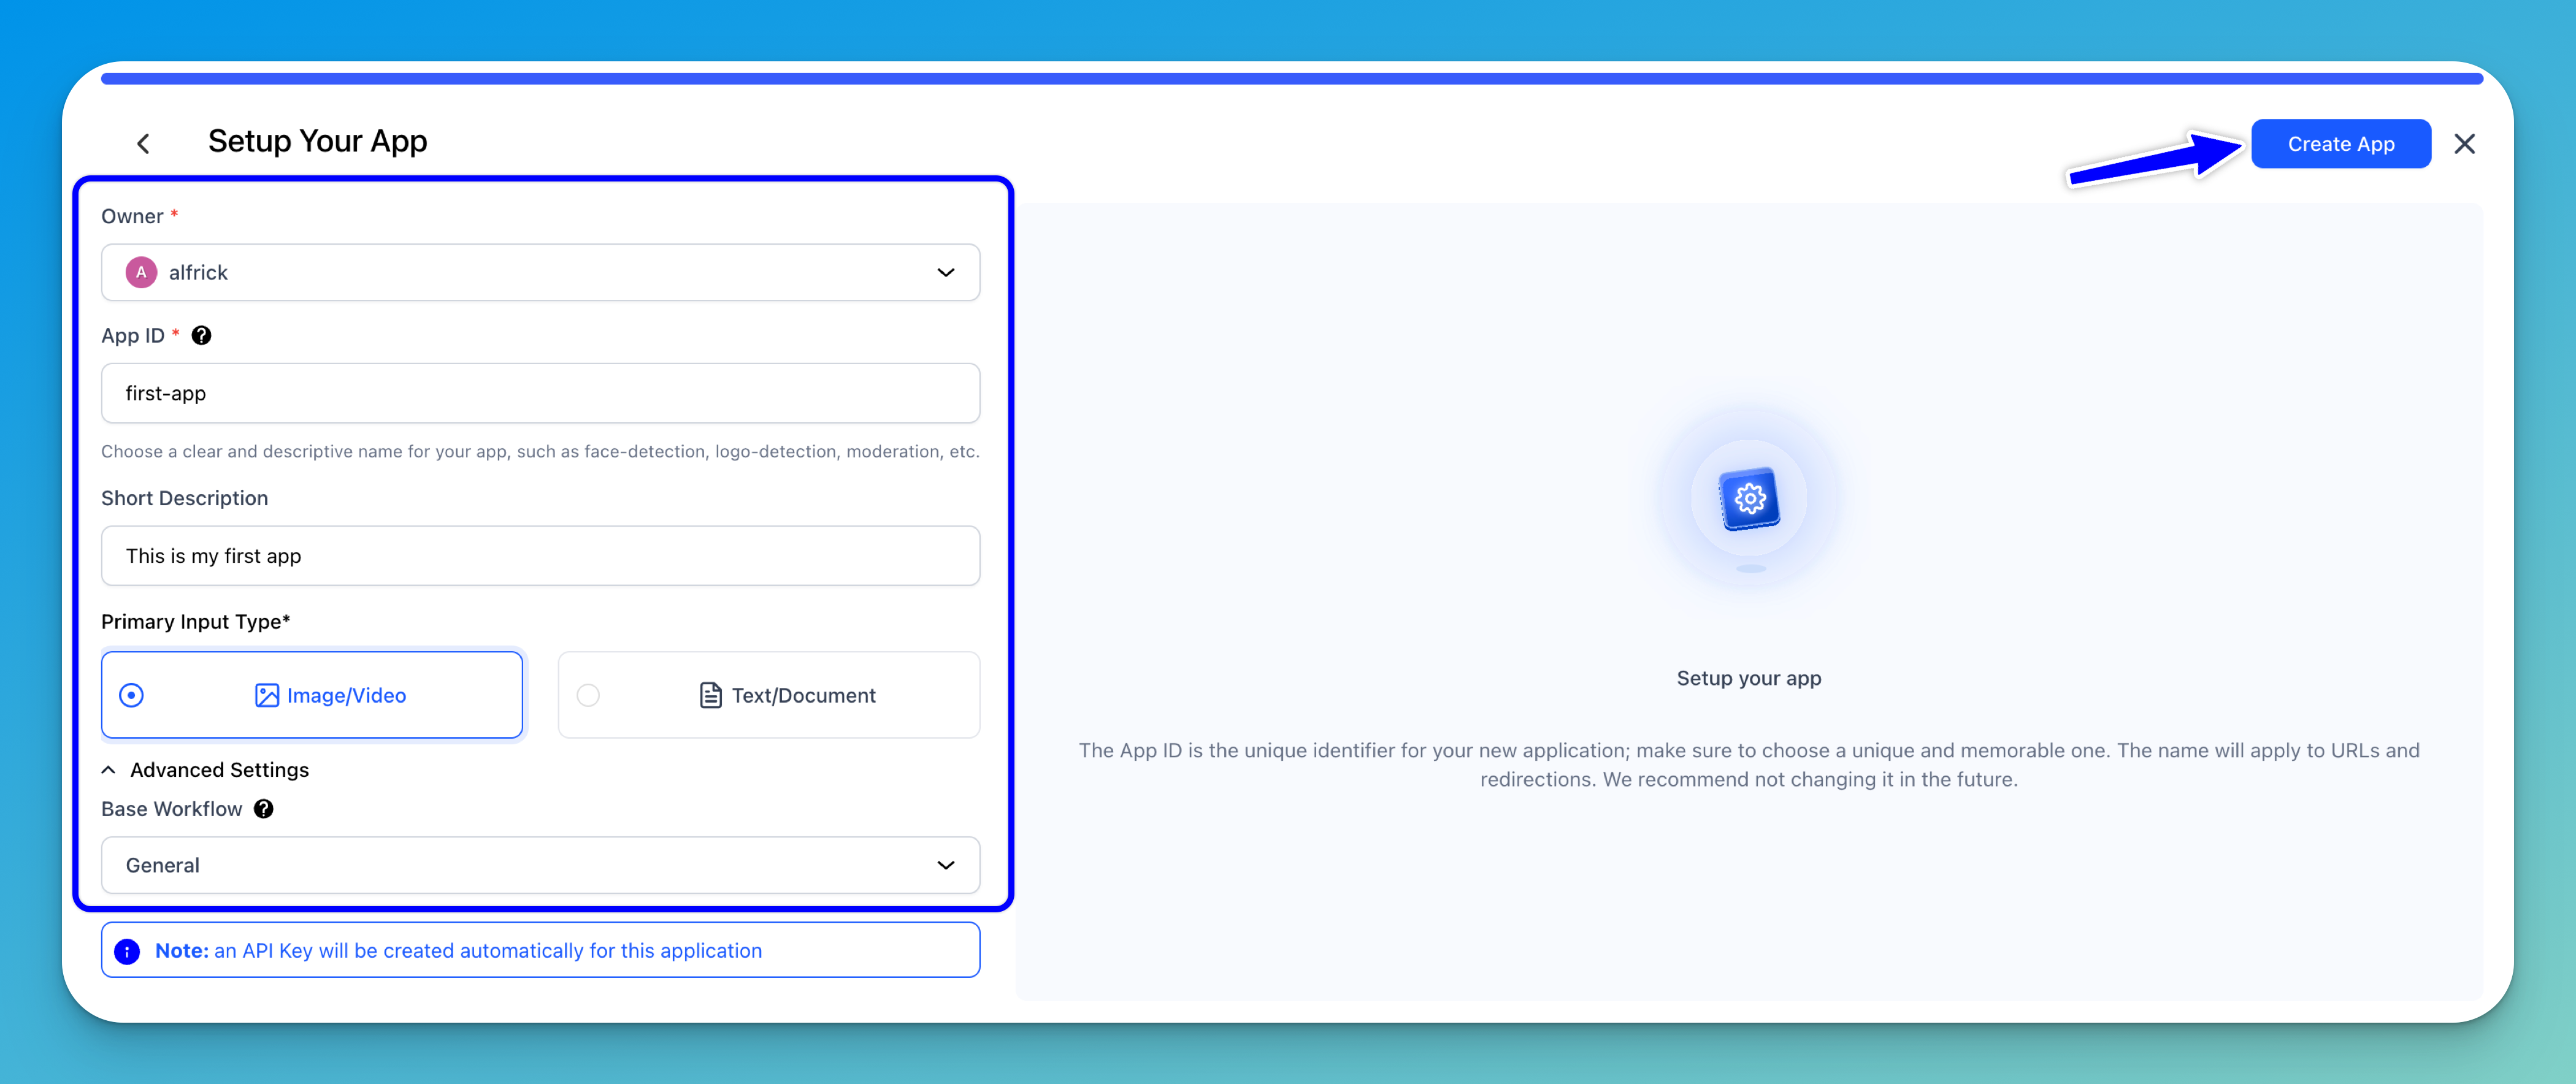
Next, on the window that appears, provide the information required to create a new application.
-
Owner — Choose the owner to associate with the app. By default, this is set to your personal account, but you can also select an organization you belong to, provided you have the necessary permissions to create apps within it.
-
App ID — This serves as a unique identifier for your application. It’s important to choose a unique and memorable ID as it will be used for URLs and redirections.
-
Short Description — Optionally, provide a brief description that outlines the purpose or features of your app.
-
Primary Input Type — Select the primary type of inputs that will be available in your app: either images/videos or texts/documents.
-
Advanced Settings — This collapsible field allows you to choose the base workflow for your app. Base workflows index your data and furnish your app with a default knowledge base. While a base workflow is automatically selected based on your primary input type, you can choose another one that best suits your specific use case.
Application names and other names in our platform must follow a few rules:
- Names must be 1 to 32 letters or numbers in length, with hyphens or underscores as separators.
- Spaces, periods, etc., are not allowed as separators.
Lastly, click the Create App button in the upper-right corner to finalize and create your application.
Copy (Duplicate) Apps
You can also create a new app by cloning an existing one. Cloning is a convenient way to start a new project using an established setup or to branch off from an existing application.
To do so, open the collapsible left sidebar, select Projects, and then choose All Resources from the dropdown list. This will take you to a page that displays all the resources you own, with the Apps / Templates tab selected by default.
From there, locate the app you want to clone. Click the three dots in the bottom-right corner of the app card, and from the dropdown menu, select Duplicate to copy its contents into a new application.
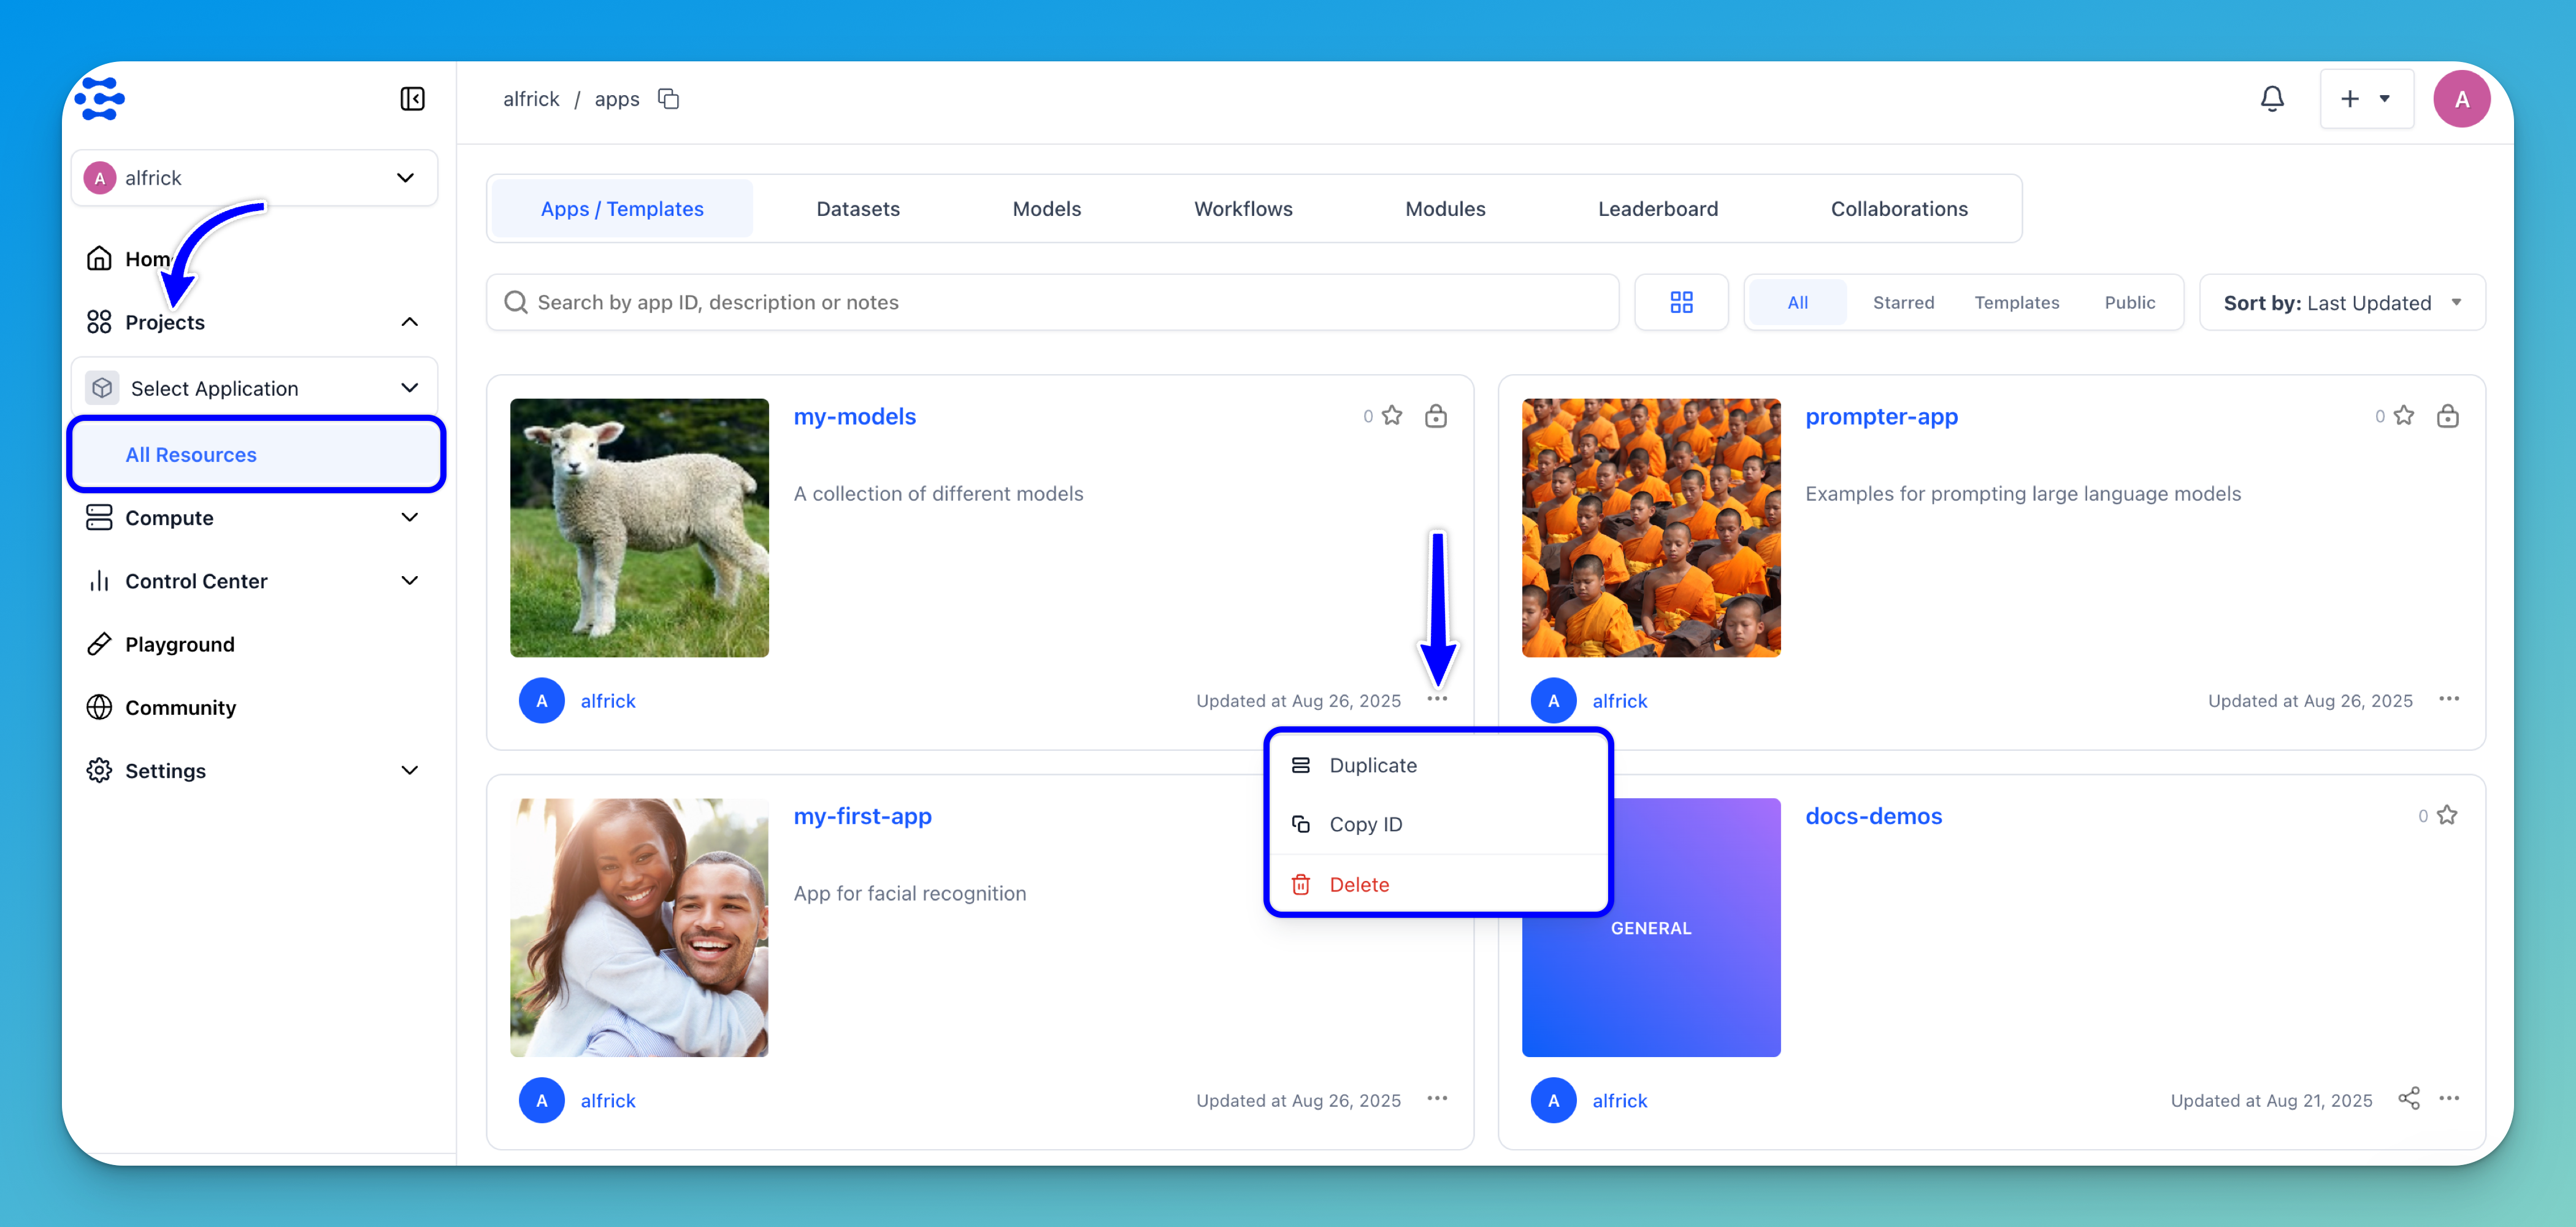
Note: The dropdown menu also allows you to copy the app ID or delete the app.
Next, a pop-up window will appear where you can choose the destination user or organization, as well as the target application. You can either create a new app as the destination or copy the contents into an existing app. The window also allows you to specify which resources you want to duplicate.
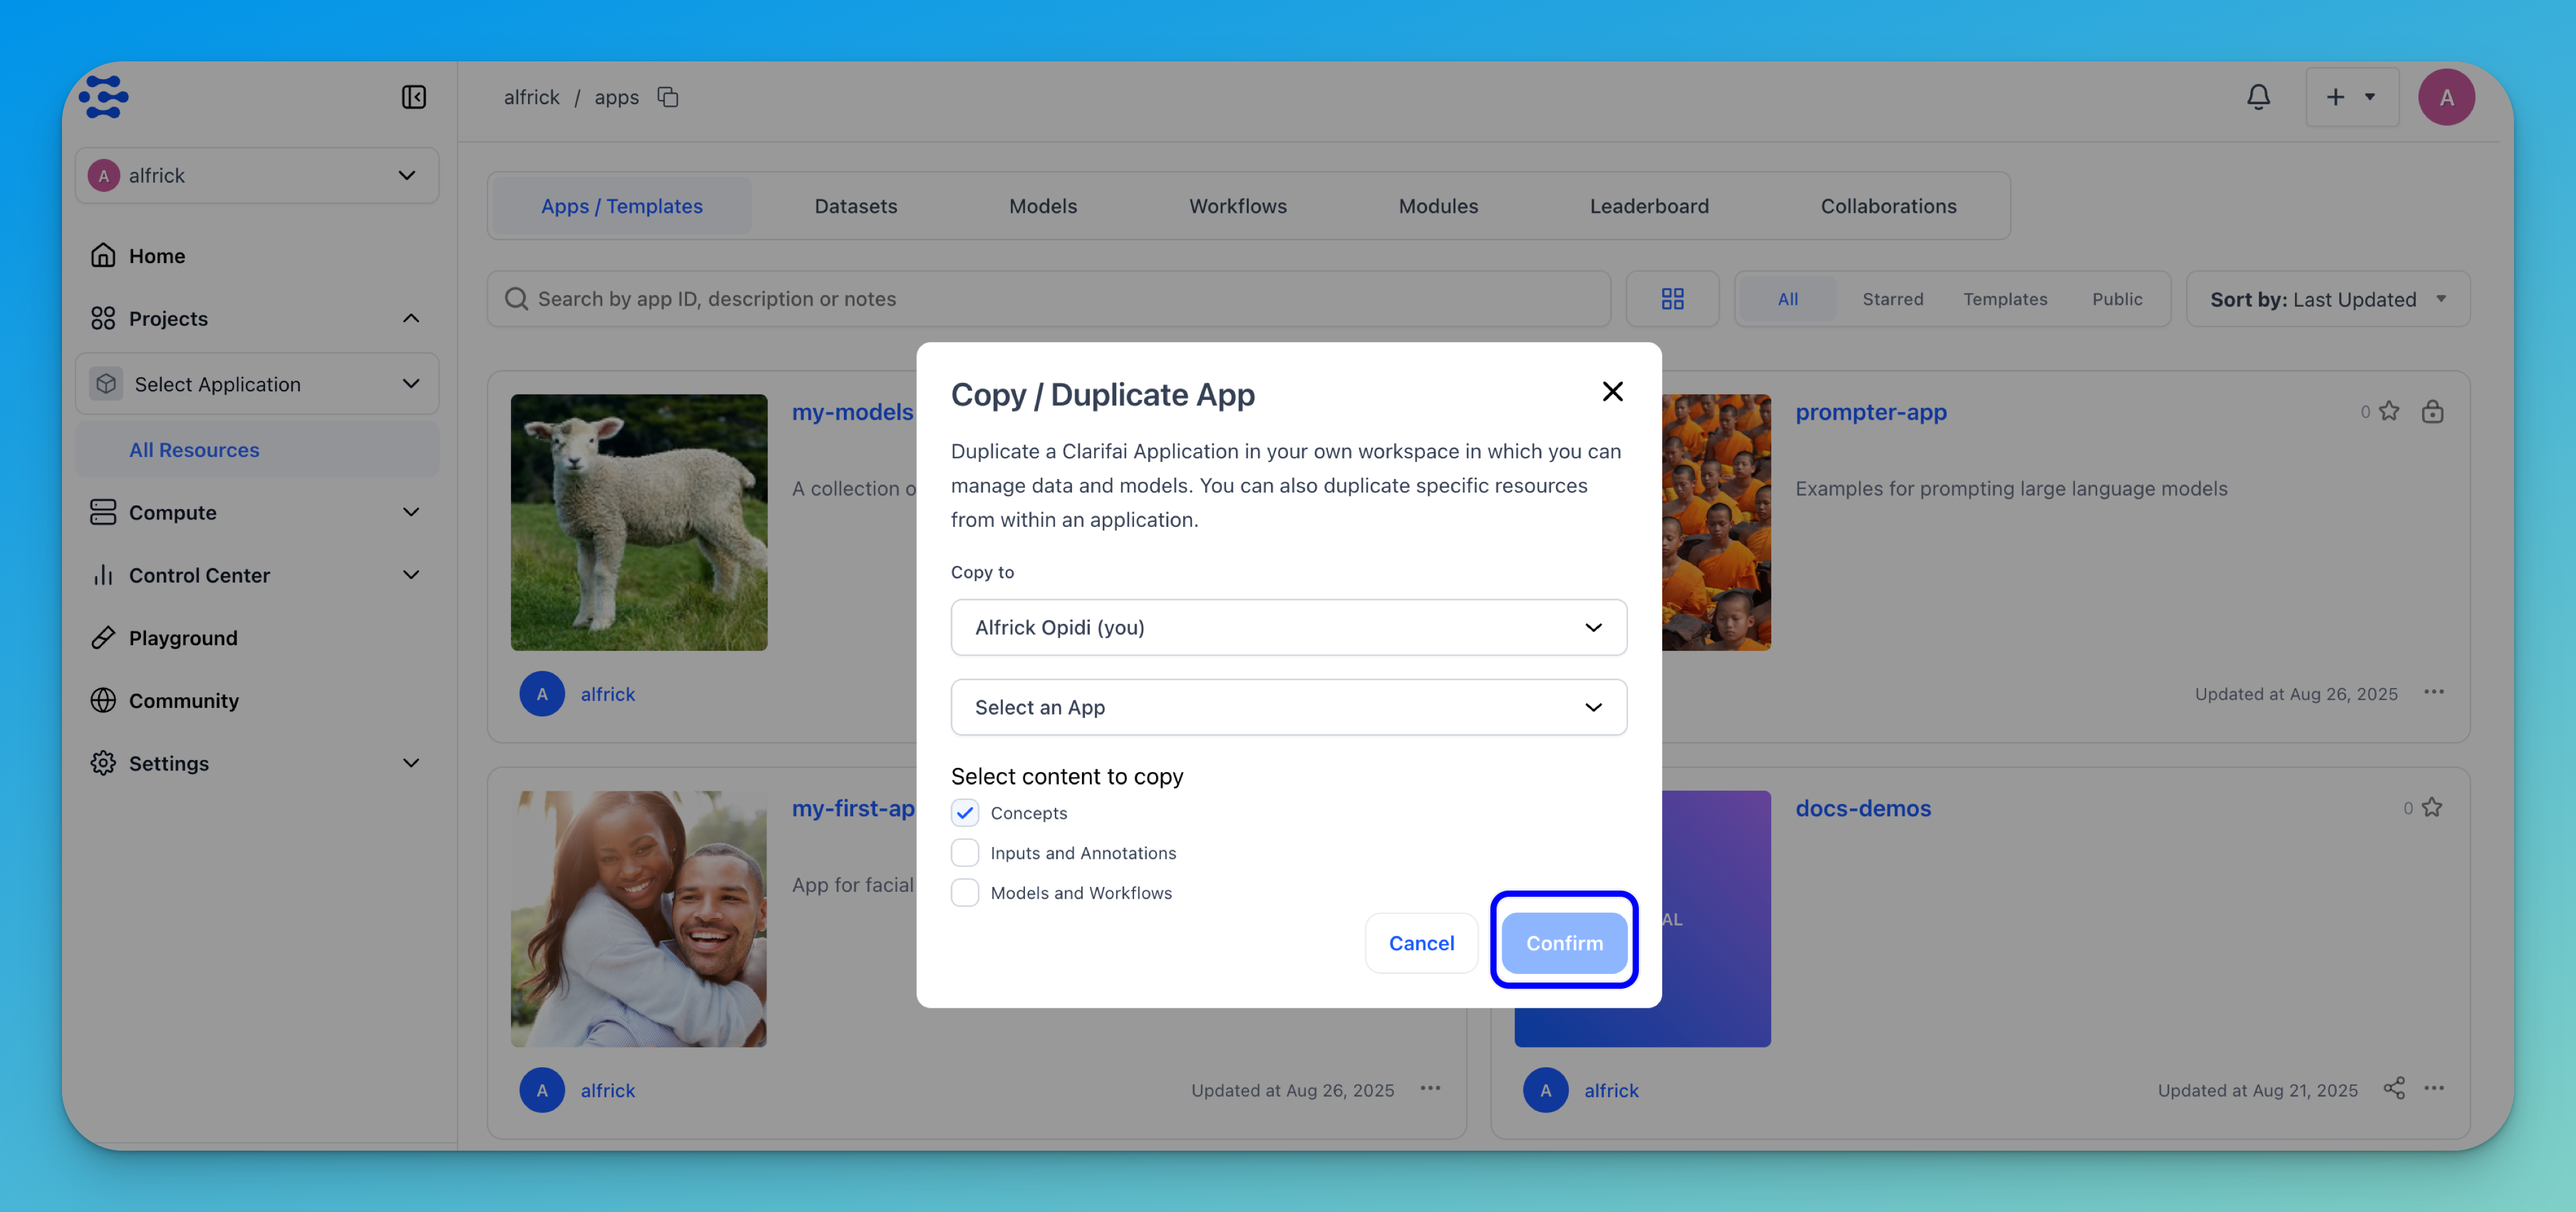
Lastly, click the Confirm button, and the copied app will be automatically created for you.
Create via the API
For enterprise customers, it is possible to generate applications programmatically. Note that you need to use a Personal Access Token (PAT) to create an application.
Create App With Default Base Workflow
The base workflow acts as the default knowledge base for your app and provides the basic structure for indexing your data.
If you create an application without specifying the base workflow, a default one will be automatically created for you.
- Python SDK
- Node.js SDK
- cURL
from clarifai.client.user import User

client = User(user_id="user_id", pat="YOUR_PAT")
# You can create an app by providing the app id
app = client.create_app(app_id="test_app")
import { User } from "clarifai-nodejs";


const client = new User({
  userId: process.env.CLARIFAI_USER_ID,
  pat: process.env.CLARIFAI_PAT,
  appId: "",
});
// You can create an app by providing the app id
const app = await client.createApp({
  appId: "test_app",
});
console.log(app);
curl --location --request POST "https://api.clarifai.com/v2/users/YOUR_USER_ID_HERE/apps/" \
--header "Content-Type: application/json" \
--header "Authorization: Key YOUR_PAT_HERE" \
--data-raw '{
    "apps": [
        {
            "id": "test-app"
        }
    ]
}'
Example Output
2024-01-15 16:11:26 INFO     clarifai.client.user:                                                      user.py:122

                             App created

                             code: SUCCESS

                             description: "Ok"

                             req_id: "1728082daee63fa593411dcb573e7e33"
Create App With Different Base Workflow
You can create an app with a different base workflow. You can choose from a range of available base workflows, including Empty, Universal, Language Understanding, and General.
This enables you to seamlessly integrate and customize the fundamental structure of your app, ensuring it aligns perfectly with your project requirements.
- Python SDK
from clarifai.client.user import User

client = User(user_id="user_id", pat="YOUR_PAT")
# You can set the base workflow as ["Empty","Universal","Language-Understanding","General"]
app = client.create_app(app_id="test_app_2", base_workflow="Universal")