Databricks-Connect Module
Use a no-code interface to move data across Databricks and Clarifai
The Clarifai’s Databricks-Connect module seamlessly integrates Clarifai and Databricks, offering a user-friendly, no-code solution for bi-directional data movement. You can use the module to effortlessly transfer data across both platforms at the click of the button.
Modules are custom plugins with UI elements that let you extend the capabilities of the Clarifai platform. You can learn more about them here.
The Databricks-Connect module allows you to:
- Authenticate a Databricks connection and connect with its compute clusters
- Import data from Databricks volume into Clarifai app and dataset
- Export data and annotations from a Clarifai app into Databricks volume and table
- Update input and annotation information within the chosen Delta table for the linked Clarifai app
Let’s demonstrate how you can use the module.
Prerequisites
- A Clarifai application
- A dataset within a Clarifai application
- Set up your Clarifai PAT inside your Databricks workspace. Click here to learn how to create and set secrets in Databricks. Also, use the following naming convention when setting secrets, as the module interprets secrets according to the specified scope and key name.
scope-name = "clarifai"key-name = "CLARIFAI_PAT"
Install the Module
Option 1
Go to the Databricks-Connect module page and click the Install Module button at the upper-right corner.
Next, on the small window that pops up, select a desired user and destination app for installing the module.
Click the Confirm button.

On the ensuing page, choose a destination URL for installing the module, select the module visibility, and click the Install to this App! button.
After the module has been successfully installed, click the Click to use installed module version button to start using it. You can also refresh the page for your installed module to appear on the left sidebar under the Installed Modules category..

If you click the button, you’ll be redirected to a page that requires you to authorize the module to access data on your behalf. You will see the permissions the module requires.
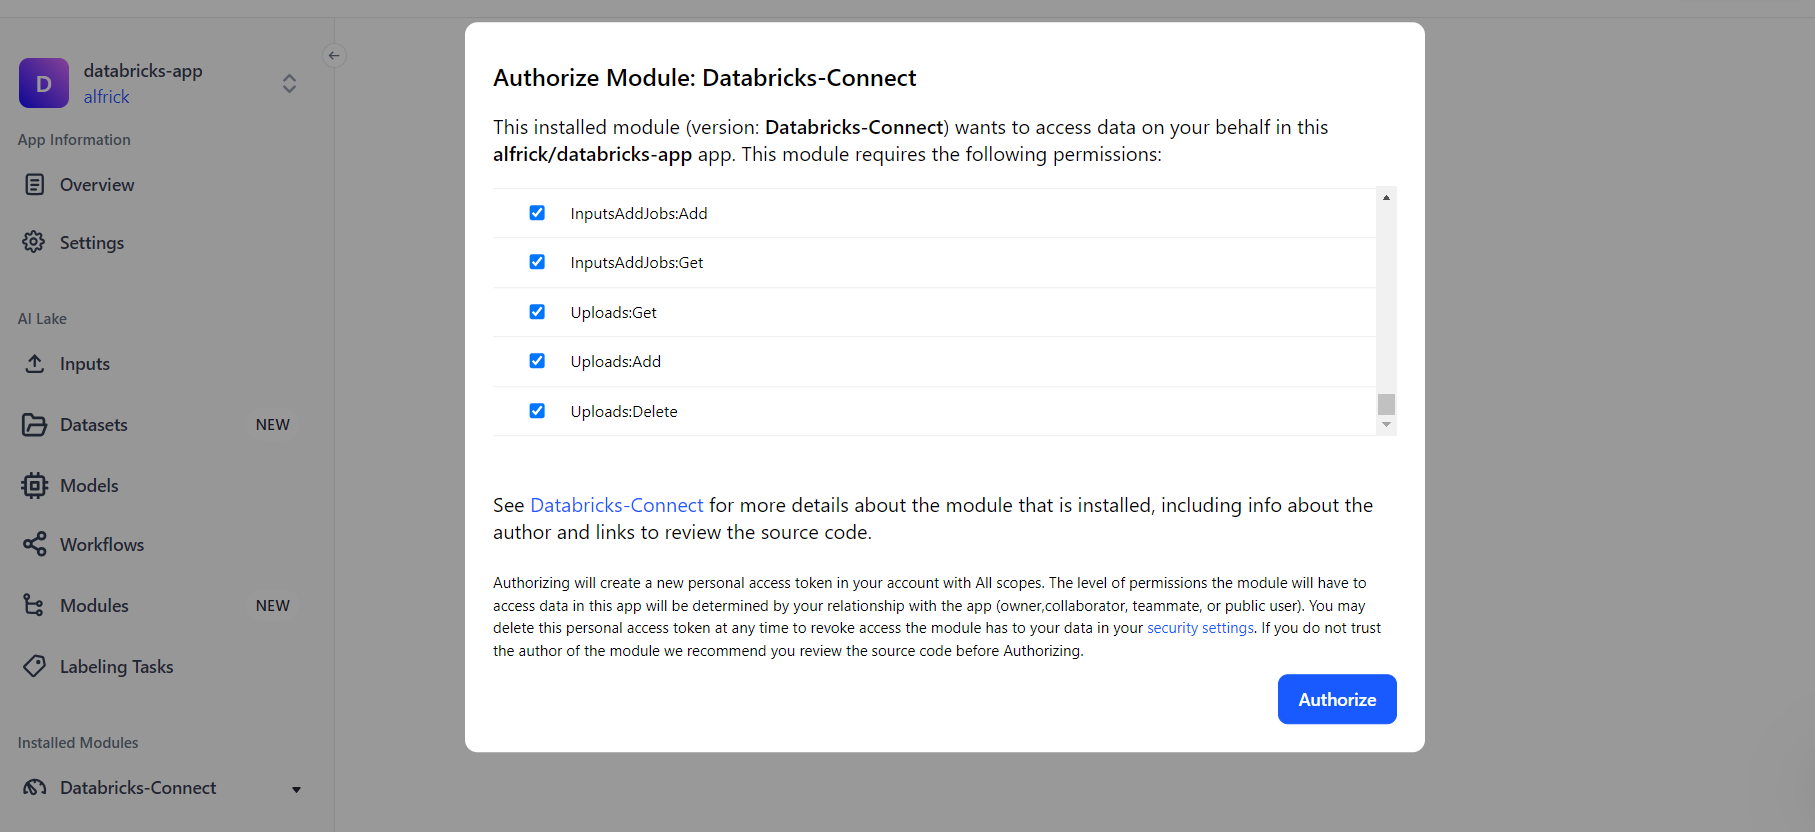
Click the Authorize button.
Option 2
Alternatively, you can use the module’s URL to install it in your app. To do so, click the Manage Installed Modules option at the bottom of the collapsible left sidebar.
Grab the URL of the Databricks-Connect module and paste it into the Module URL input field.
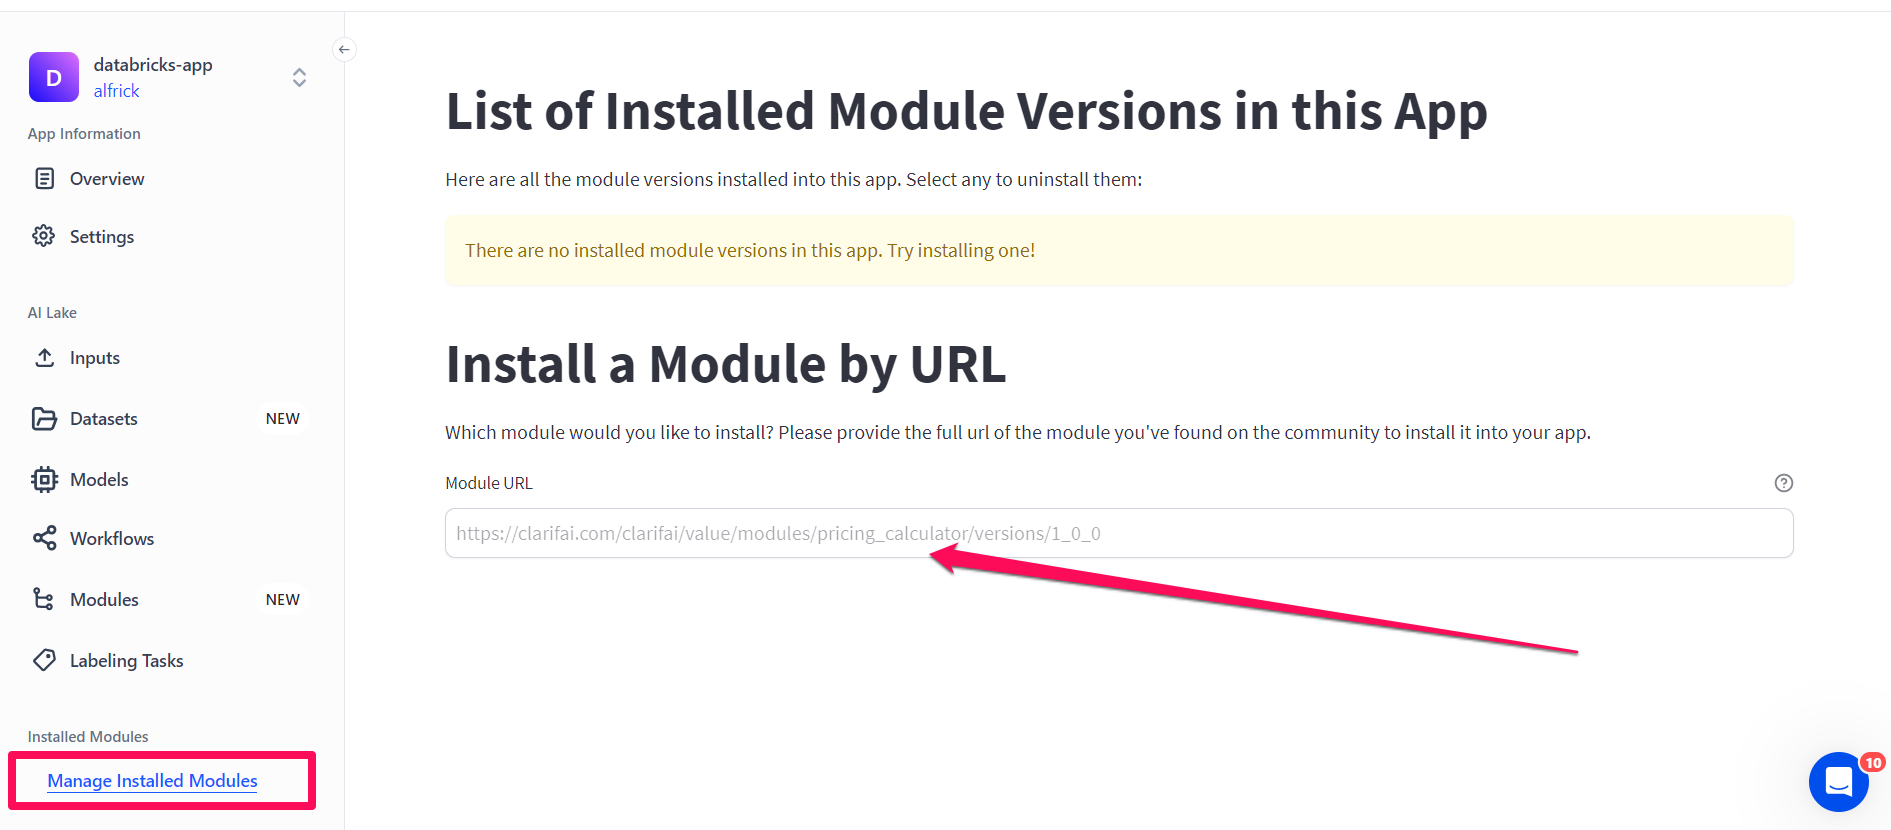
You can then follow the ensuing prompts to complete installing the module in your app.
Authenticate a Databricks Connection
After installing the module and authorizing it to access data on your behalf, you’ll be redirected to a page that requires you to provide configuration information to connect to your Databricks workspace.
Provide the following credentials:
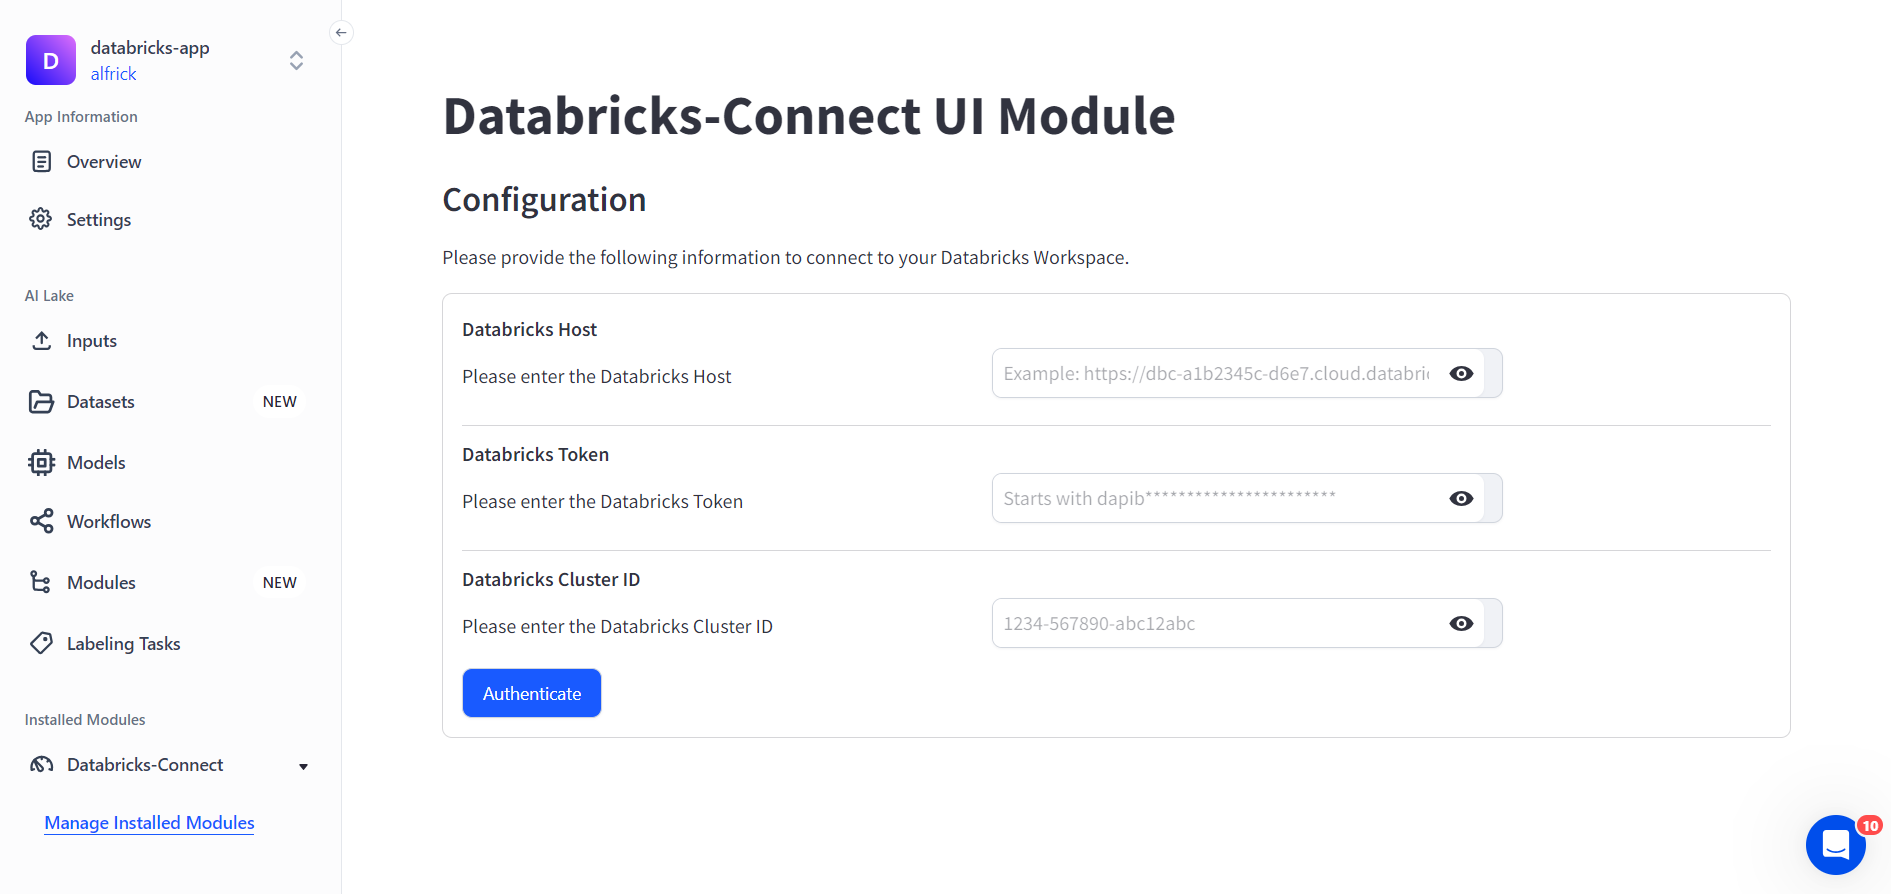
- Databricks Host — Specify the hostname. Example is
https://<your_host_name>.cloud.databricks.com. - Databricks Token — Specify the personal access token. Learn how to get it here.
- Databricks Cluster ID — Specify the
cluster_id. Example is1234-12345-ab1cd2ef.
Next, click the Authenticate button.
After successfully authenticating a Databricks connection, a section will appear on the same page that allows you to carry out various data ingestion tasks with the module.
We currently only support transferring image data between Clarifai and Databricks.
Import Data From Databricks to Clarifai
You can use the module to import data into a Clarifai app and a dataset. While importing the data, a Delta table will be created in Databricks that tracks the exported input information.
Under the Import tab, you can either import data from a Databricks Unity Catalog or an Amazon S3 bucket.
a) Import from a Databricks volume
To import data from a Databricks volume, select the Databricks Unity Catalog tab and provide the needed information.
In Databricks, a catalog contains schemas, and a schema acts like a database that contains tables (for storing structured data) and volumes (for storing unstructured data).
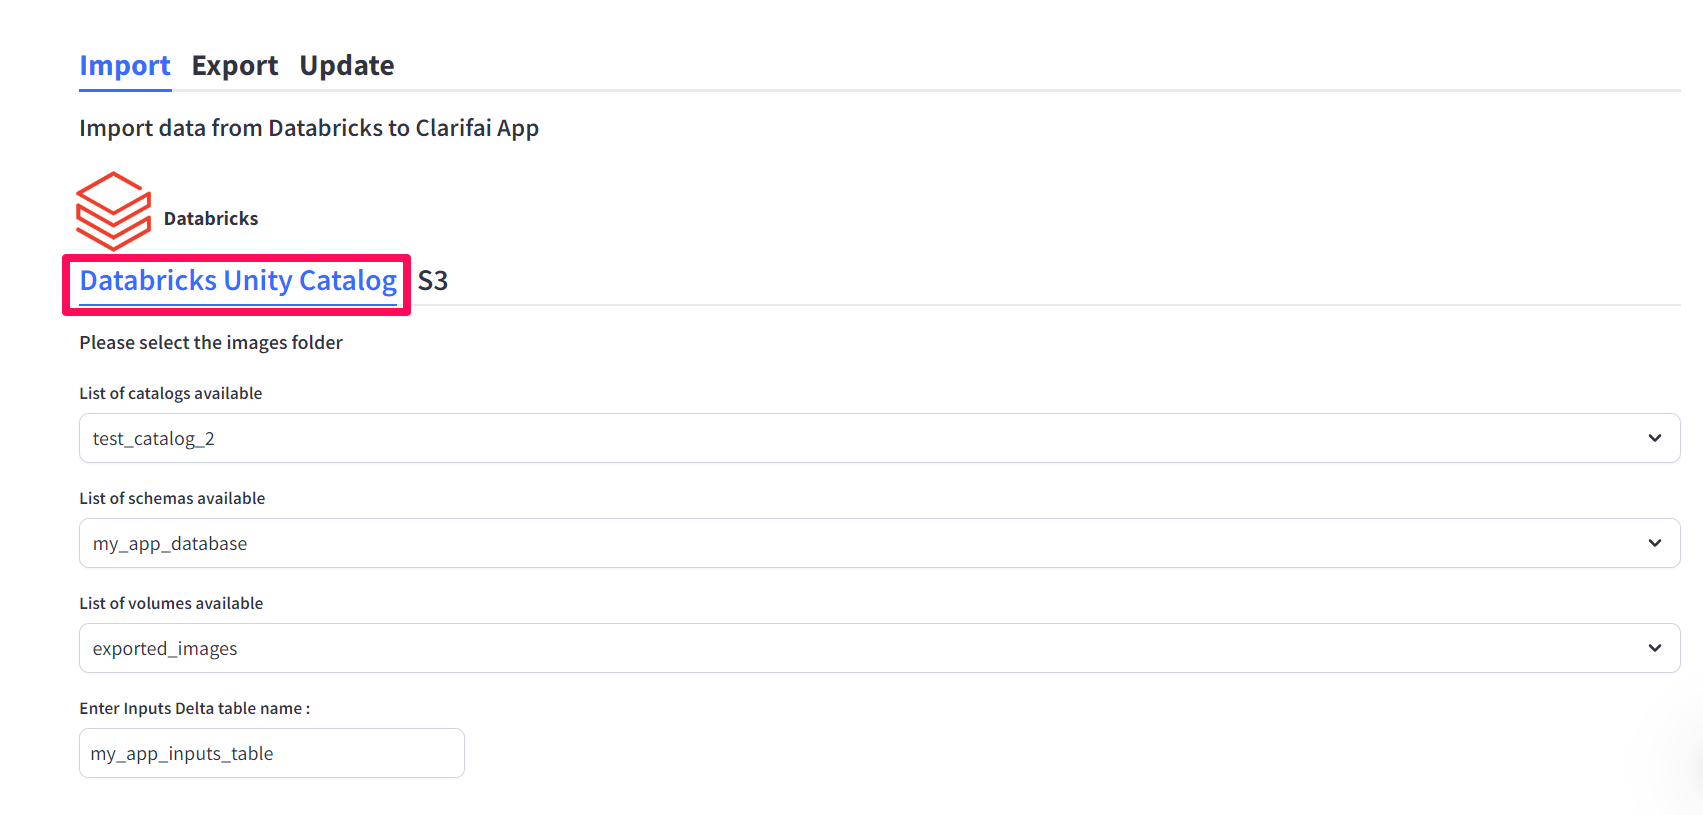
- List of catalogs available — Select your desired source catalog.
- List of schemas available — Select your desired source schema.
- List of volumes available — Select your desired source volume.
- Inputs Delta table name — Provide the name of the new table that will be created in Databricks. The table will be created inside
selected_catalog.selected_schema.table_name.
The image names in the Databricks platform will be used as input_id names on the Clarifai platform. So, ensure the names are unique to prevent any potential errors during the import process.
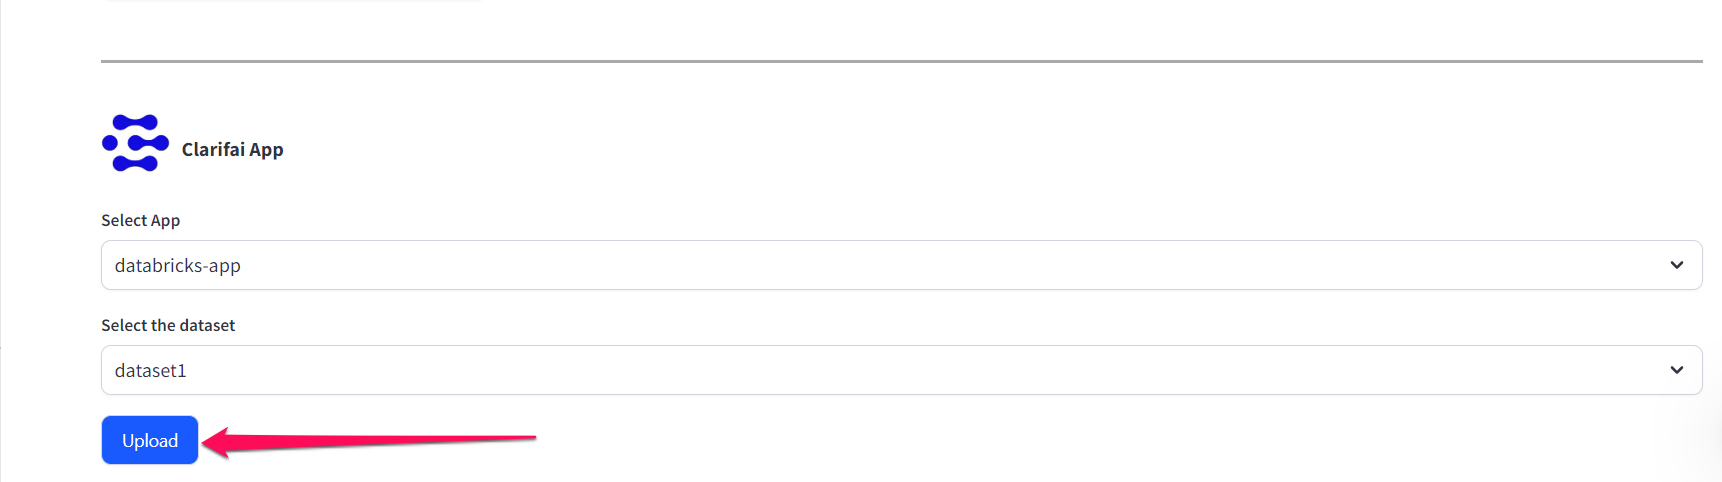
Lastly, specify the destination app and dataset on the Clarifai platform where you intend the data to be imported.
Click the Upload button.
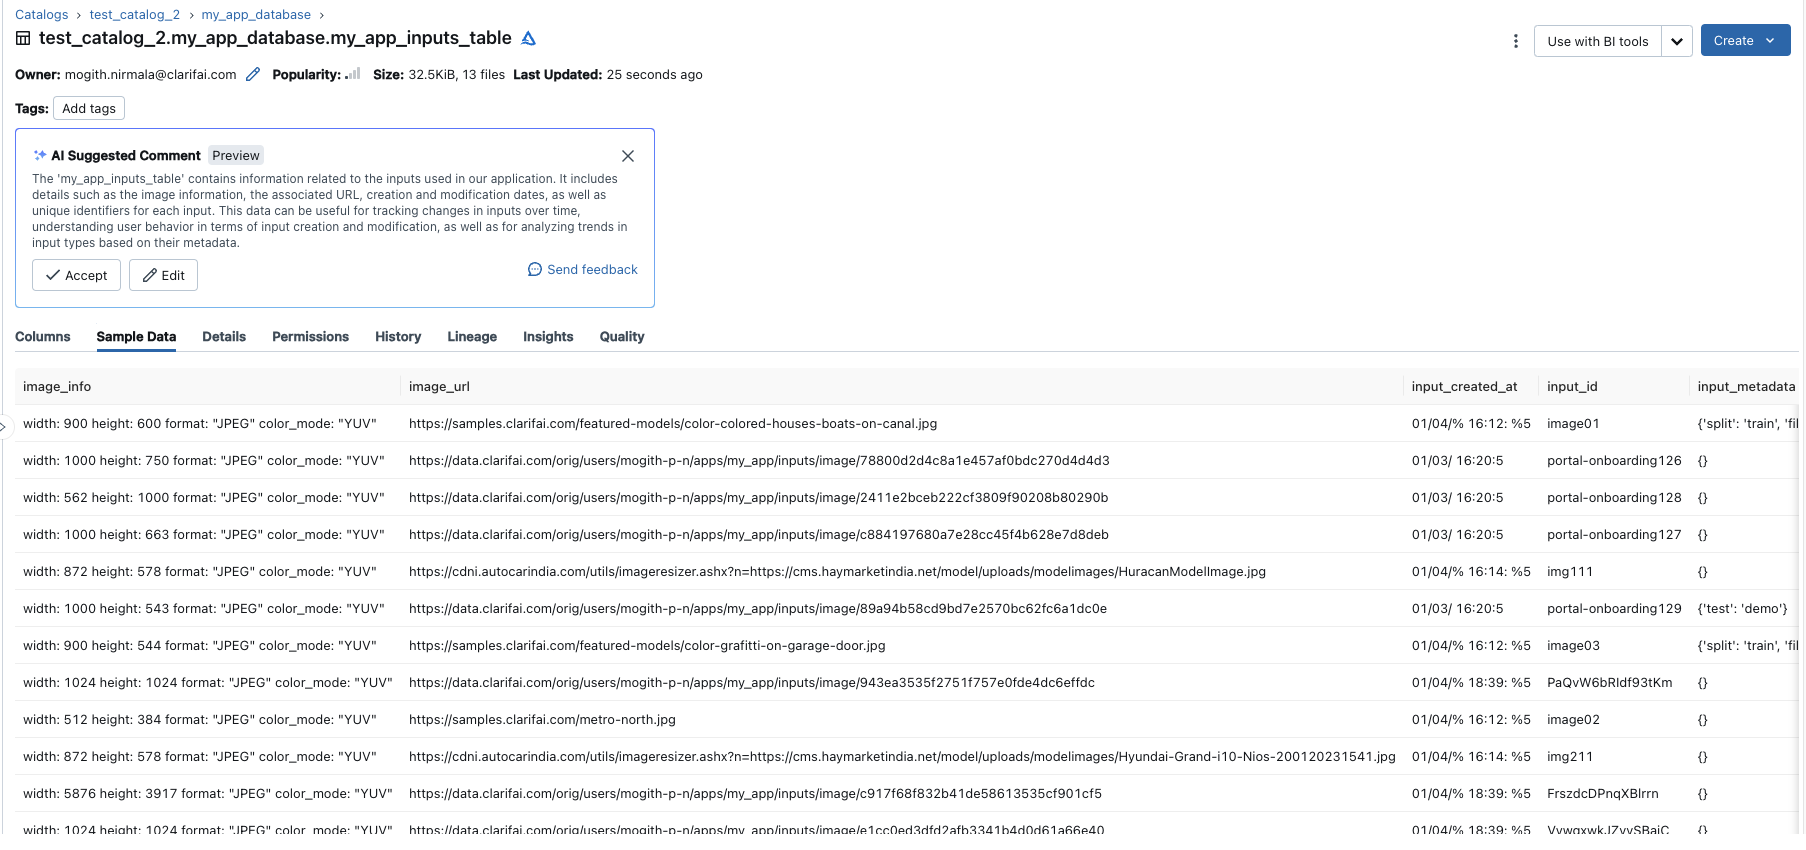
If the import process is successful, you’ll see the exported data tracked inside the created selected_catalog.selected_schema.table_name.
b) Import from an S3 bucket
To import data from an S3 bucket, select the S3 tab and provide the needed information.
To enable the ingestion of inputs from an S3 bucket, ensure that the chosen cluster for the operation has the required permissions and roles to access it. For detailed instructions on configuring Databricks S3 access with the instance profile, refer to the documentation here.
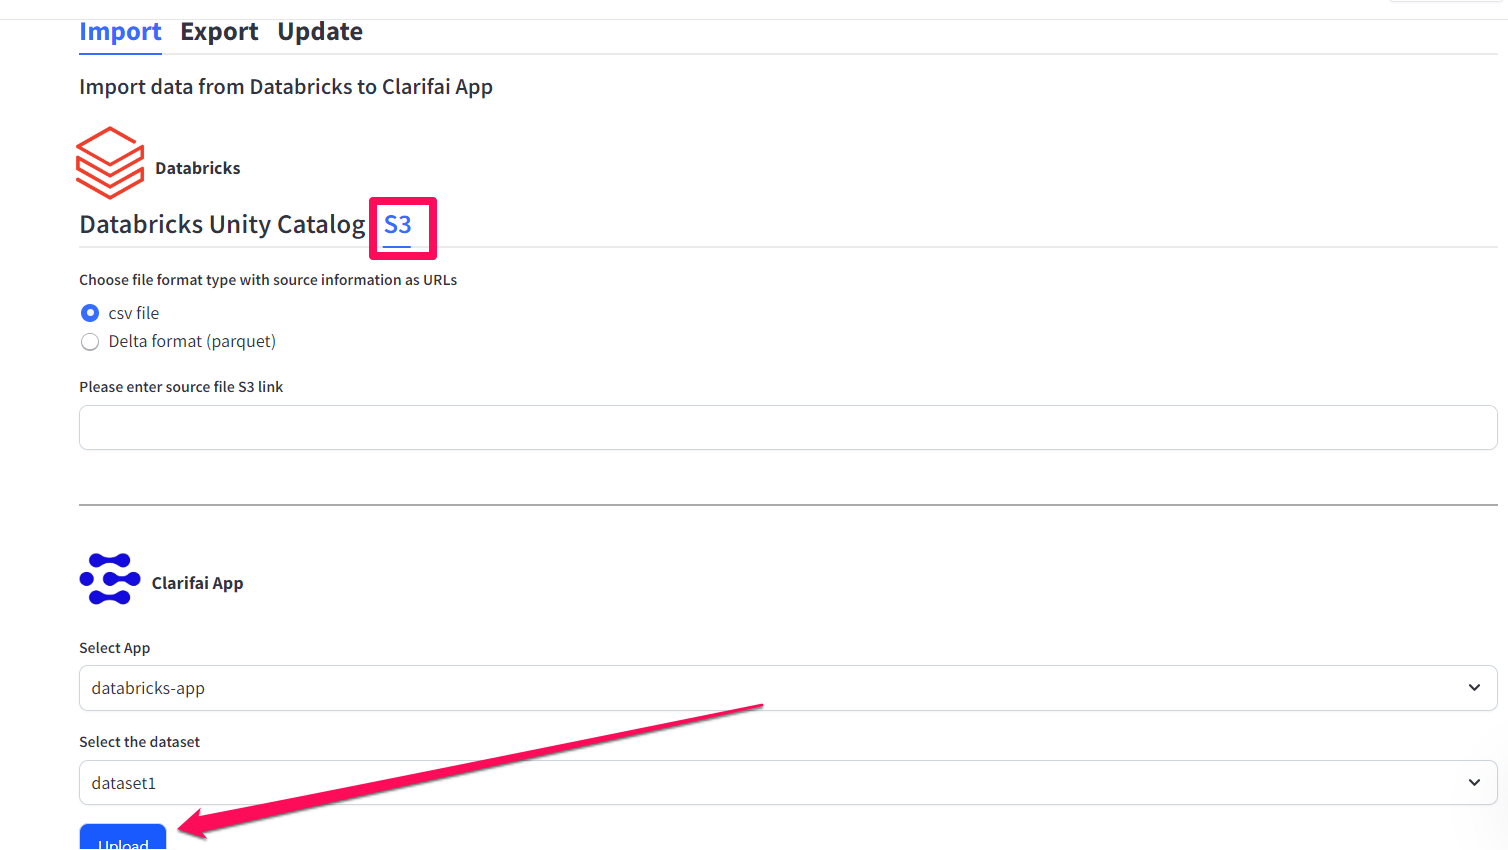
You have the flexibility to use any of the following file formats for data ingestion:
- CSV — Refer to the explanation below on the correct format to use.
- Delta format (Parquet format) — Ensure the format follows the correct data schema as explained below.
After choosing your desired file format type, enter the S3 URL of the file you want to import. Here is an example: s3://my-s3-bucket/my-folder/my-file.csv.
Lastly, specify the destination app and dataset on the Clarifai platform where you intend the data to be imported.
Click the Upload button.
File Format
The CSV or the Delta file you want to import should be in the format that Clarifai accepts. Here are the columns you can include in the file:
- inputid (mandatory) — A unique identifier for the input.
- input (mandatory) — A publicly accessible URL that will be used to download the image.
- concepts (optional) — The concepts contained in images.
- metadata (optional) — Additional information in inputs.
- geopoints (optional) — Geopoints applicable to the inputs.
Here is an example:
| inputid | input | concepts | metadata | geopoints |
|---|---|---|---|---|
| image01 | https://samples.clarifai.com/featured-models/color-colored-houses-boats-on-canal.jpg | image | {'filename': 'canal.jpg', 'split': 'train'} | 102,70 |
| image02 | https://samples.clarifai.com/metro-north.jpg | image |
Here are more details of the annotation structures Clarifai support:
| Annotation Type | Structure |
|---|---|
| Bounding box annotation | Regions[...].region_info.bounding_box{top_row,left_col,bottom_row,right_col}, Regions[...].data.concepts |
| Polygon annotation | Regions[...].region_info.polygon.points{row[…],col[…]}, Regions[...].data.concepts |
| Image segmentation | Regions[...].region_info.mask, Regions[...].data.concepts |
| Video prediction | Frame.frame_info.time[…], Frame.frame_info.data.concepts |
| Text/image classification | Annotations.data.concepts |
Export Data From Clarifai to Databricks
You can use the module to export data from a Clarifai app to a Databricks table. This allows you to seamlessly transfer pre-annotated, ready-to-use data for building AI pipelines within the Databricks environment.
Under the Export tab, start by specifying the app and dataset on the Clarifai platform from which you want to export the data.
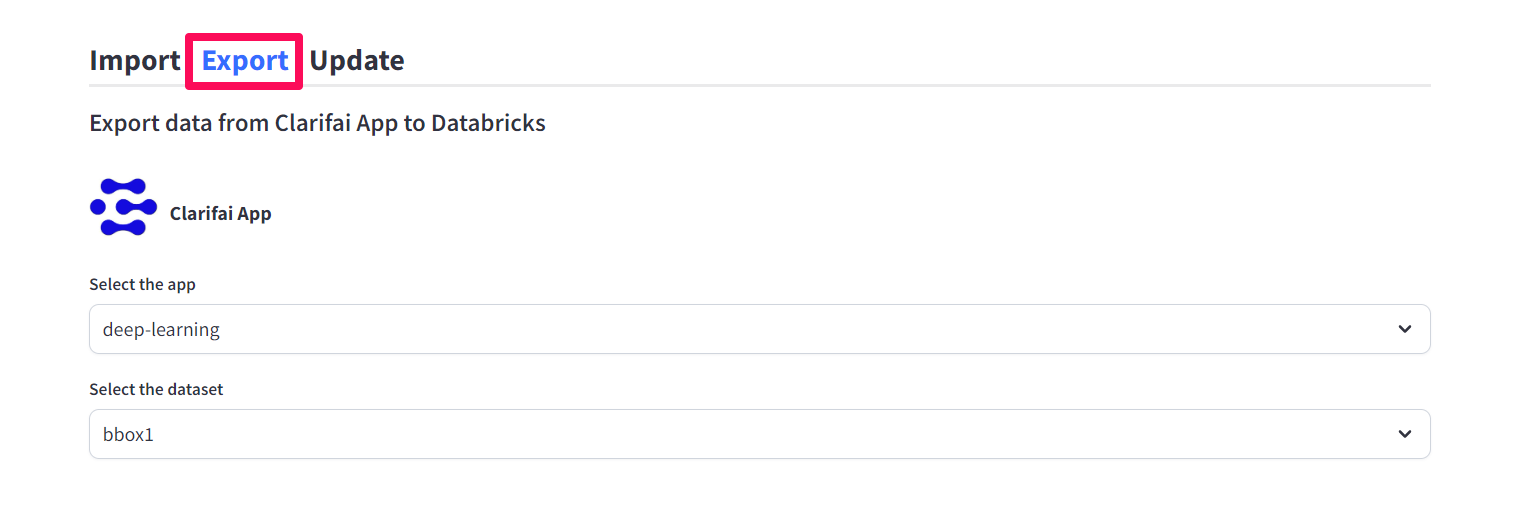
Next, on the Databricks section, you have the option to select Export images. If left unchecked, the specified annotations and their associated information will be exported to a Databricks table. On the other hand, checking it will result in the export of both the specified annotations and their corresponding images to a Databricks table.
Option 1
If you leave the Export images option unchecked, you need to provide the following information:
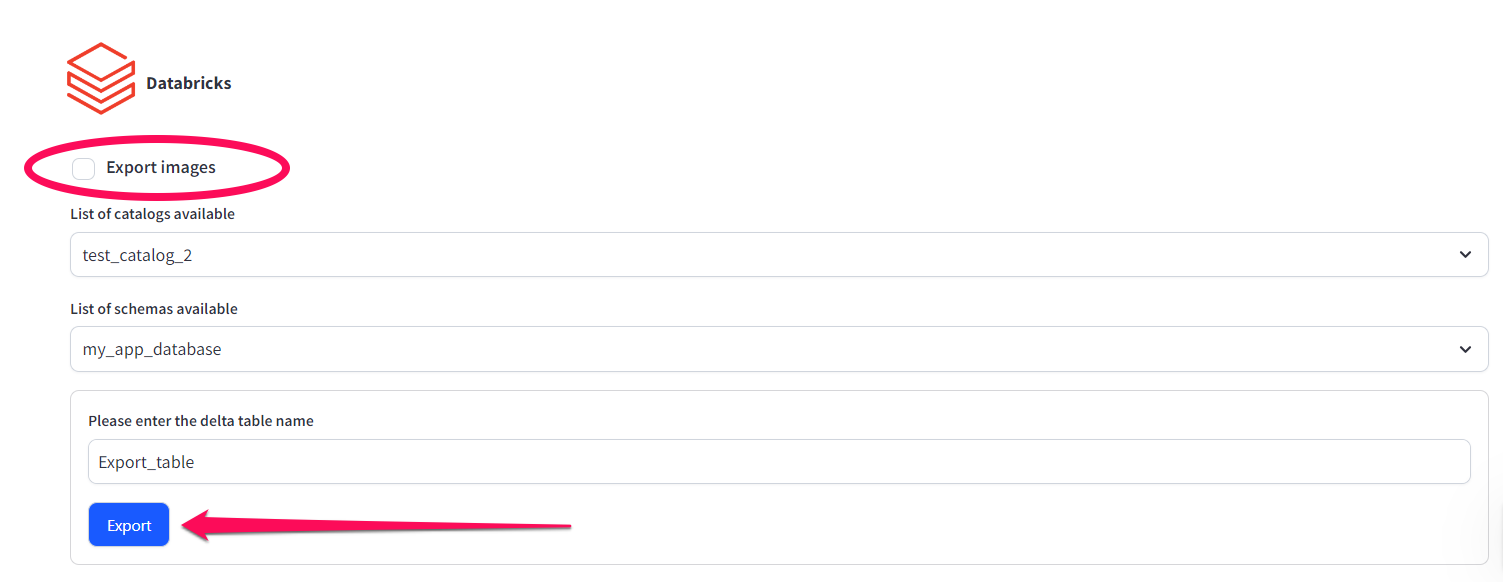
- List of catalogs available — Select your destined, pre-existing catalog.
- List of schemas available — Select your destined, pre-existing schema.
- Inputs Delta table name — Provide the name of a new annotations Delta table to be created.
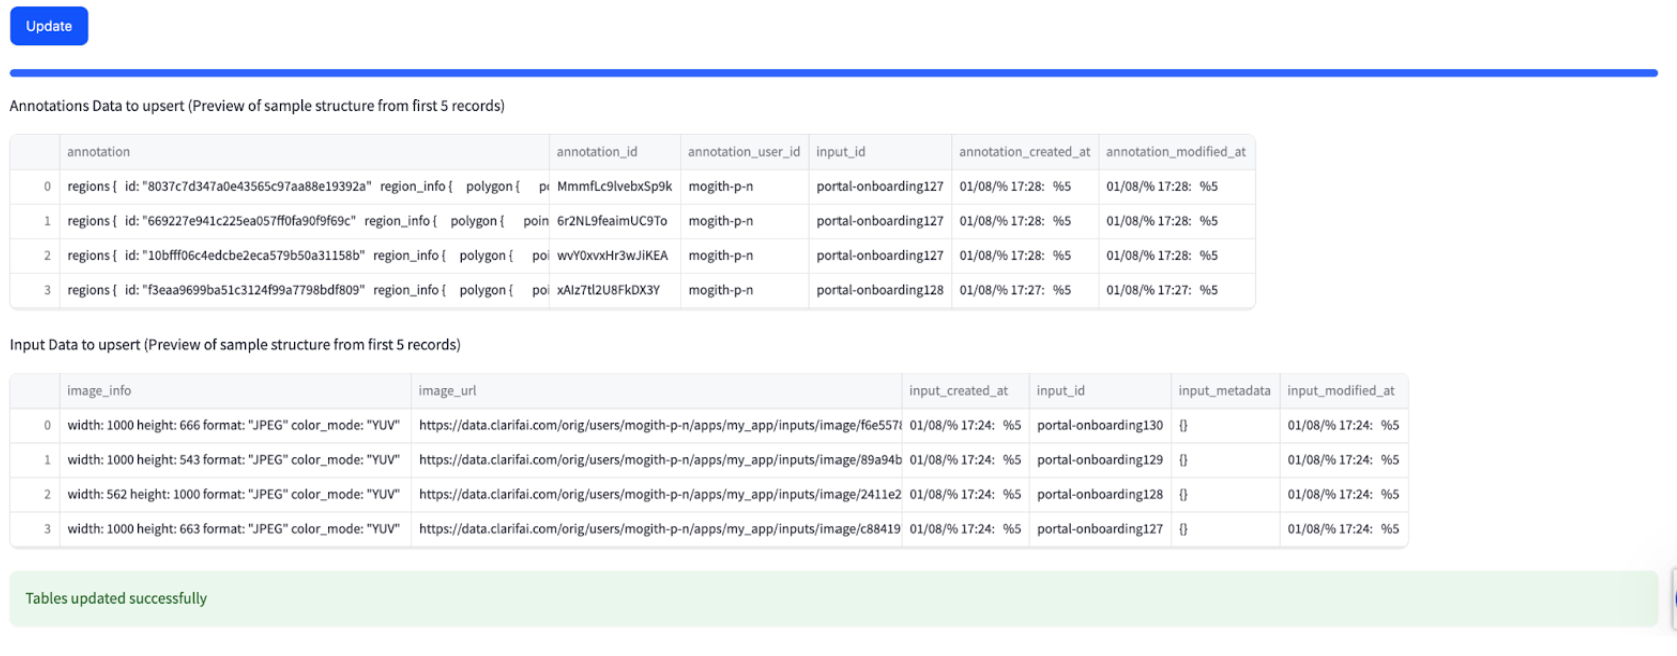
After providing the required information, click the Export button. It will create a Delta table that contains both annotations and inputs information.
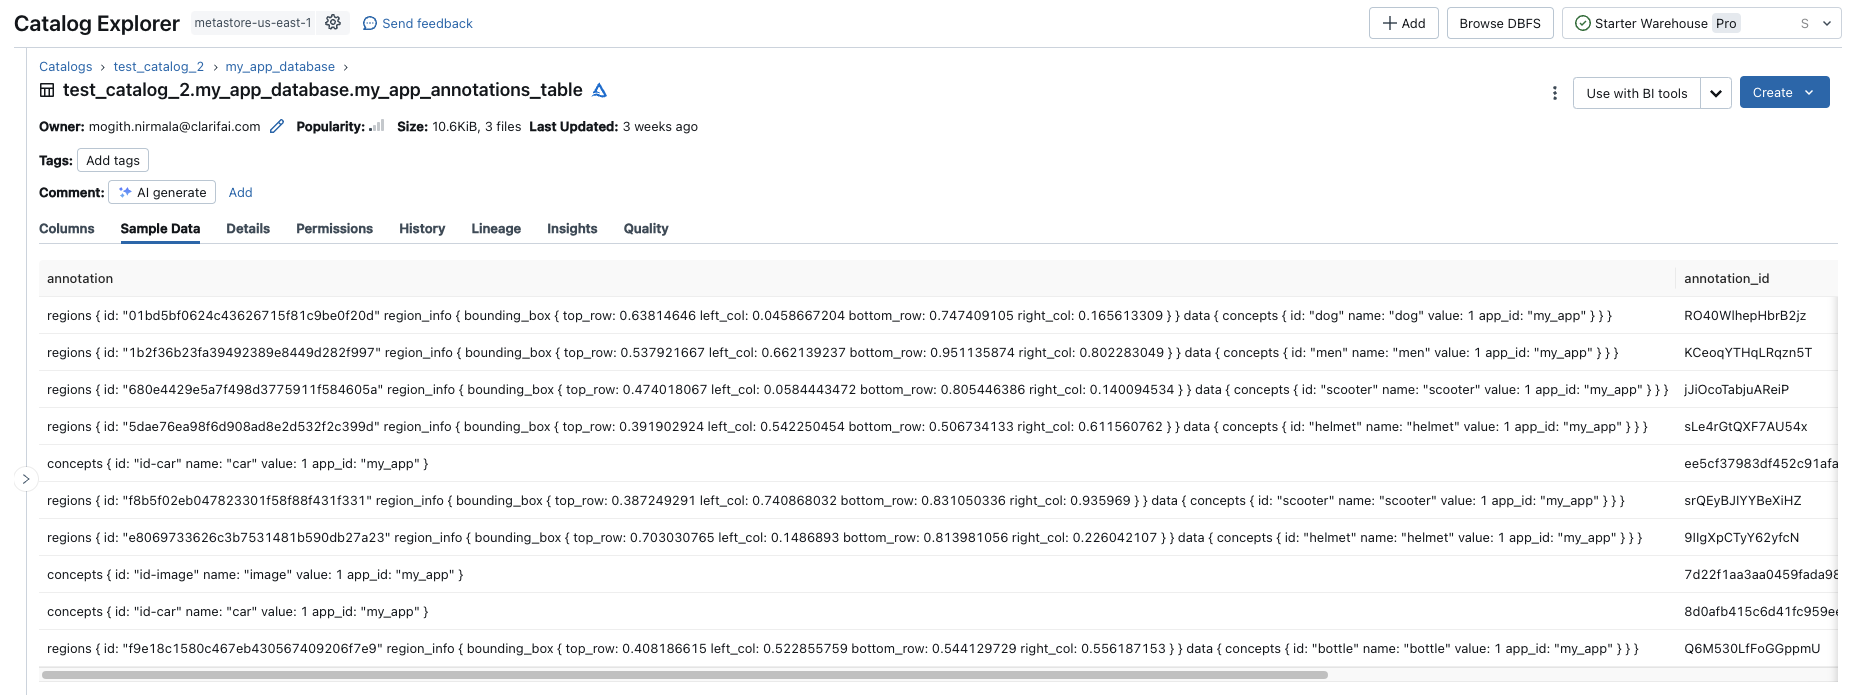
A preview of the newly created table data will also be displayed below the Export button.
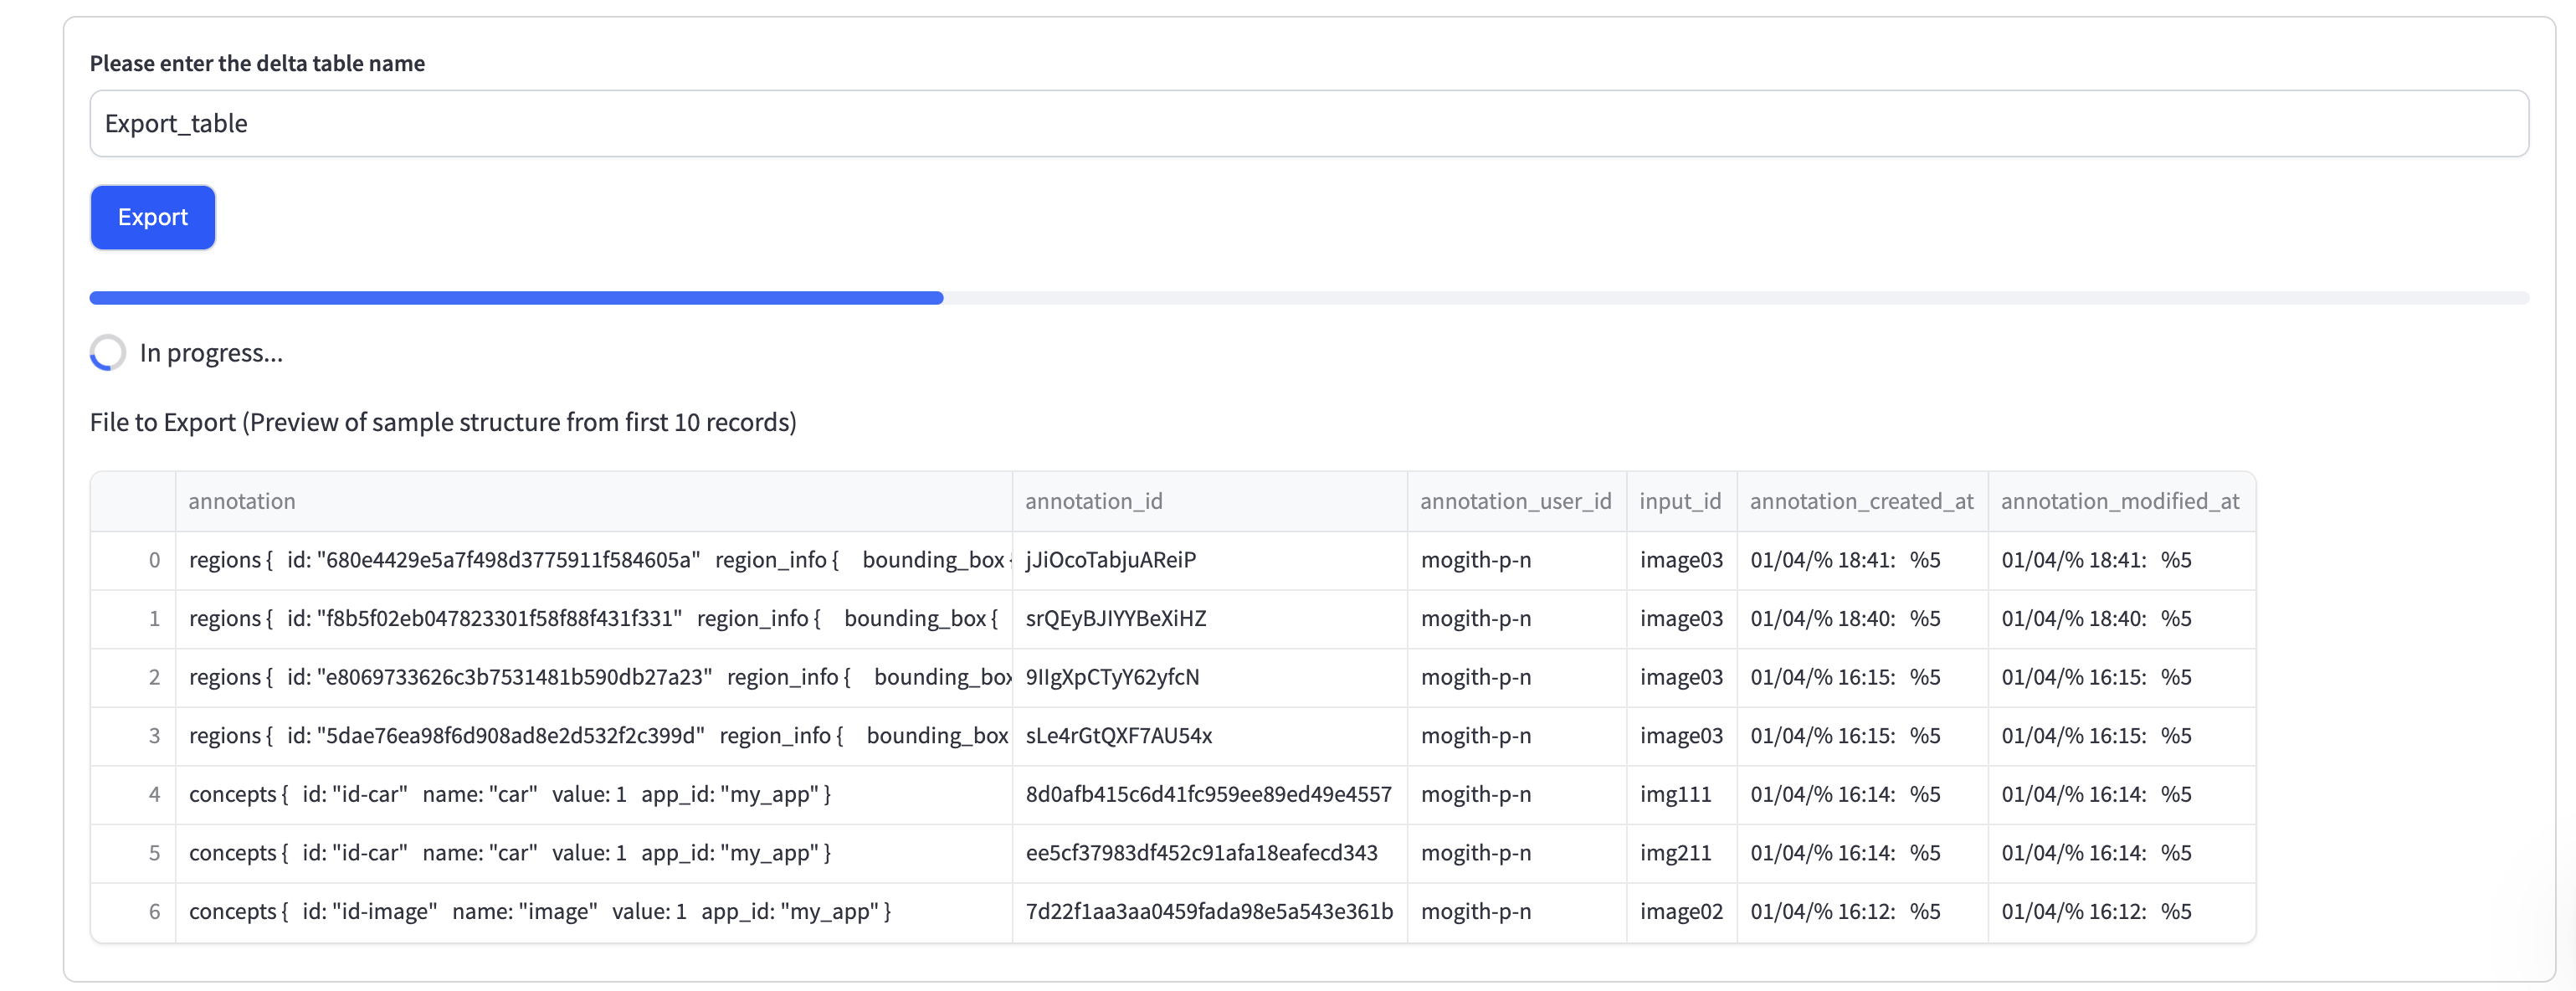
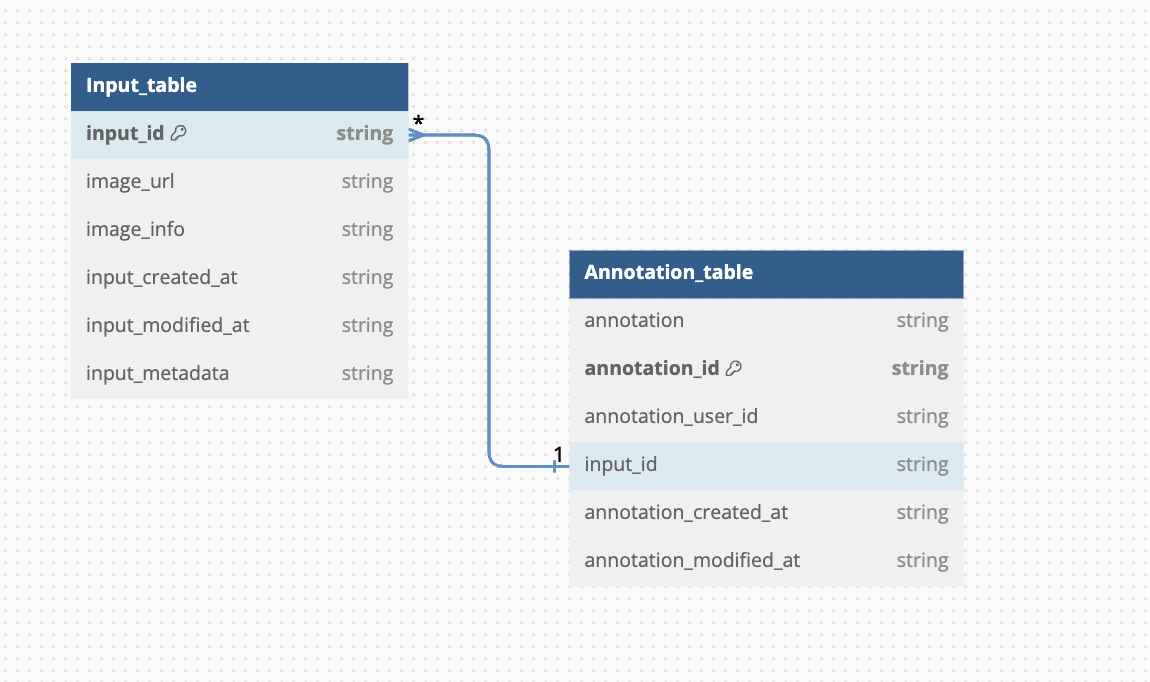
The inputs table encompasses details about each input, including input ID, image information, date created, and more. The annotations table holds information on each annotation, such as annotation ID, annotation user ID, date created, and more. The common link between these two tables is the input ID, which is the same in both of them.
Here is a sample database structure of inputs table and annotations table:
Option 2
On the other hand, checking the Export images option enables you to export the annotations alongside their associated images in a Databricks volume. Note that this action will activate an extra selection box, allowing you to choose the specific volume within the schema where you wish to store the images.
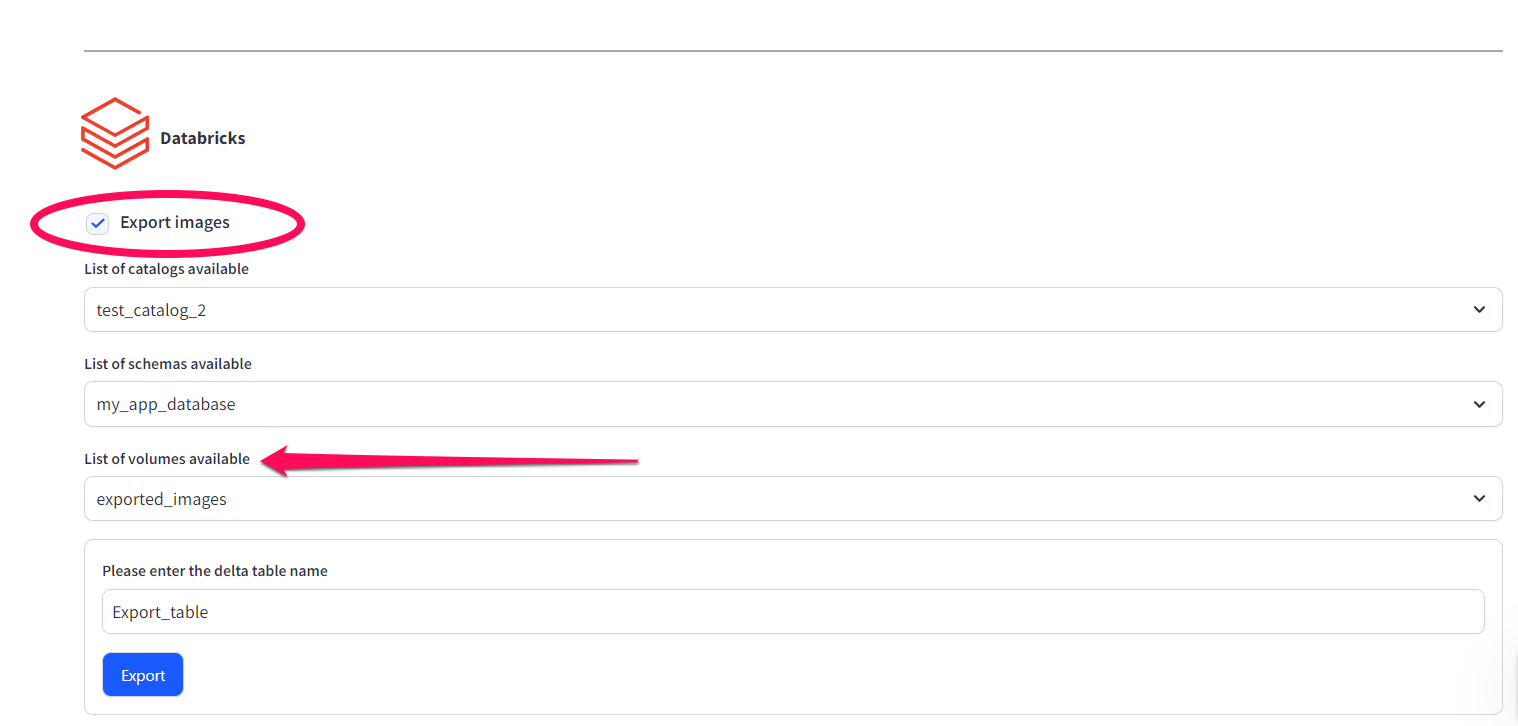
The input_id of an input will serve as its filename when stored within the designated volume.
This is how the exported data appears on Databricks:
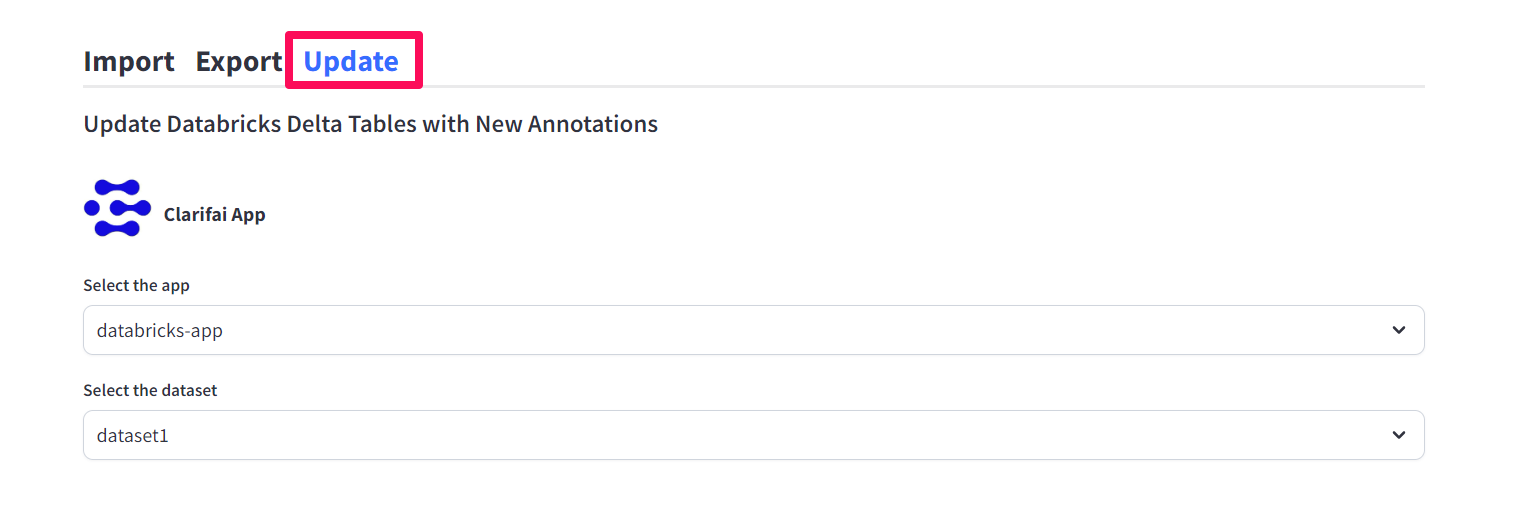
Update Databricks With Inputs and Annotations
You can use the module to update Databricks Delta tables with new inputs and annotations. This allows you to synchronize your Databricks workspace whenever you've added new inputs or annotations in your Clarifai app, modified existing ones, or made any changes to them.
Under the Update tab, start by specifying the app and dataset on the Clarifai platform which have your updated data.
Next, on the Databricks section, provide the following information:
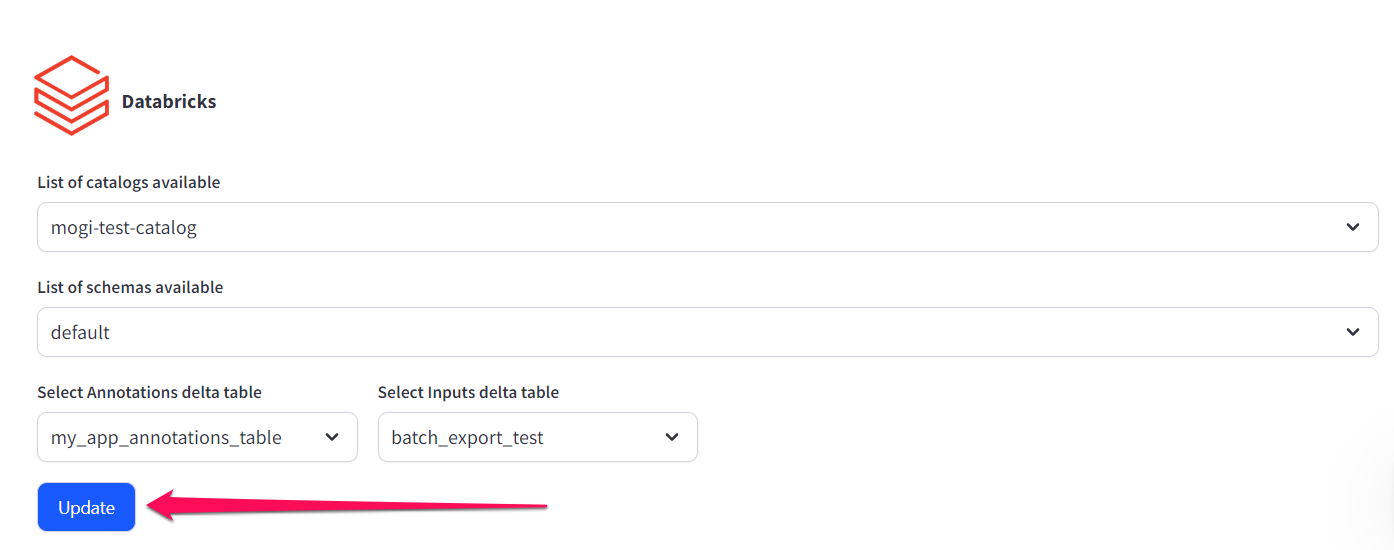
- List of catalogs available — Select your destined, pre-existing catalog.
- List of schemas available — Select your destined, pre-existing schema.
- Annotations Delta table — Select your destined, pre-existing annotations table. It cannot be the same as the inputs Delta table.
- Inputs Delta table — Select your destined, pre-existing inputs table. It cannot be the same as the annotations Delta table.
After providing the required information, click the Update button. The upsert process will begin in the background, seamlessly updating the corresponding tables.
A preview of the table data will also be displayed below the button.