Deploy a Model
Deploy a model into your created cluster and nodepool
Clarifai’s Compute Orchestration provides efficient capabilities for you to deploy any model on any compute infrastructure, at any scale.
You can configure your compute environment and deploy your models into nodepools with your preferred settings, optimizing for both cost and scalability.
With model deployment, you can quickly take a trained model and set it up for inference.
Learn how deployment works when making a prediction using our Compute Orchestration capabilities here.
Via the UI
Each model or workflow can only have one deployment per nodepool.
Step 1: Start Creating a Deployment
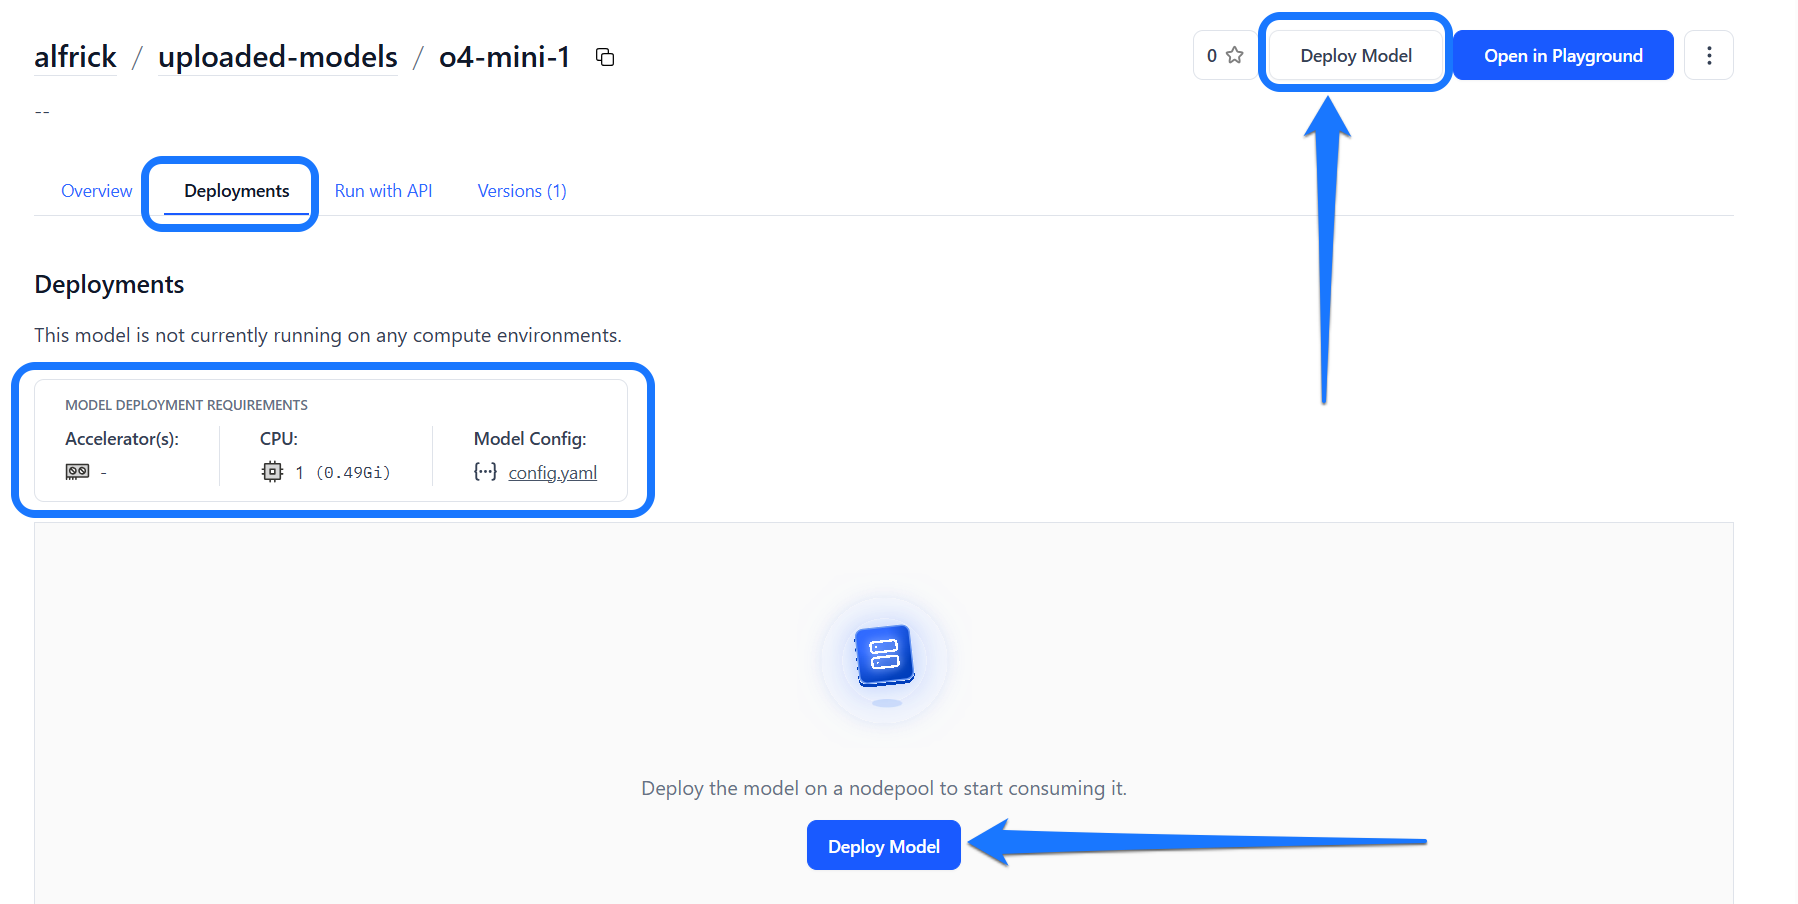
To create a deployment, navigate to the model’s page and click the Deploy Model button.
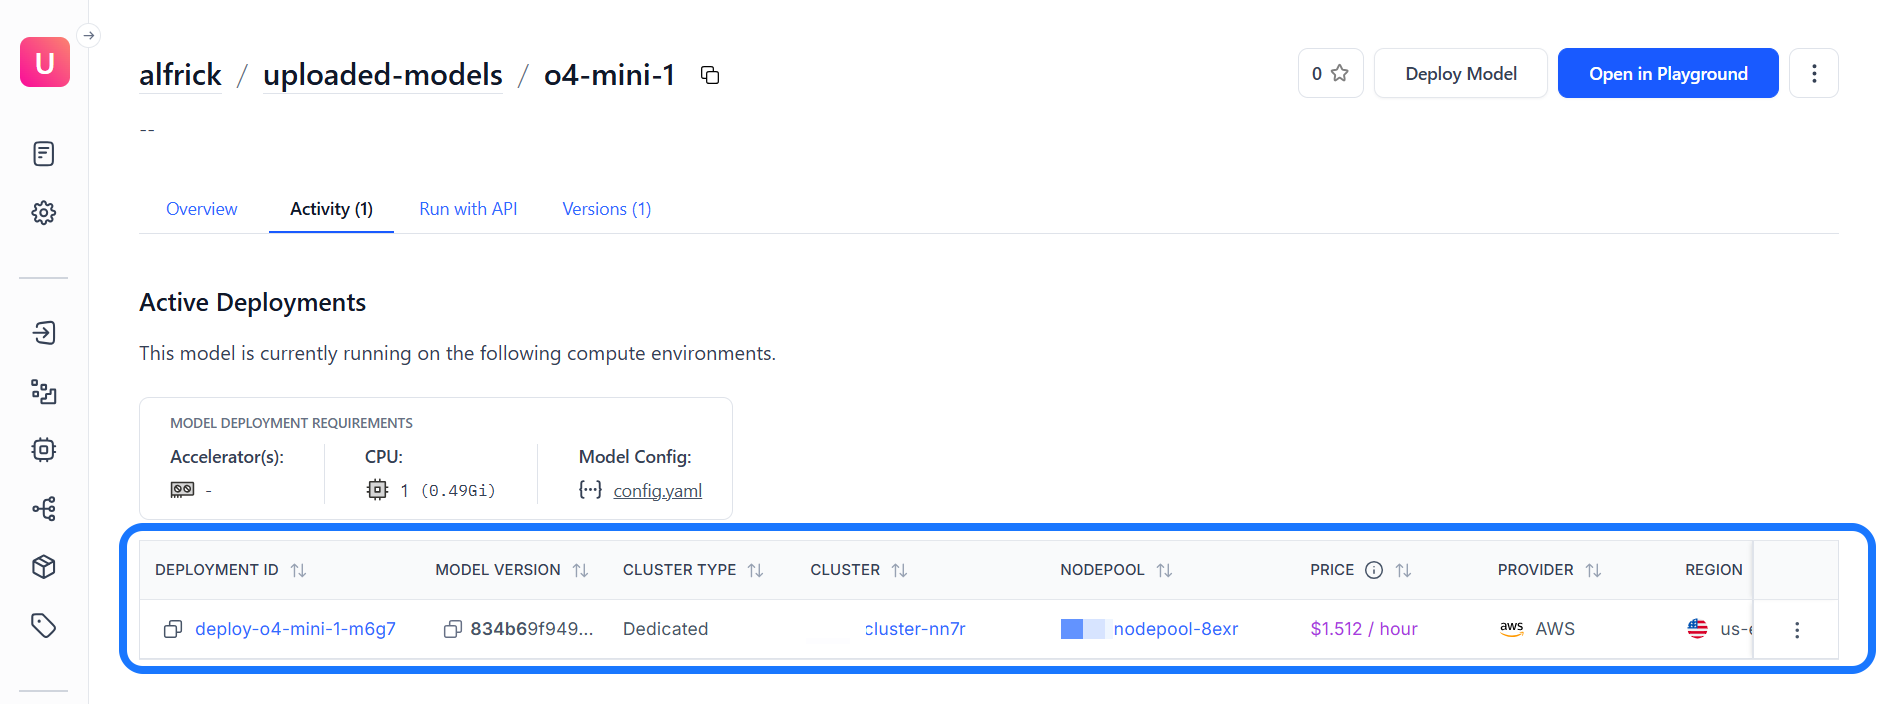
You can also open the Deployments tab to check if the model is already running on any compute environments.
This tab displays the compute requirements needed for successfully deploying the model, allowing you to choose a nodepool that meets those requirements.
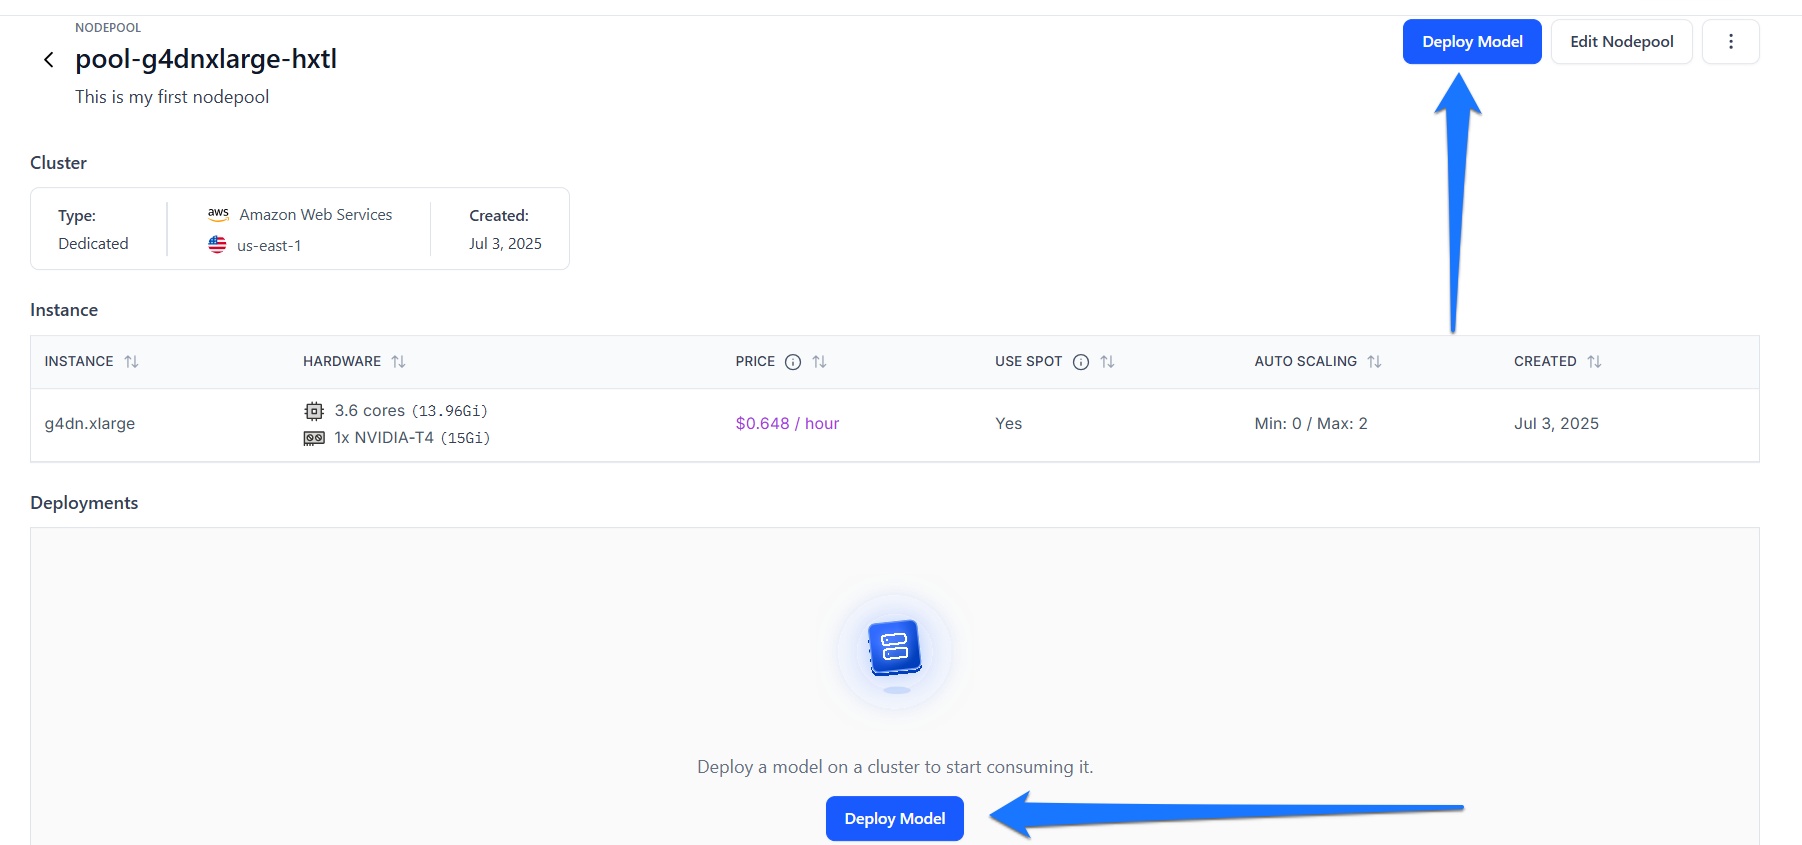
Alternatively, to create a deployment, go to the specific cluster or nodepool where you want the deployment to run, then click the Deploy Model button on that page.
Step 2: Select a Model
You’ll be redirected to a page where you can configure the compute settings for your deployment.
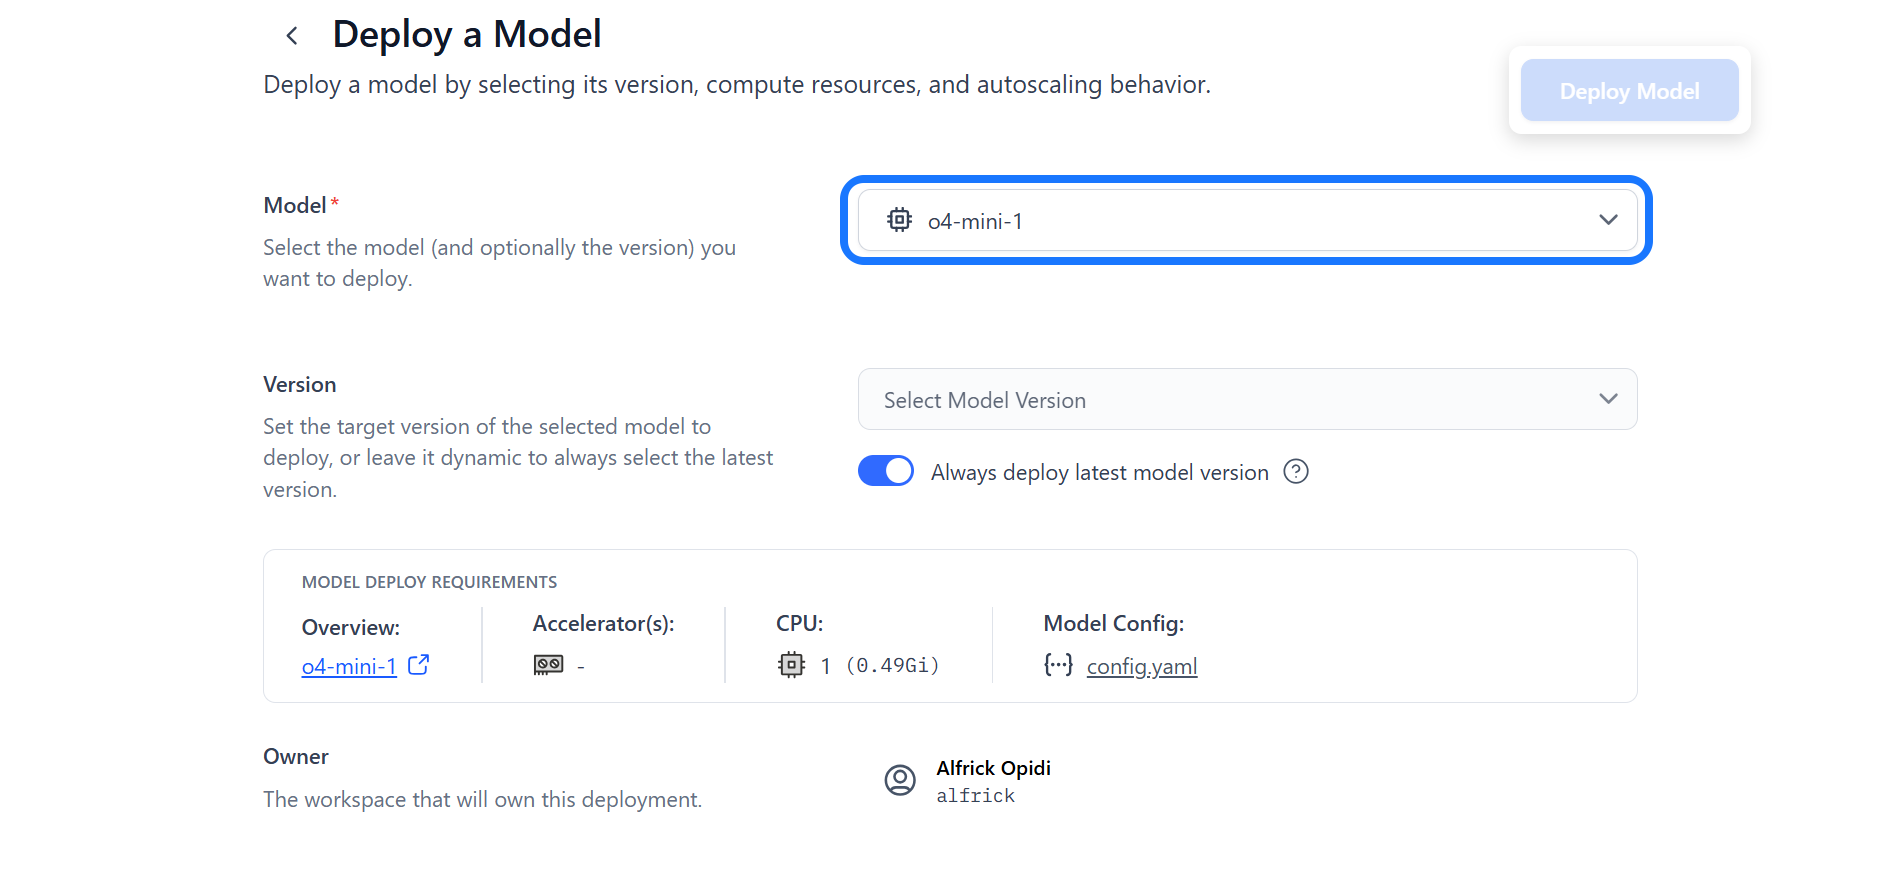
If you haven’t already selected a trained model, you can do so here. By default, the latest version of the model will be used, unless you switch the version toggle off to manually select a different version.
The model’s compute requirements will also be displayed, helping you select a compatible cluster and nodepool that meet those specifications.
Step 3: Select Cluster and Nodepool
Choose an existing cluster and nodepool — or create new ones — based on your model’s compute requirements and performance goals.
Once selected, the details of the chosen cluster and nodepool will be displayed for your review.
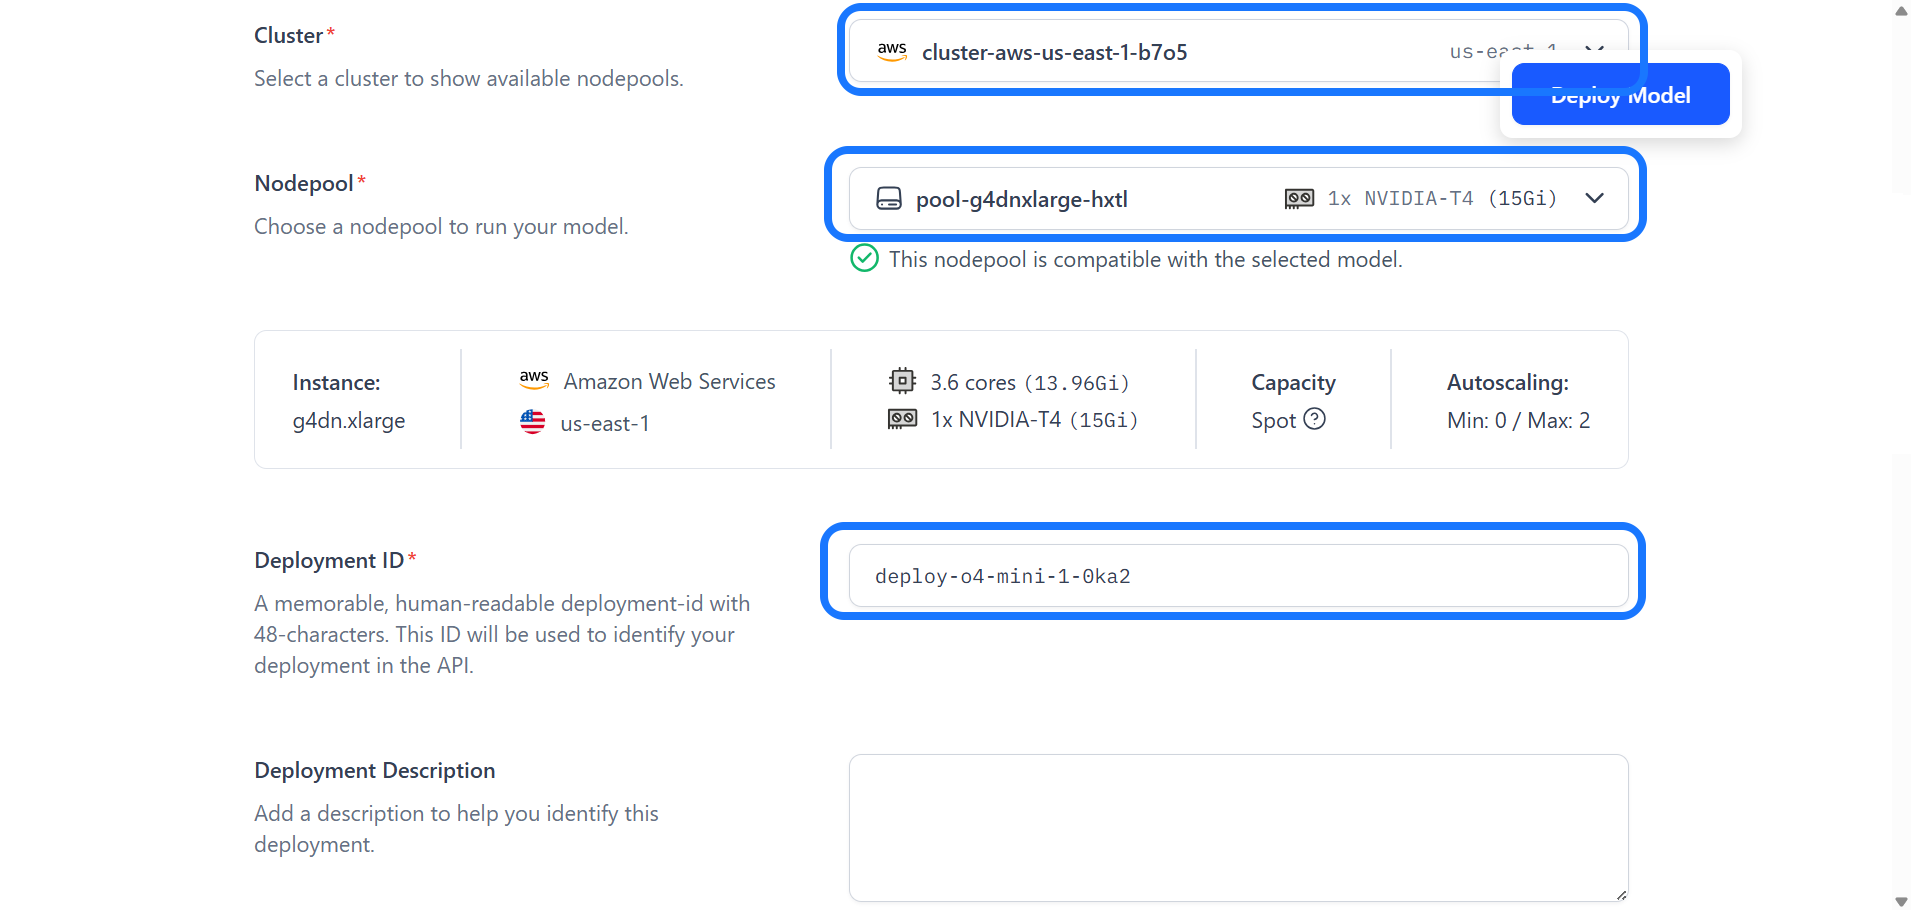
Step 4: Provide Deployment ID
Provide a deployment ID to uniquely identify your deployment.
You can also add an optional description to provide additional context and make it easier to recognize later.
Step 5: Configure Advanced Settings
You can also configure advanced deployment settings if needed. If you choose not to, the default values will be applied automatically.
- Model Replicas — This specifies the minimum and maximum range of model replicas to deploy, adjusting based on your performance needs and anticipated workload. Adding replicas enables horizontal scaling, where the workload is distributed across several instances of the model rather than relying on a single one. However, increasing them consumes more resources and may lead to higher costs. Each node in your nodepool can host multiple replicas, depending on model size and available resources.
Click here to find out how to set up node autoscaling ranges to automatically adjust your infrastructure based on traffic demand.
- Scale Up Delay — This sets the waiting period (in seconds) before adding resources in response to rising demand.
- Scale Down Delay — This sets the waiting period (in seconds) before reducing resources after a demand decrease. Note that your nodepool will only scale down to the minimum number of replica(s) configured.
- Scale To Zero Delay — This sets the idle time (in seconds) before scaling down to zero replicas after inactivity.
- Traffic History Timeframe — This defines the traffic history period (in seconds) that your deployment will review before making scaling decisions.
- Disable Nodepool Packing — Enabling this option restricts deployments to a single model replica per node. While this can be useful for specific performance needs, it may lead to underutilized nodes and increased costs due to reduced resource efficiency.
Step 6: Finalize and Create the Deployment
After completing the setup, click the Deploy Model button to create the deployment. You’ll be redirected to the nodepool page, where your deployed model will be listed.
You can also find the deployment listed in the Activity tab within the model's page. From there, you can select it to run inferences.
Via the API
Create a Deployment
To deploy a model within a nodepool you've created, provide the deployment_id and config_filepath parameters to the create_deployment method of the Nodepool class.
You can learn how to create the deployment_config.yaml file, which contains the deployment configuration details, here.
Each model or workflow can only have one deployment per nodepool.
- Python
- CLI
from clarifai.client.nodepool import Nodepool
import os

# Set the PAT key
os.environ["CLARIFAI_PAT"] = "YOUR_PAT_HERE"

# Initialize the Nodepool instance
nodepool = Nodepool(
    user_id="YOUR_USER_ID_HERE",
    nodepool_id="test-nodepool",
    base_url="https://api.clarifai.com"
)

# Create a new deployment
deployment = nodepool.create_deployment(
    deployment_id="test-deployment",
    config_filepath="./configs/deployment_config.yaml"
)
clarifai deployment create --config <deployment-config-filepath>
After creating it, initialize the Deployment class by providing the user_id and deployment_id parameters.
- Python
from clarifai.client.deployment import Deployment

# Initialize the deployment
deployment = Deployment(
    user_id="YOUR_USER_ID_HERE",
    deployment_id="test-deployment",
    base_url="https://api.clarifai.com"
)